I get many questions about my live insect photography, so I have created this page to answer some of the questions. Many examples of my images can be found in the Galleries page. Let's start at the most important part - FLASH - The most important thing to remember with flash is that THE LIGHT IS DELIVERED IN A VERY VERY SHORT TIME, maybe 1/5000 sec to 1/10000 sec (t0.5) when using it as described below. What I describe here is for live insects while handholding the camera. For stationary subjects I would most likely use a tripod and different lighting, although the technique described here will certainly work for stationary subjects.
Flash
Flash is key to how I photograph insects. Some people use flash because they need more light due to the image is being under exposed, as a last resort they add flash for more light. This usually comes about through selecting a small aperture (for greater depth of field) and fast shutter speed (to freeze motion) and not wanting to push ISO to high.
Let's start from a different angle. When photographing insects we will get unsharp images due to subject movement and hand shake, what is a great way of getting sharp images? - use flash. Flash is desired not as a last resort but because it is a great way to get sharp images and we will base our whole technique around it's use.
Flash enables us to get sharp images. Imagine taking a photograph in a dark room, of course we will get a dark image even with a long shutter speed. Now take another image in the dark room with a long shutter speed but add a pulse of light. The duration of the exposure will be controlled by how long the pulse of light lasts, regardless of shutter speed. If we can send a pulse of light with a duration of around 1/8000 of second, that is how long the it takes to capture the image. Flash can do this. A typical flash will have a flash duration of around 1/400 sec at full power to maybe 1/25000 sec at lowest power so firing a flash at low power will give us a short flash duration.
Of course most live insect photography will take place in daylight so we need to set the camera up to reduce the amount of natural daylight hitting the sensor. If too much ambient light is included in the image the short flash duration will be of no use. To put it another way, the subject needs to be exposed mainly by the flash, not the ambient light.
If your flash has HSS (High Speed Sync) it is best avoided as the light output of the flash may well be lower and the flash duration will increase.
Settings
When shooting live insects I usually start with settings of F11, 1/250th sec, ISO 100. Below I go through each setting in more detail.
Aperture
A small aperture (higher F number) will give us a greater depth of field which is usually desired in close up photography. If we set the aperture too small, the image will loose some sharpness due to diffraction. A small aperture will also cut down on the amount of ambient light hitting the sensor which is what is desired to enable the flash to work it's magic. I find on my full frame mirrorless camera F11 is a small enough to give some good depth of field but not too small for diffraction to be a problem.
Shutter speed
Shutter speed loses some of it's usual importance to stop motion blur because we use the short flash duration to achieve this. The shutter speed should be set high enough to cut down on the ambient light but not so high that we are forced to use the flash in HSS mode (High Speed Sync). In HSS mode the flash duration will increase and the flash will be lit for the time the shutter is open which is undesirable. The amount of natural daylight may affect how we set the shutter speed but always a good starting point is the max sync speed of your camera. In my case it is 1/250 sec. In my previous camera it was 1/160 sec. I could write much more about HSS but let's just say it is not what is needed to achieve a short flash duration. So we have F11 and 1/250 (or max flash sync speed) as our starting settings.
ISO
ISO is pretty simple. Set it to base ISO. Maximum image quality and it will reduce the effect of ambient light. So for my camera the starting point is F11, 1/250 sec, ISO 100. Raising the ISO and reducing the flash power can be worth experimenting with. It will depend on your gear/setup and outdoor lighting conditions.
Diffuser and flash
The flash diffuser is important because without it our image can have that harsh, hard light look that I am sure we have all seen either in close up shots or even portraits of people when flash is used. We use the diffuser in a similar way to how a portrait photographer uses soft boxes and umbrellas and in the same way a portrait photographer would not just put a bare flash on top the camera and expect to get a good look, we cannot either. The position of the flash can also have an effect on the quality of light. Even though we can set the camera up to give us sharp images, getting a good soft light with a natural look can be a challenge. For softer light, the closer the light source is to the subject the better and a larger light source is better. Keep in mind that if you use a diffuser, the diffuser becomes the source of the light hitting the subject and is usually closer to the subject and larger than the bare flash.
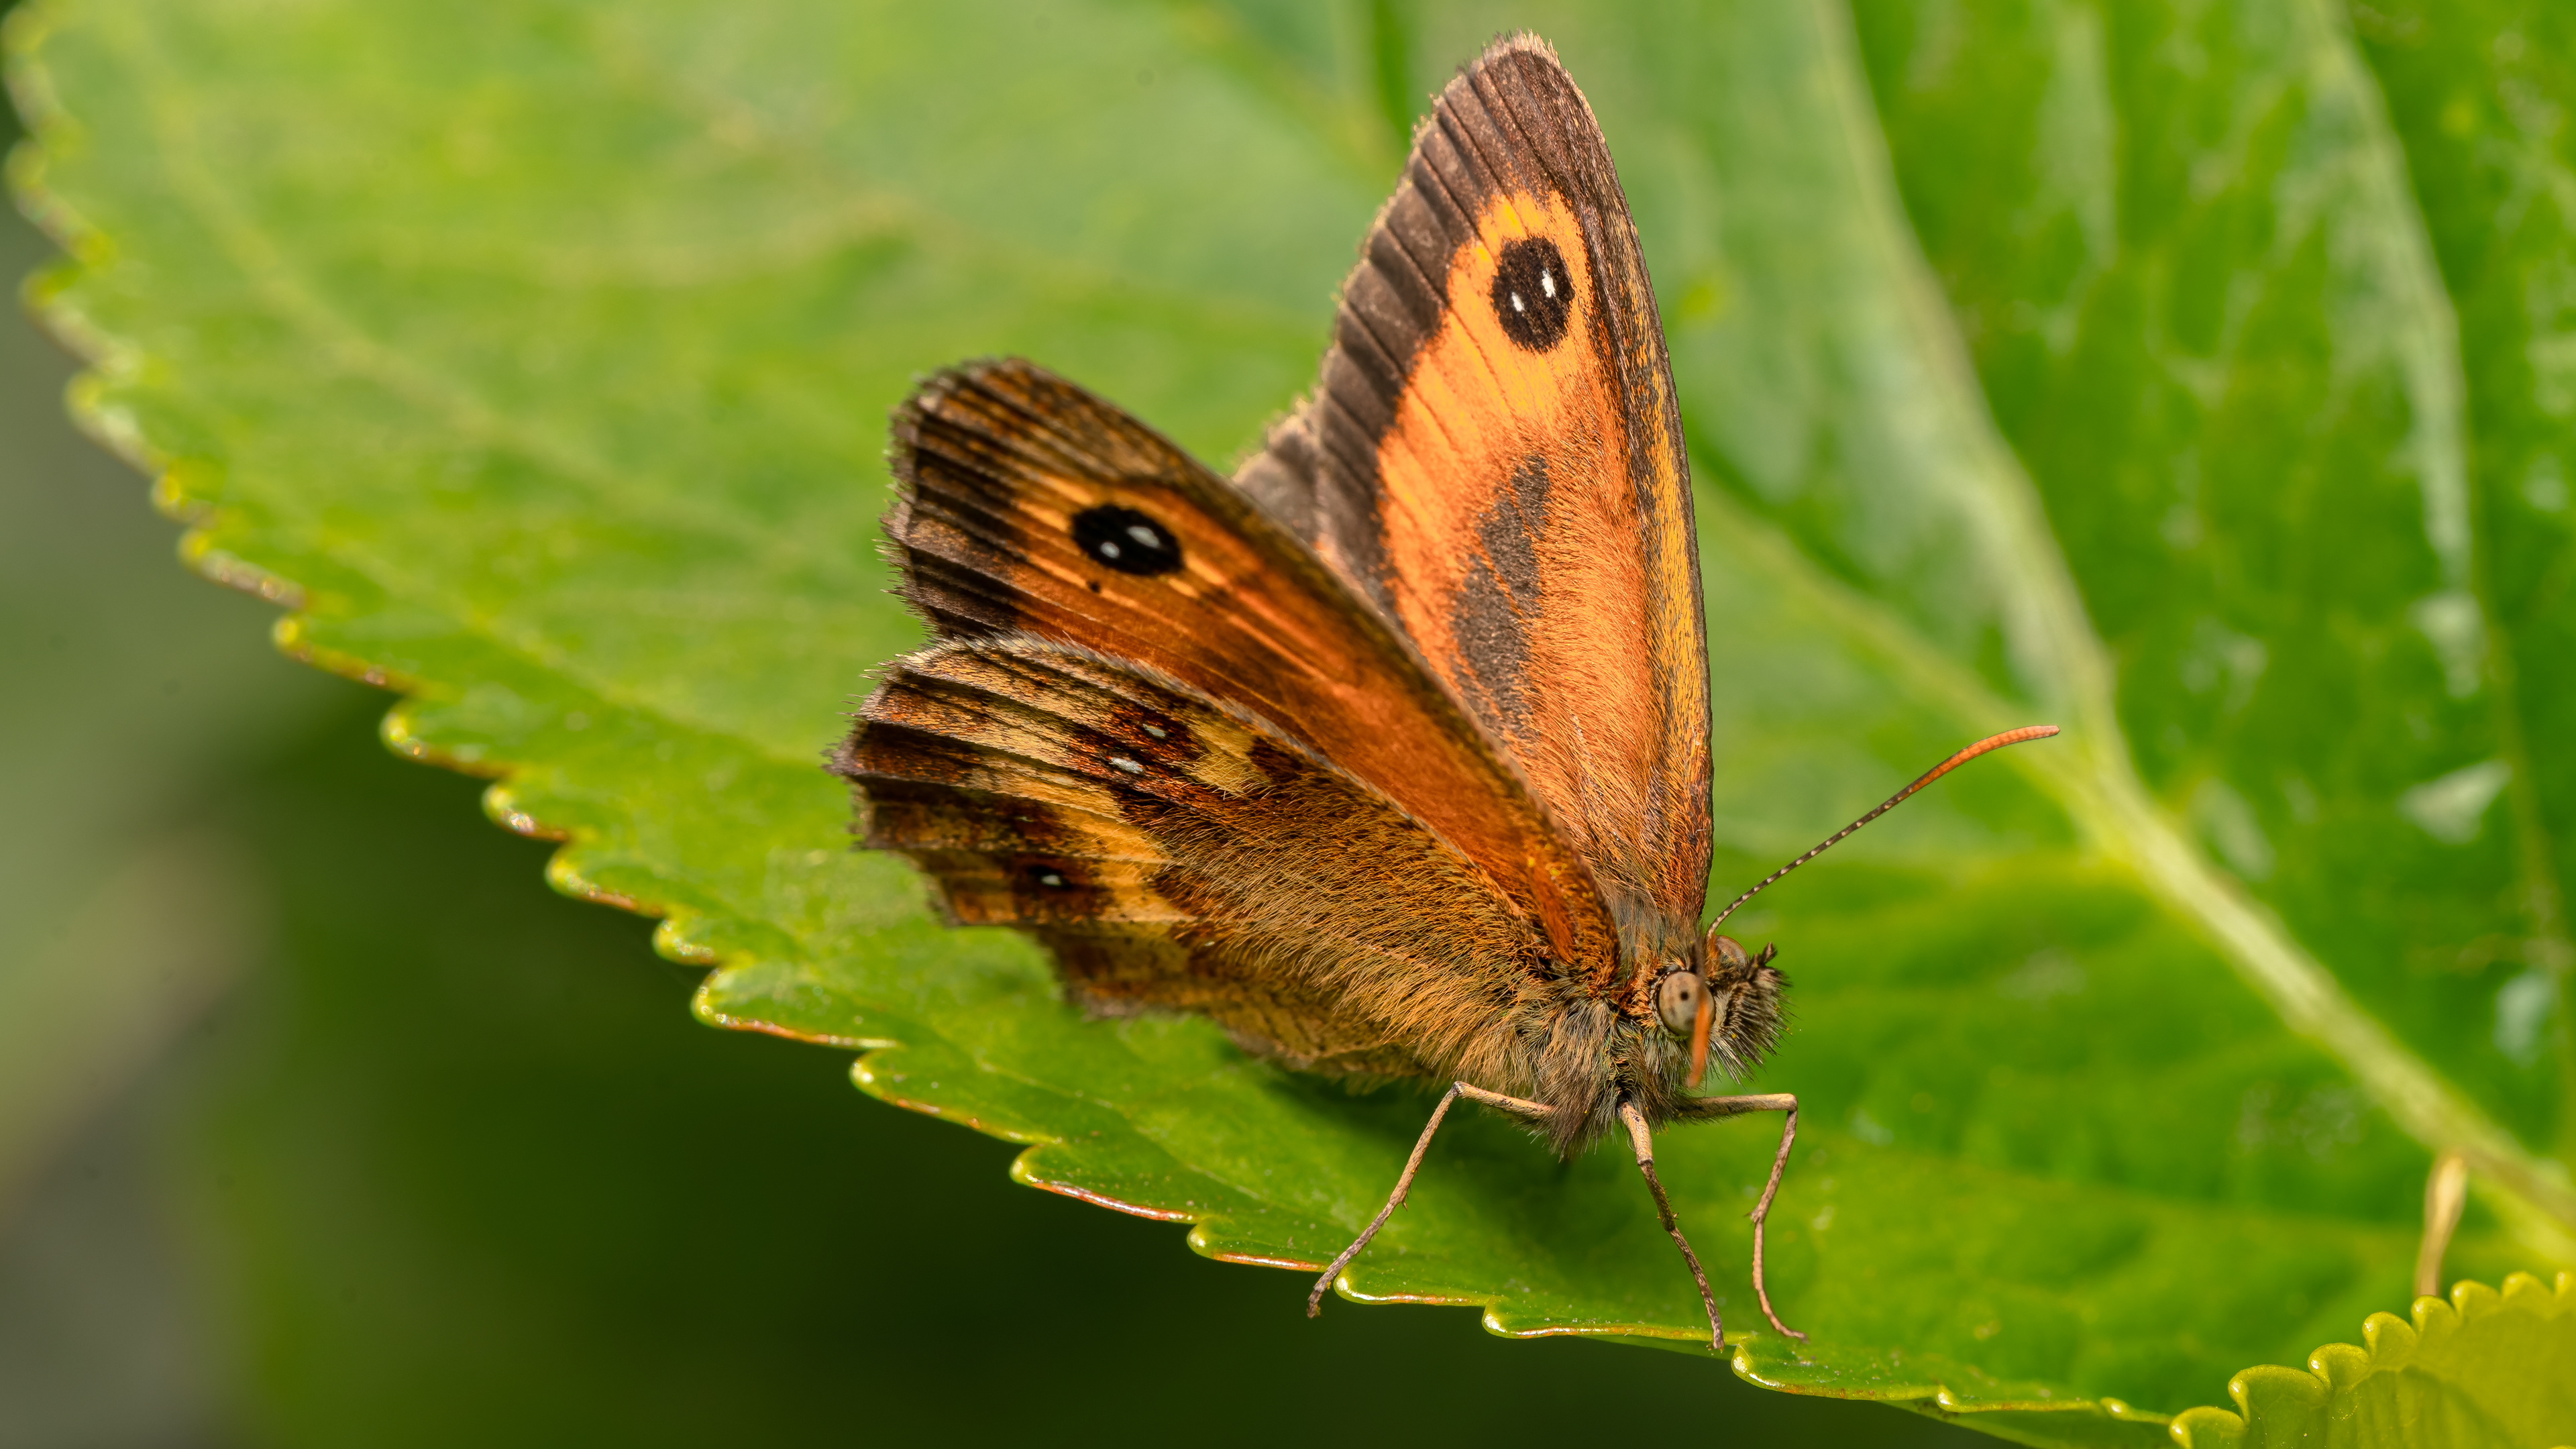
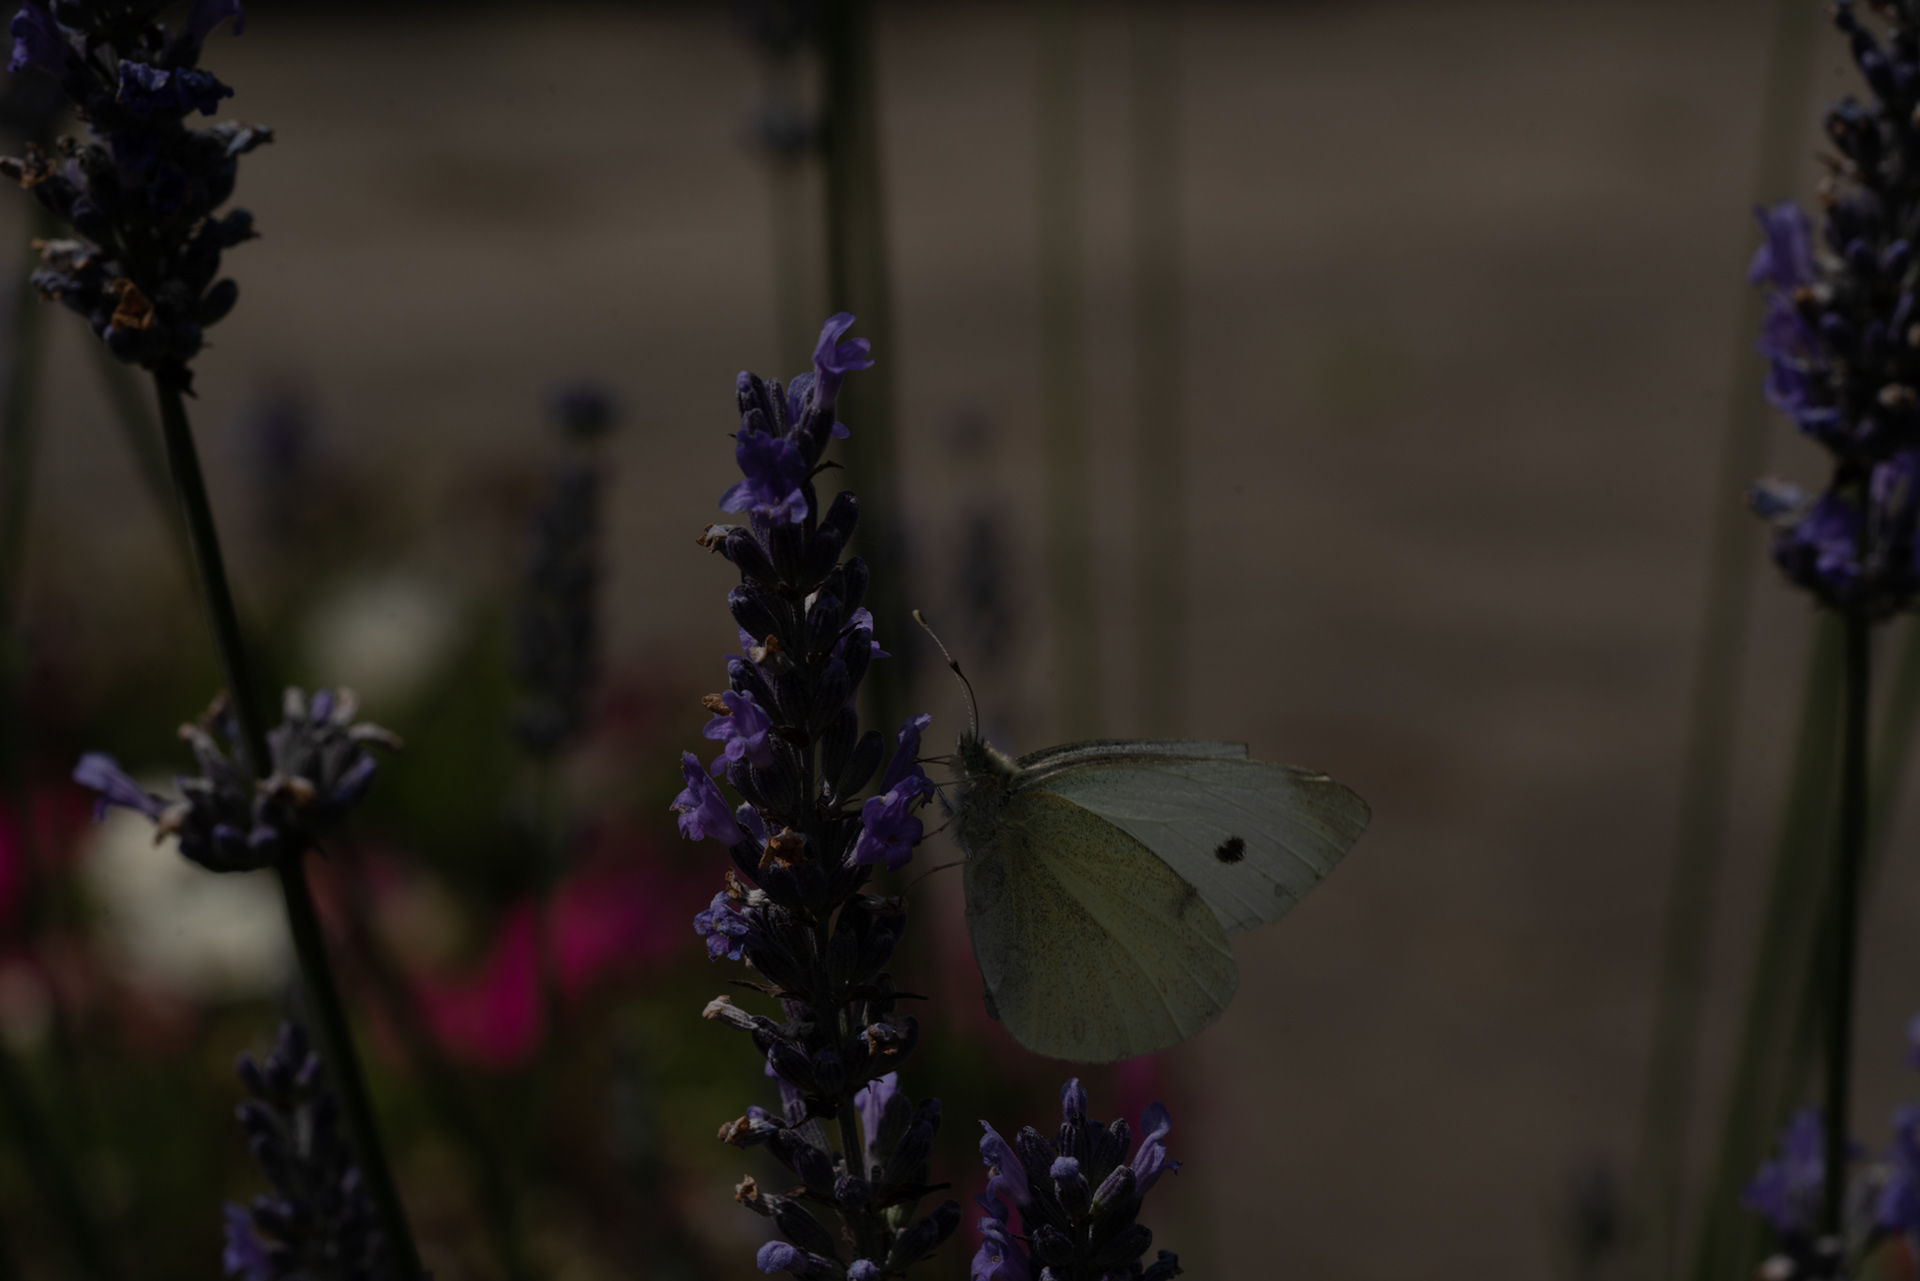
Below is an example of soft light. See how the shadow under the butterfly has not got a sharp edge but has a gentle transition from light to shade. This was taken using a 20 cm reflector but a similar look can be achieved with a diffuser.
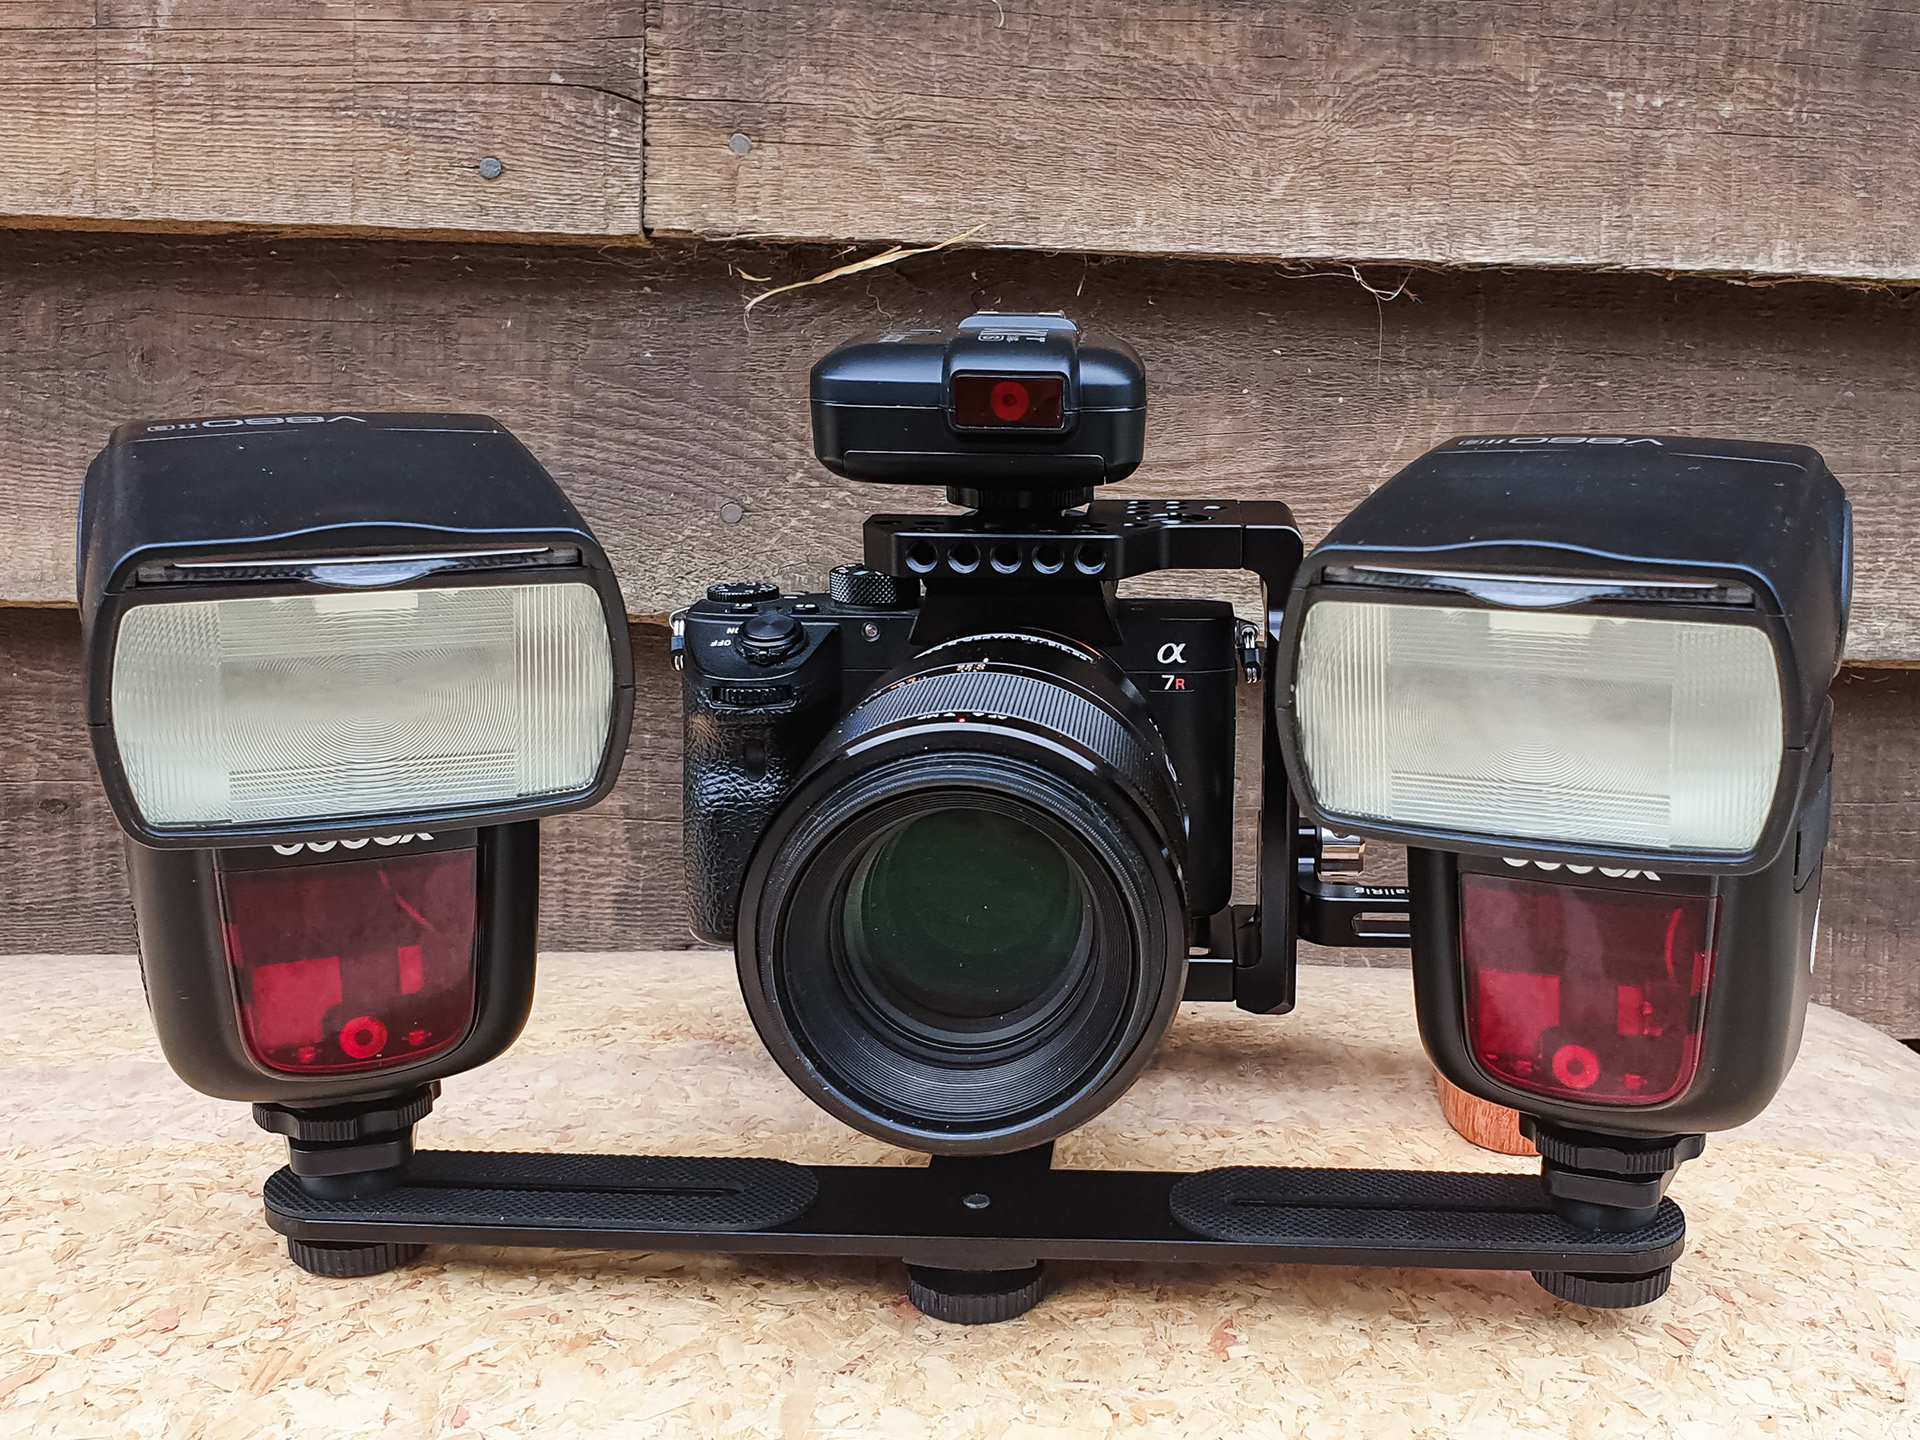
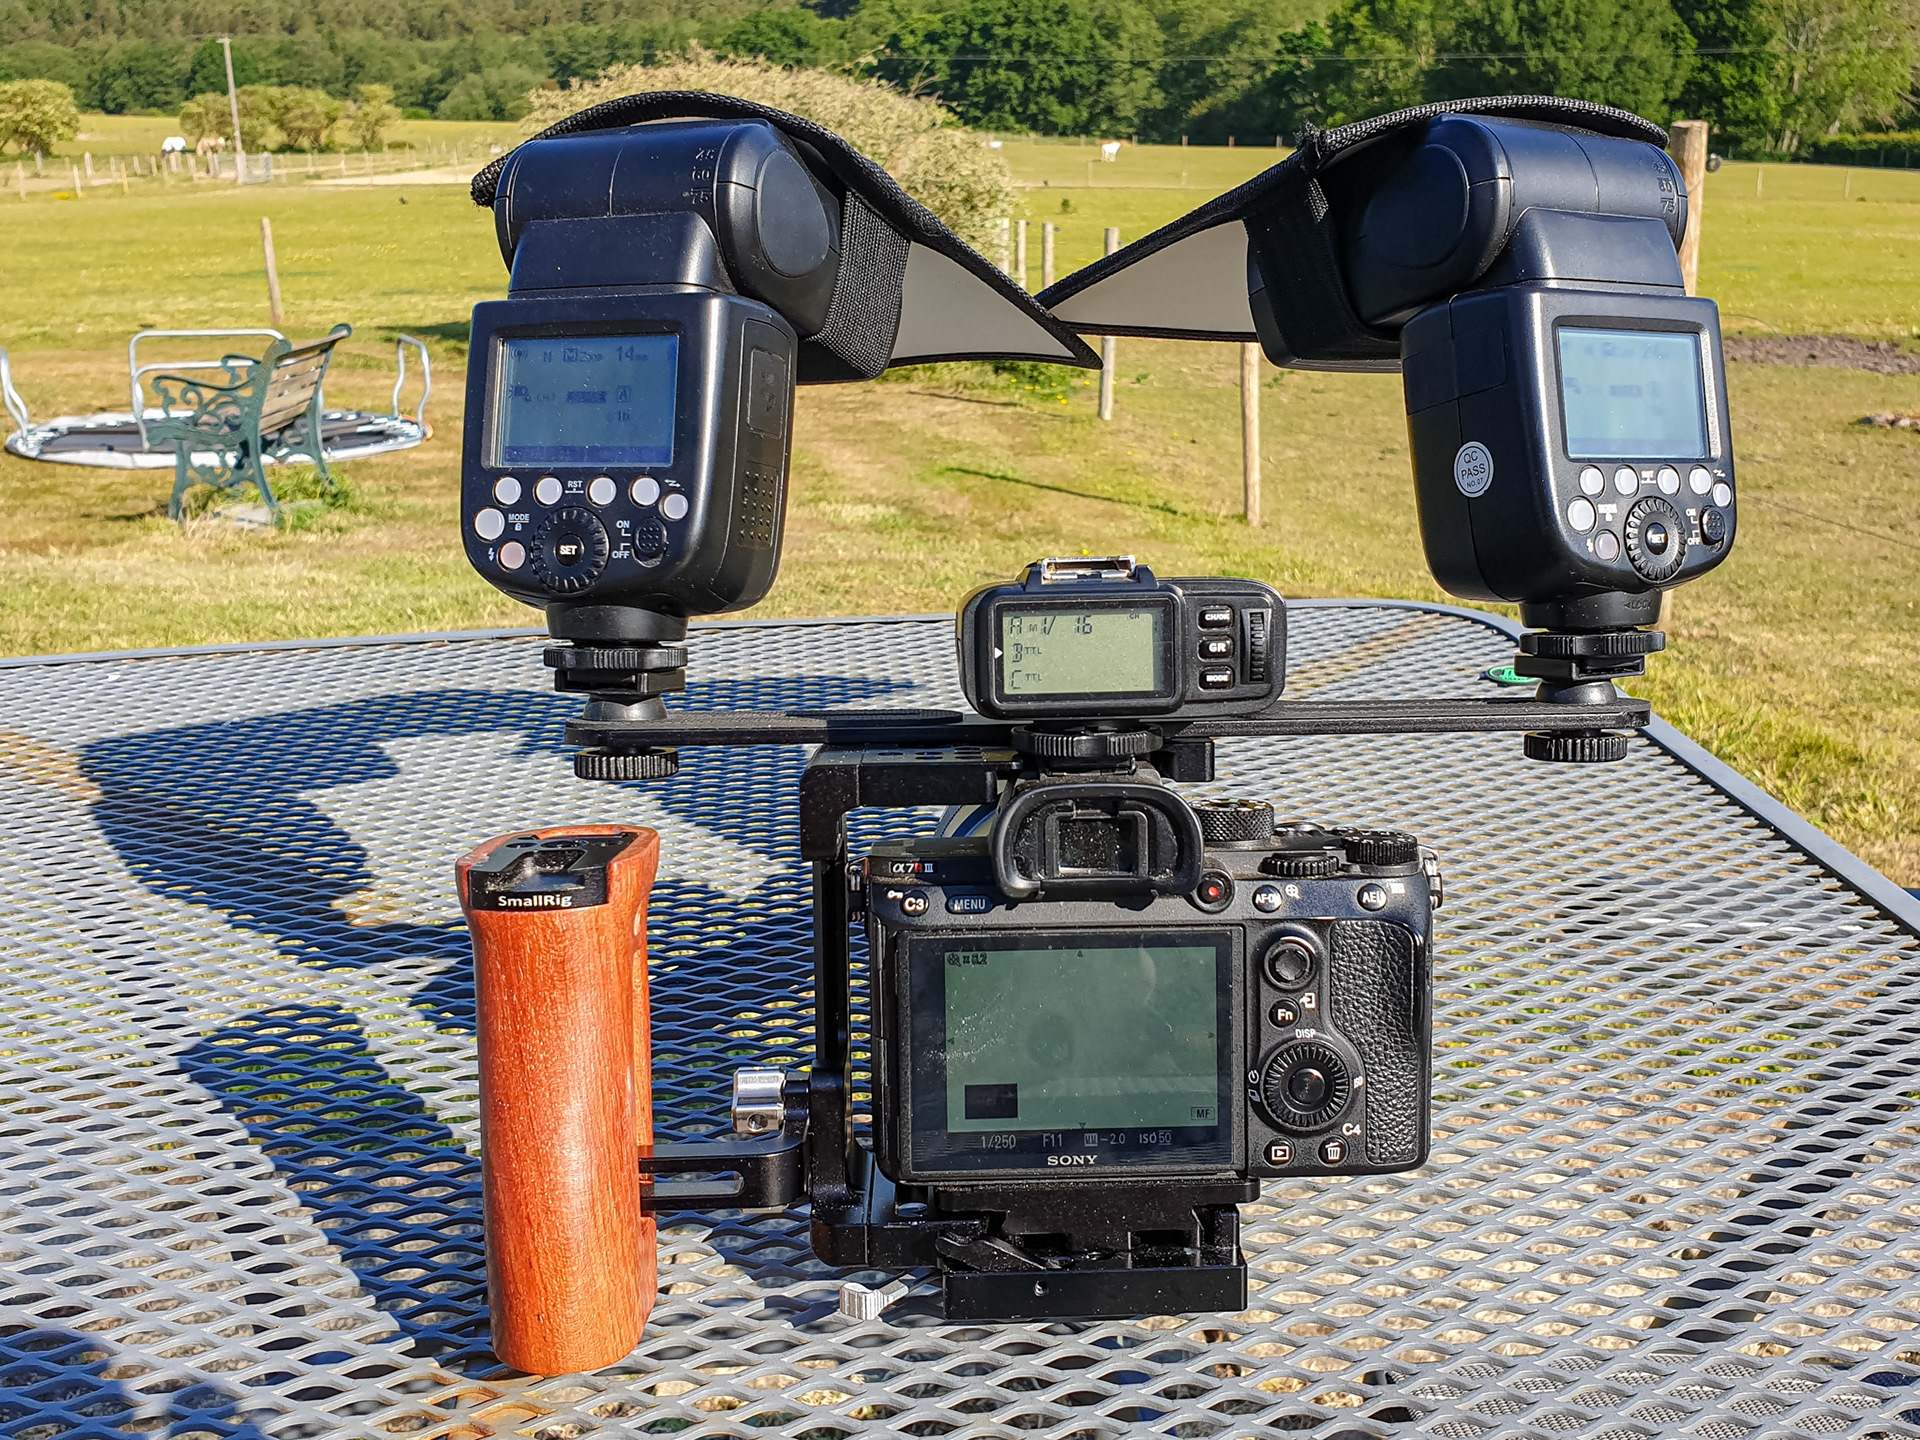
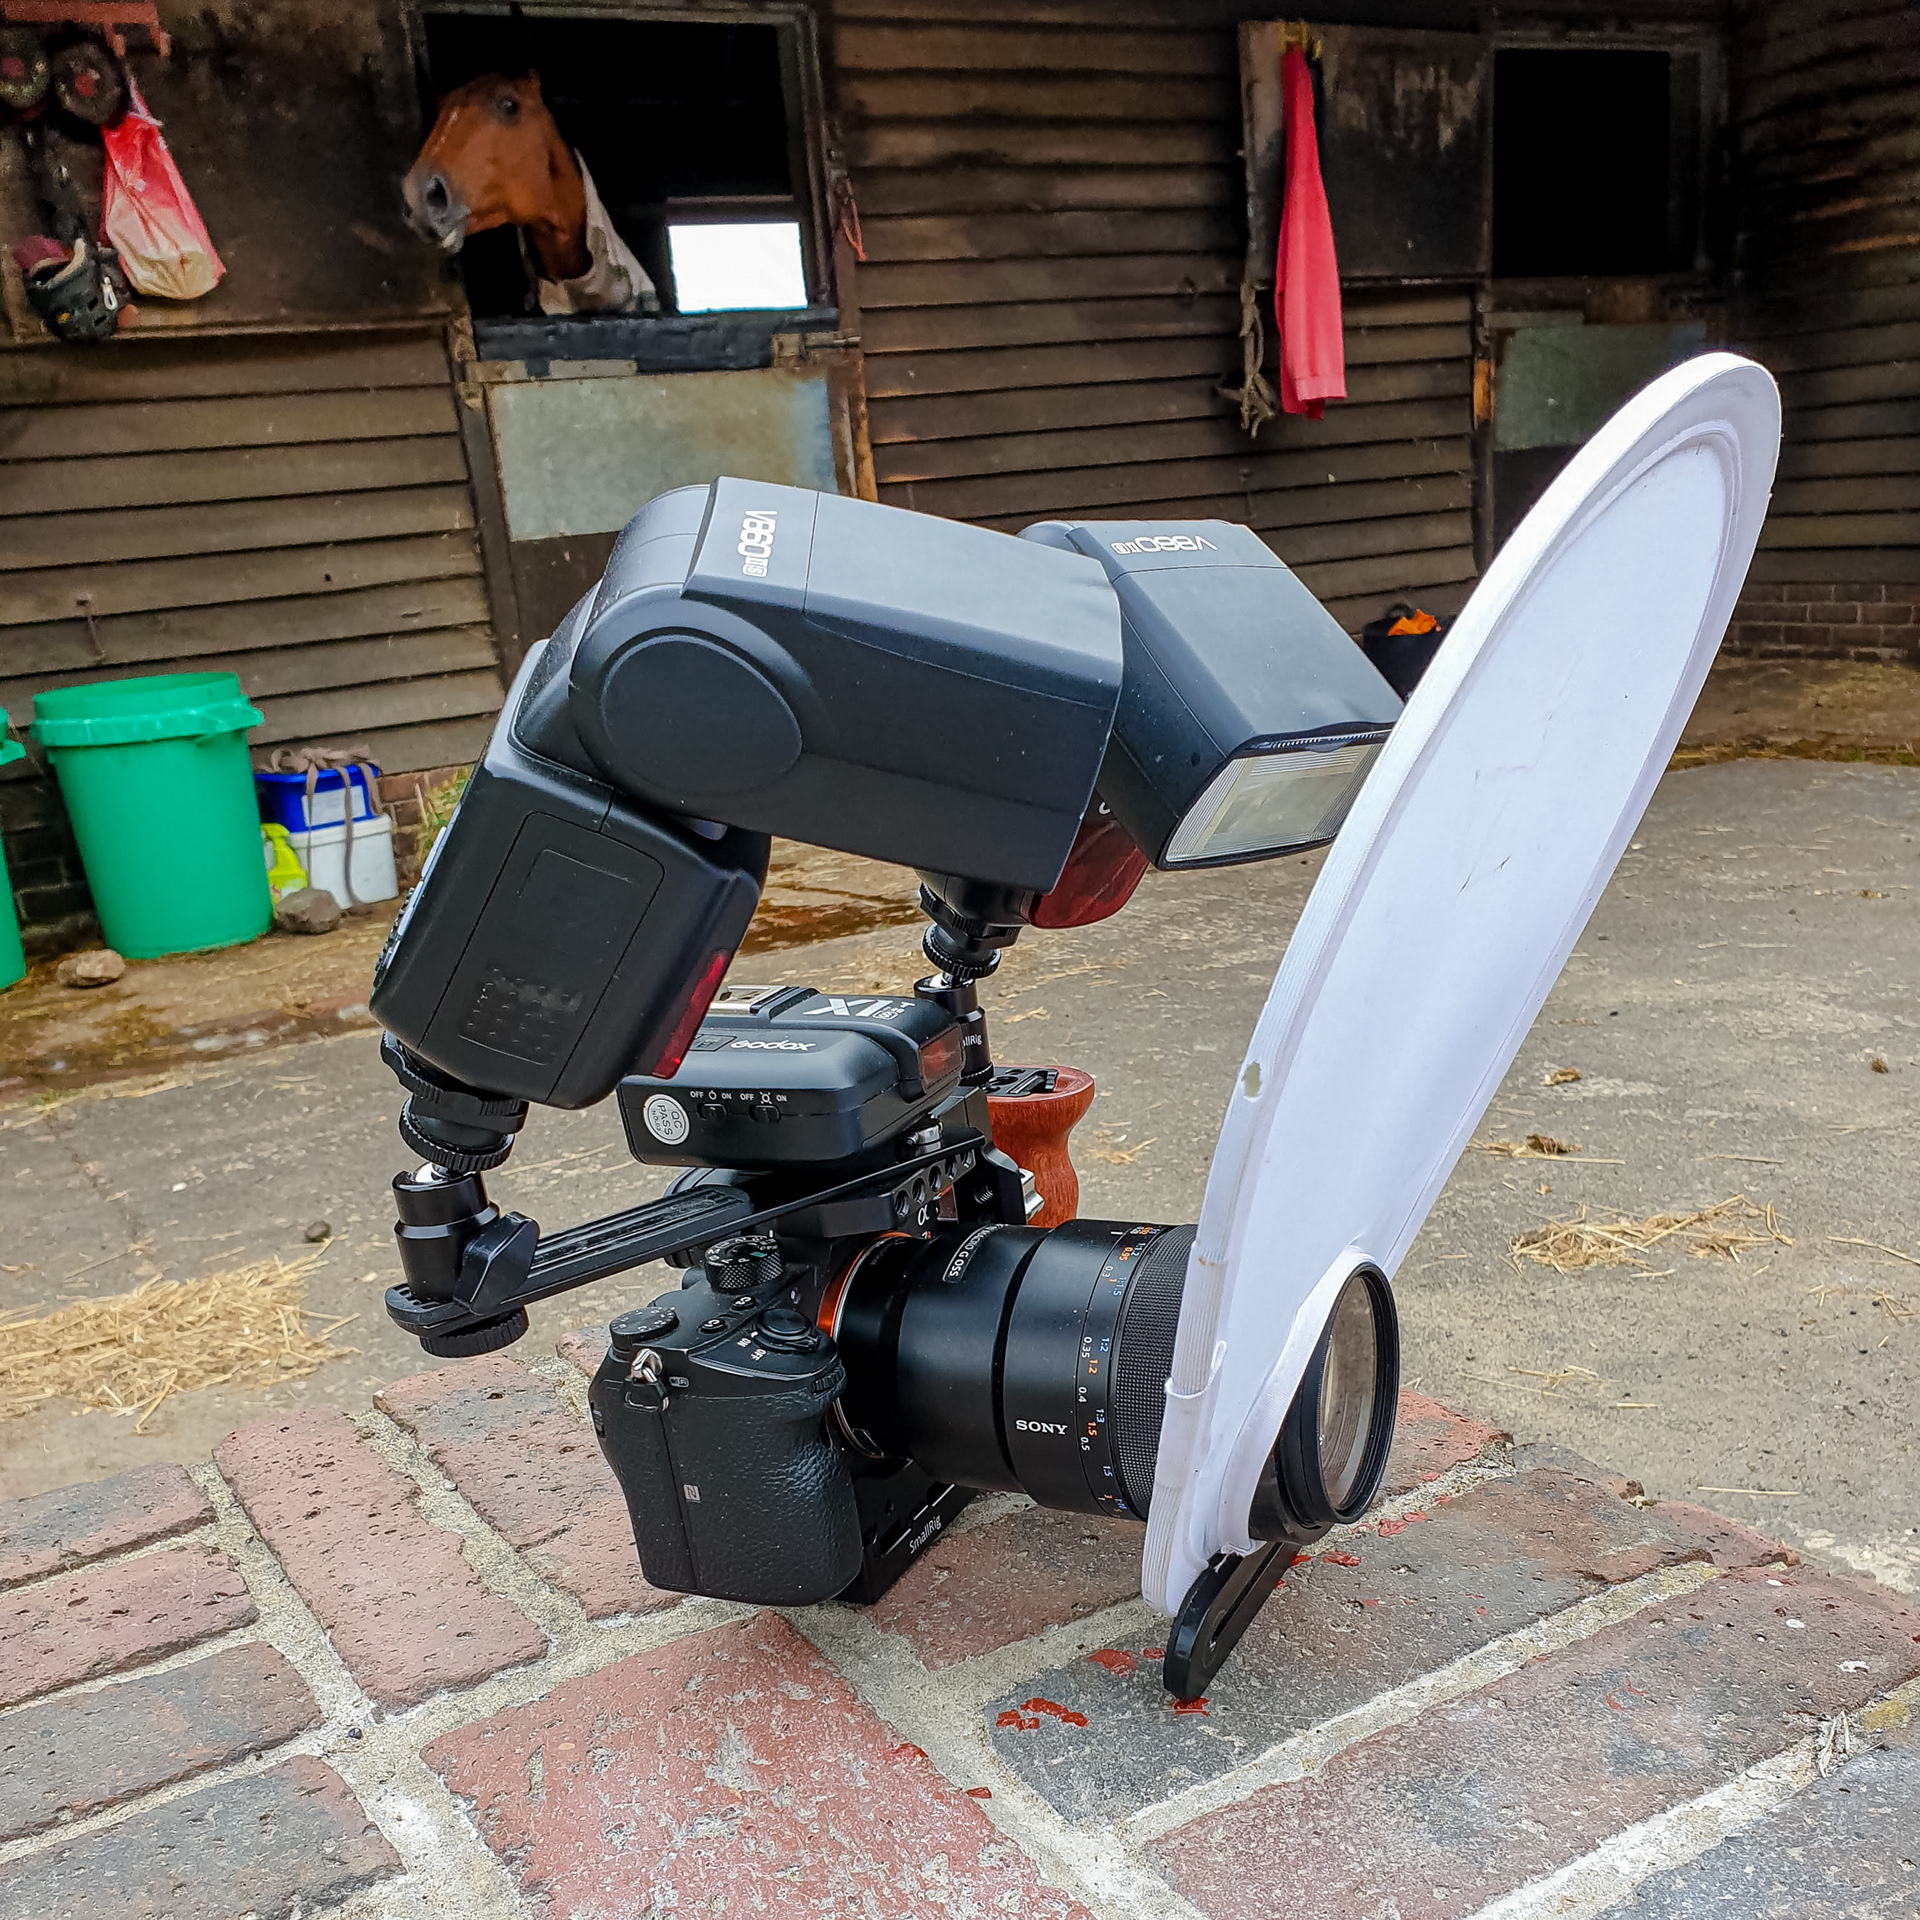
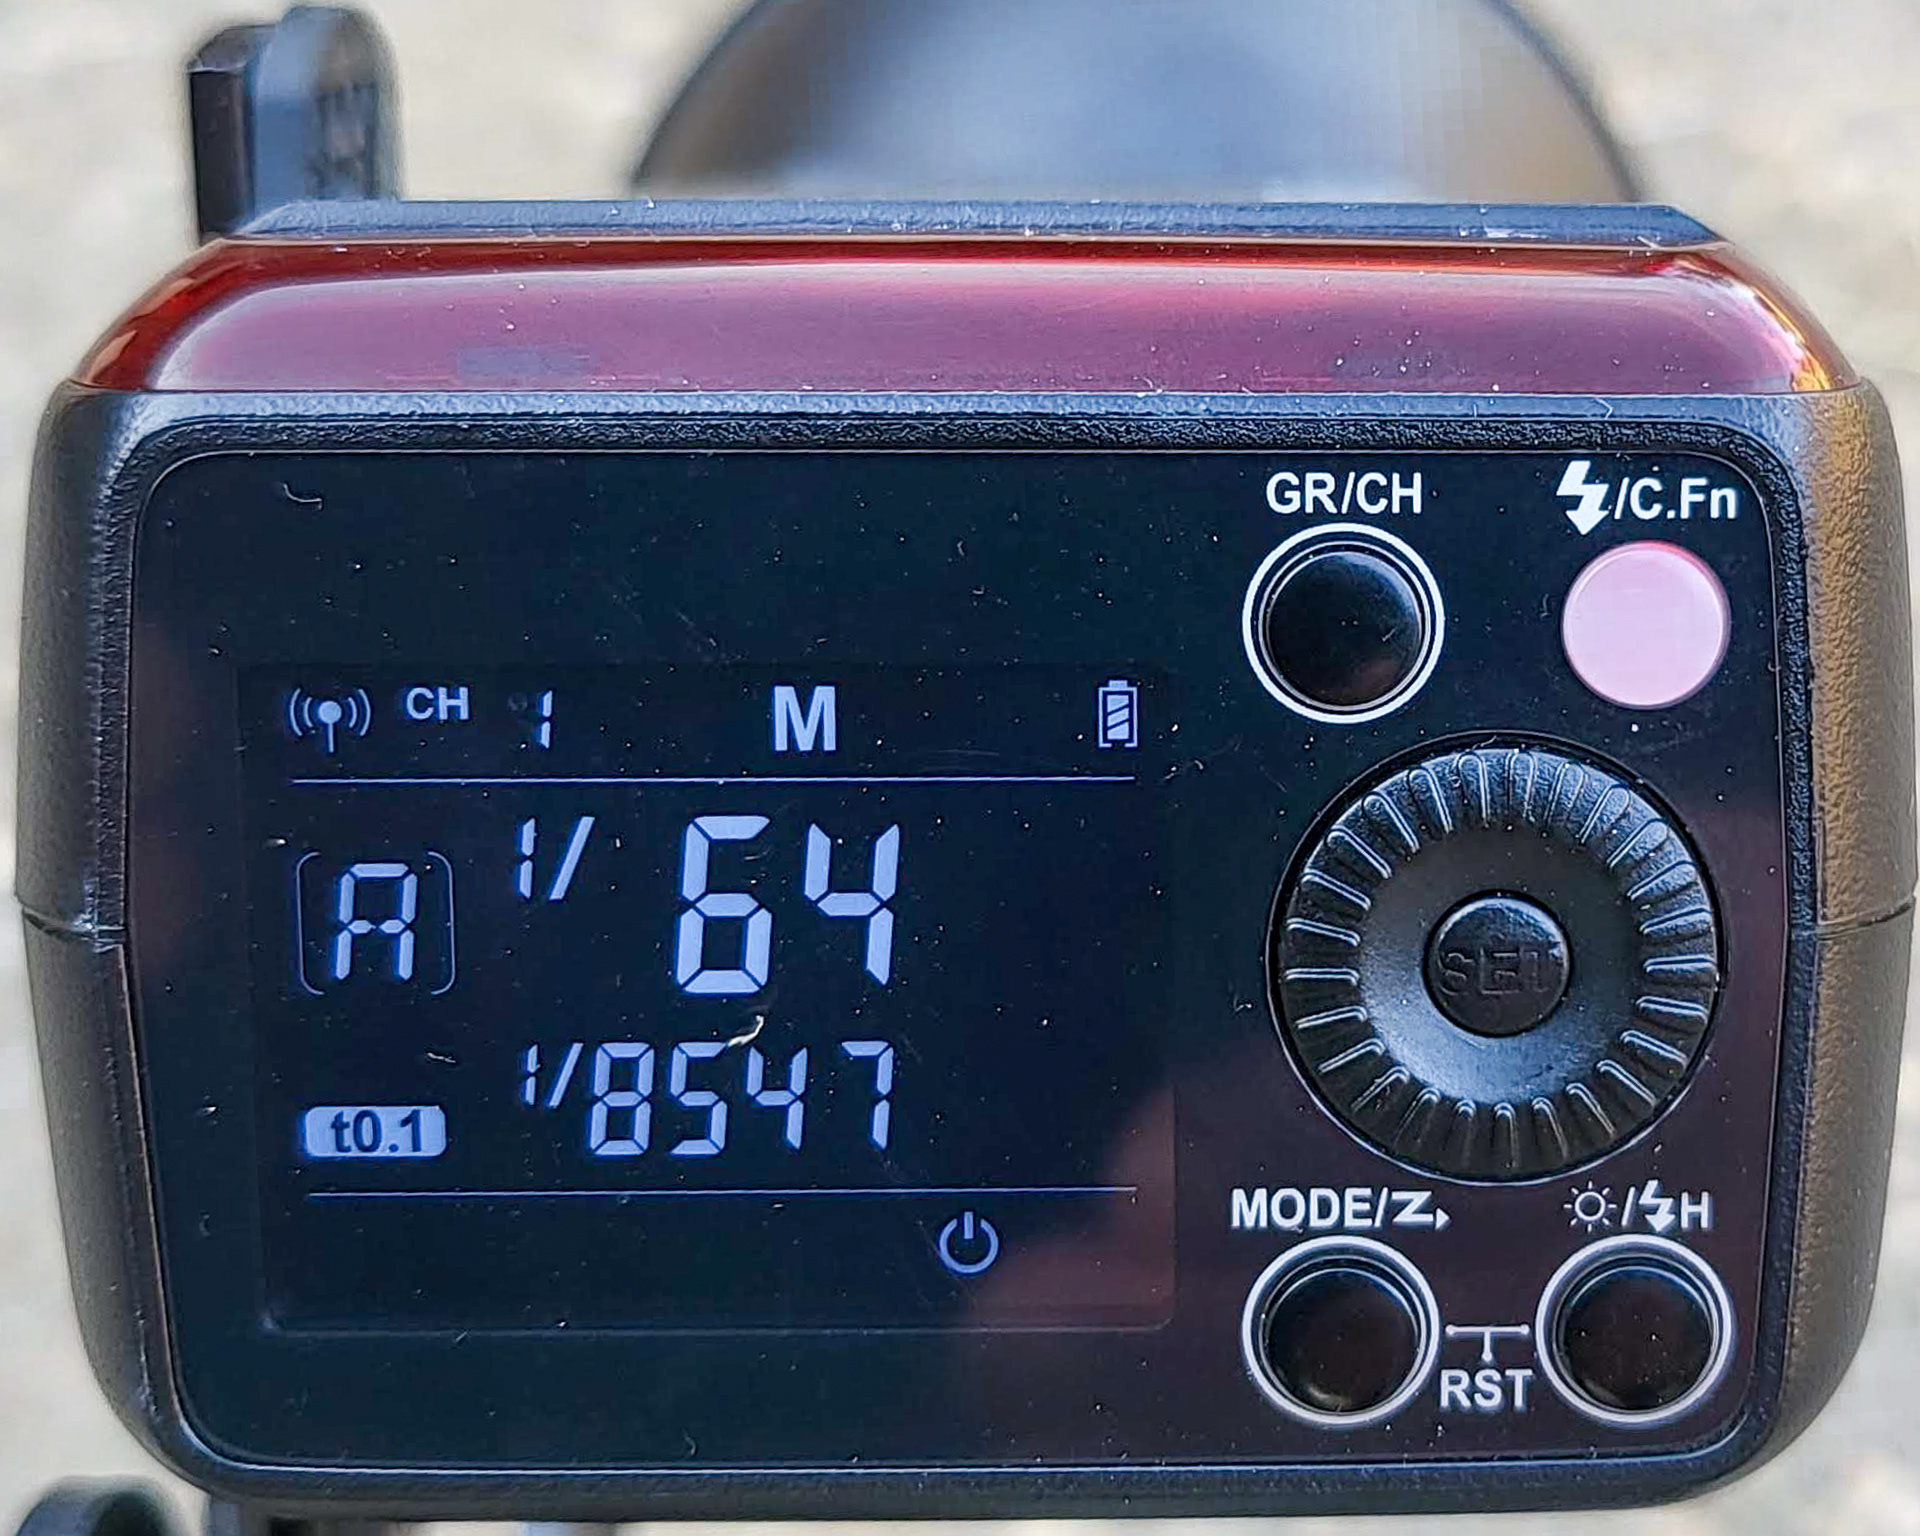
Below are some setups I have tried over the years. I had other camera setups before this but no longer have photographs of them. The last six images are my current set up and the best setup I have had so far. You do not need a cage or two flashes. I got the cage to enable taking the camera out of the cage and leaving the flashes setup on the cage. I used two flashes because it adds a little extra light and I mount them on ball heads so I can angle them downwards. One flash of normal size will give good results but I am now shooting with a larger Godox AD200 which gives out plenty of light at a low power setting and with a short flash duration. (At 1/32 power the AD200 has a flash duration of 1/6535 sec (t0.1))
Anyone using the Godox X1 transmitter and getting unreliable firing of the flashes, there is a method of turning on the X1 to get it to work well at close range. Hold down the test button while you turn on the X1, the LED will flash twice. You are now in close range mode.
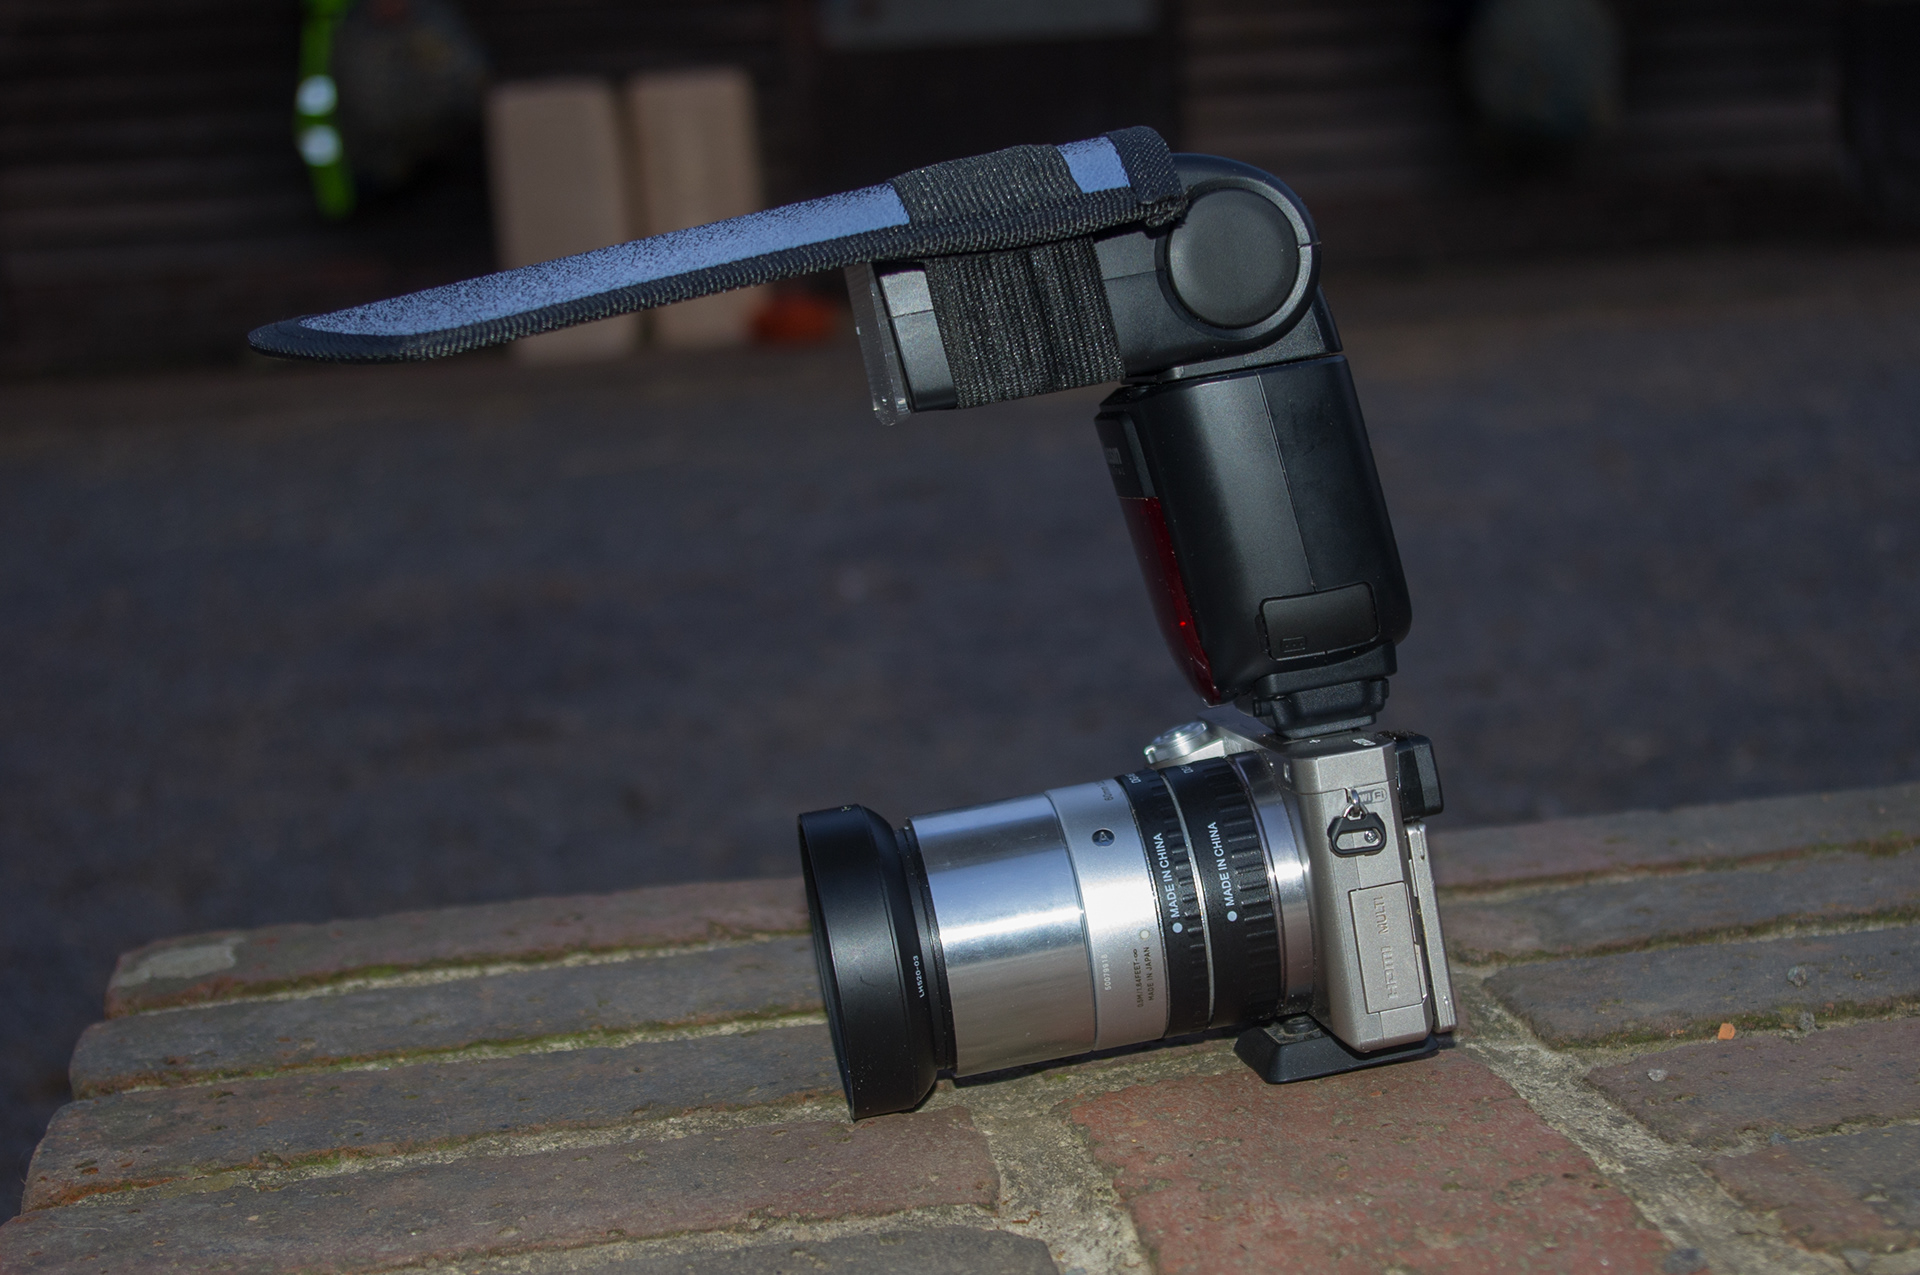
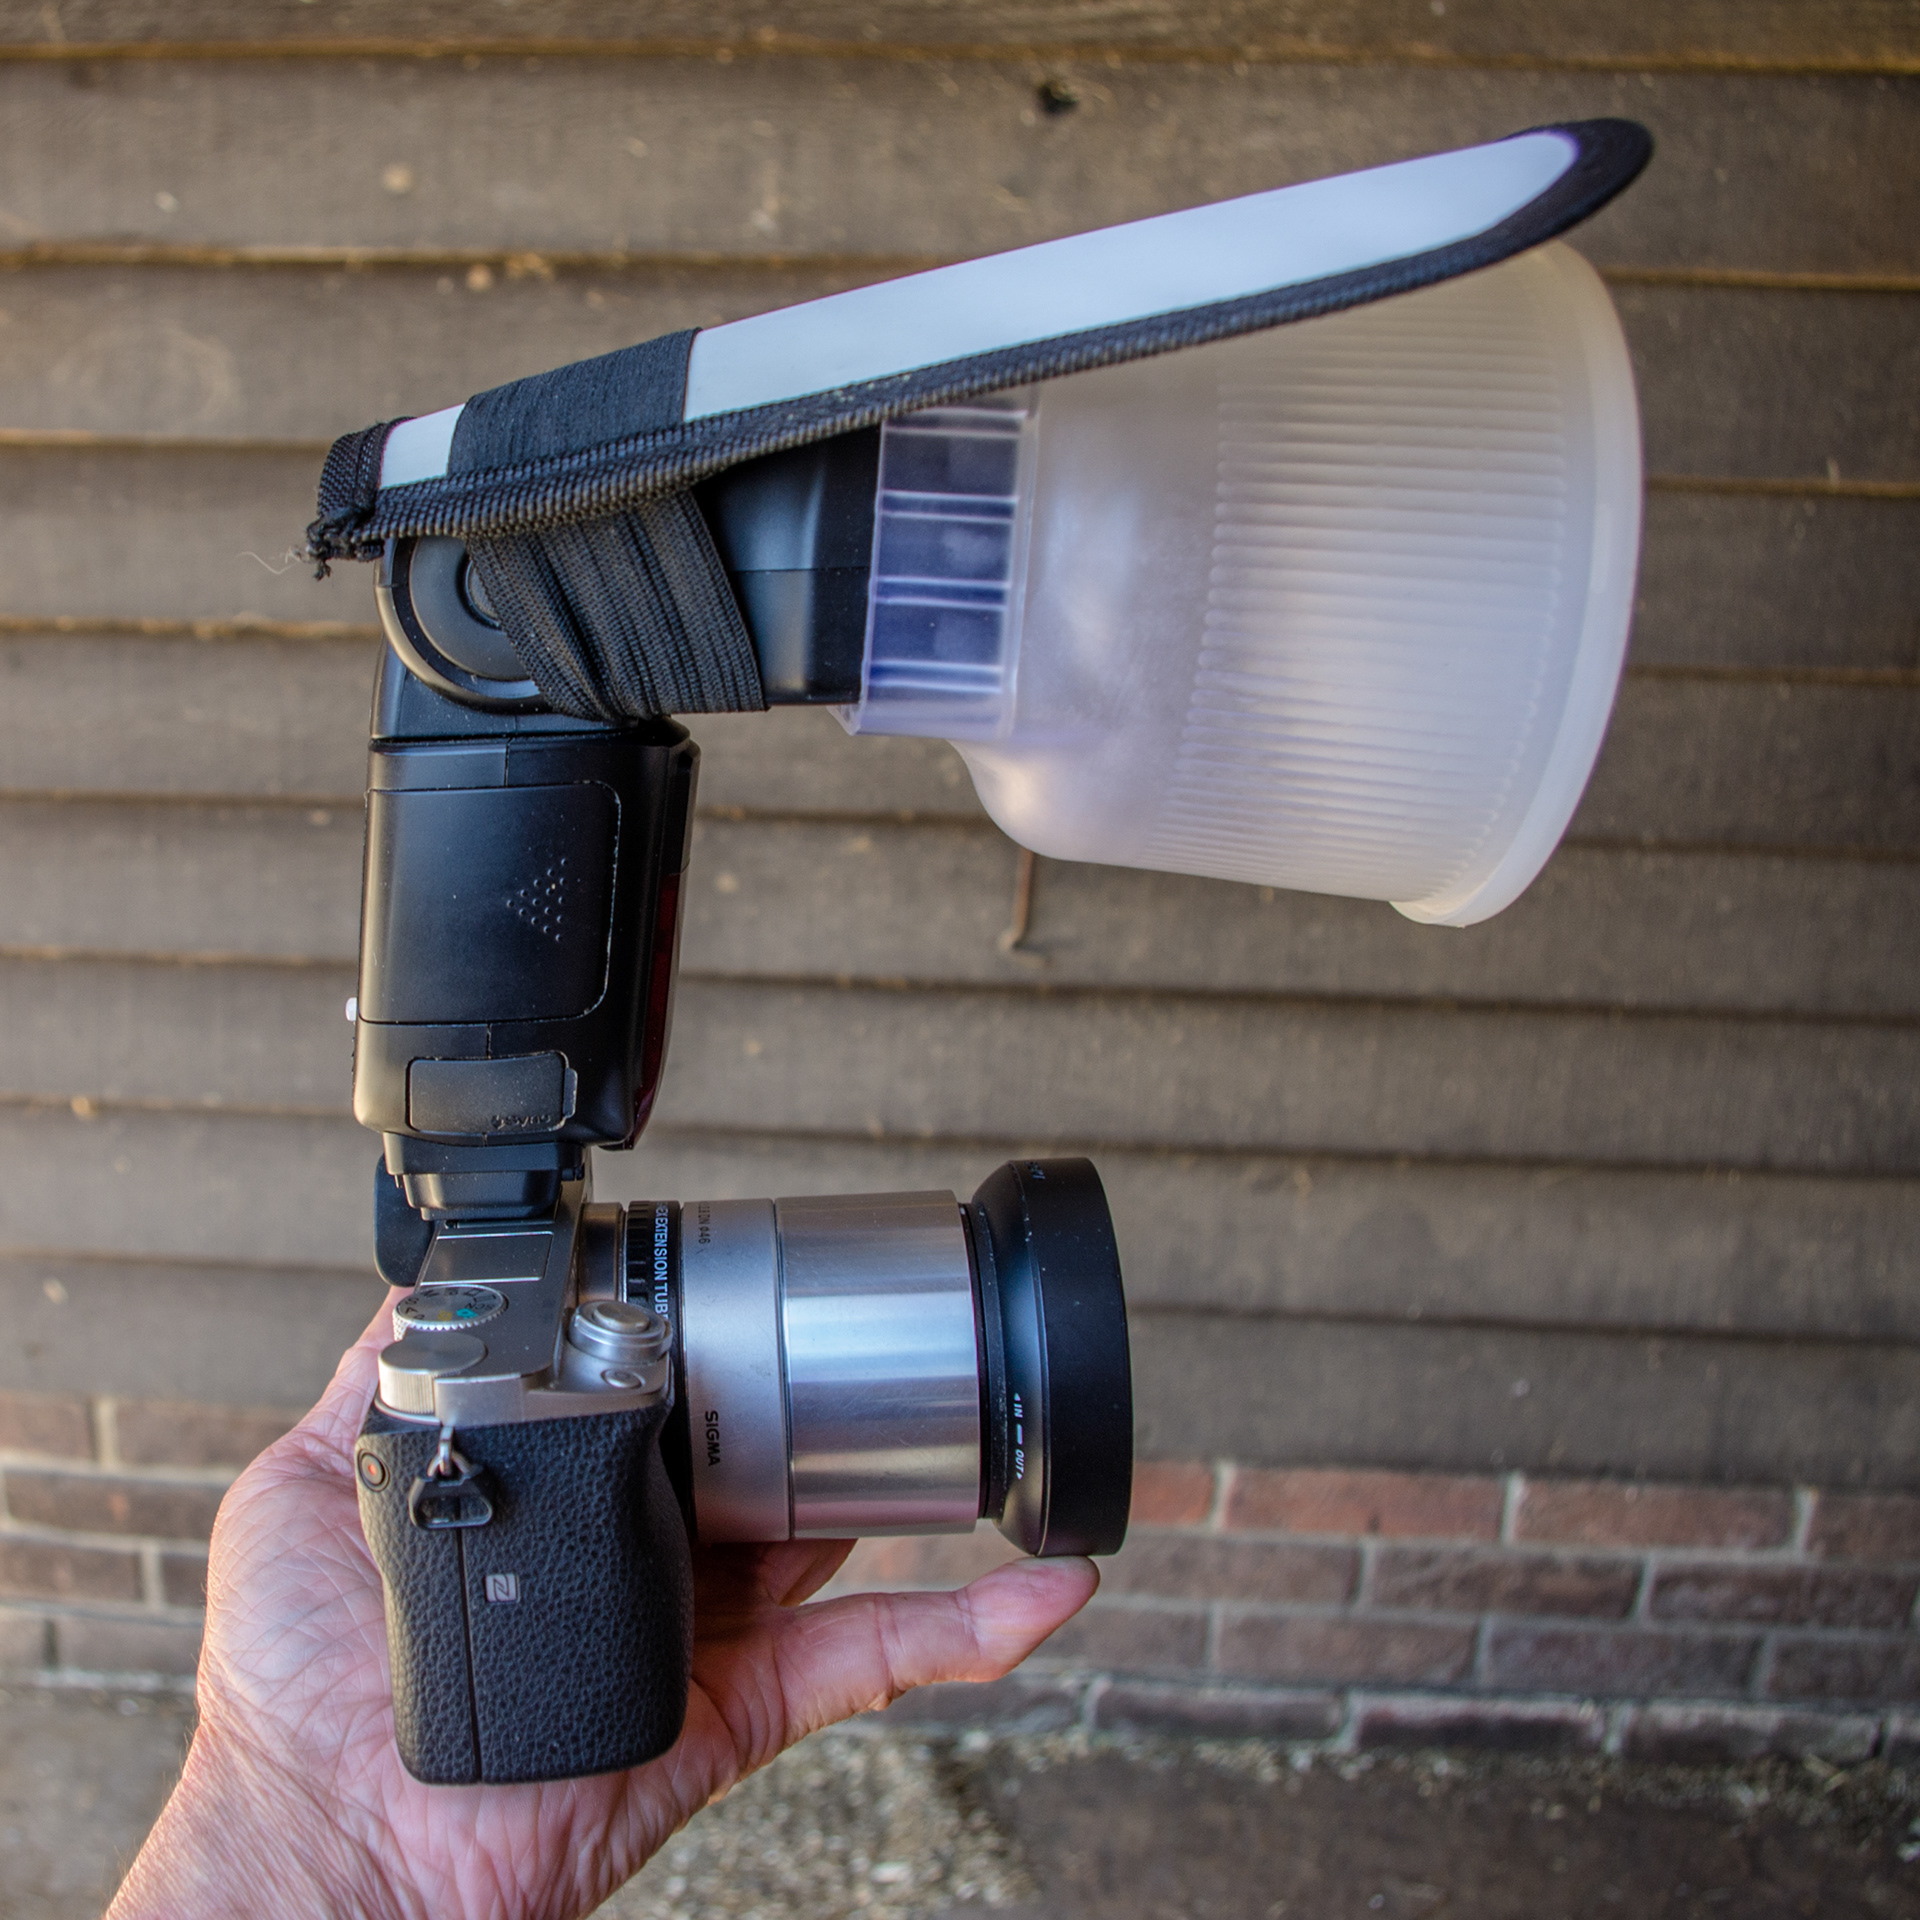
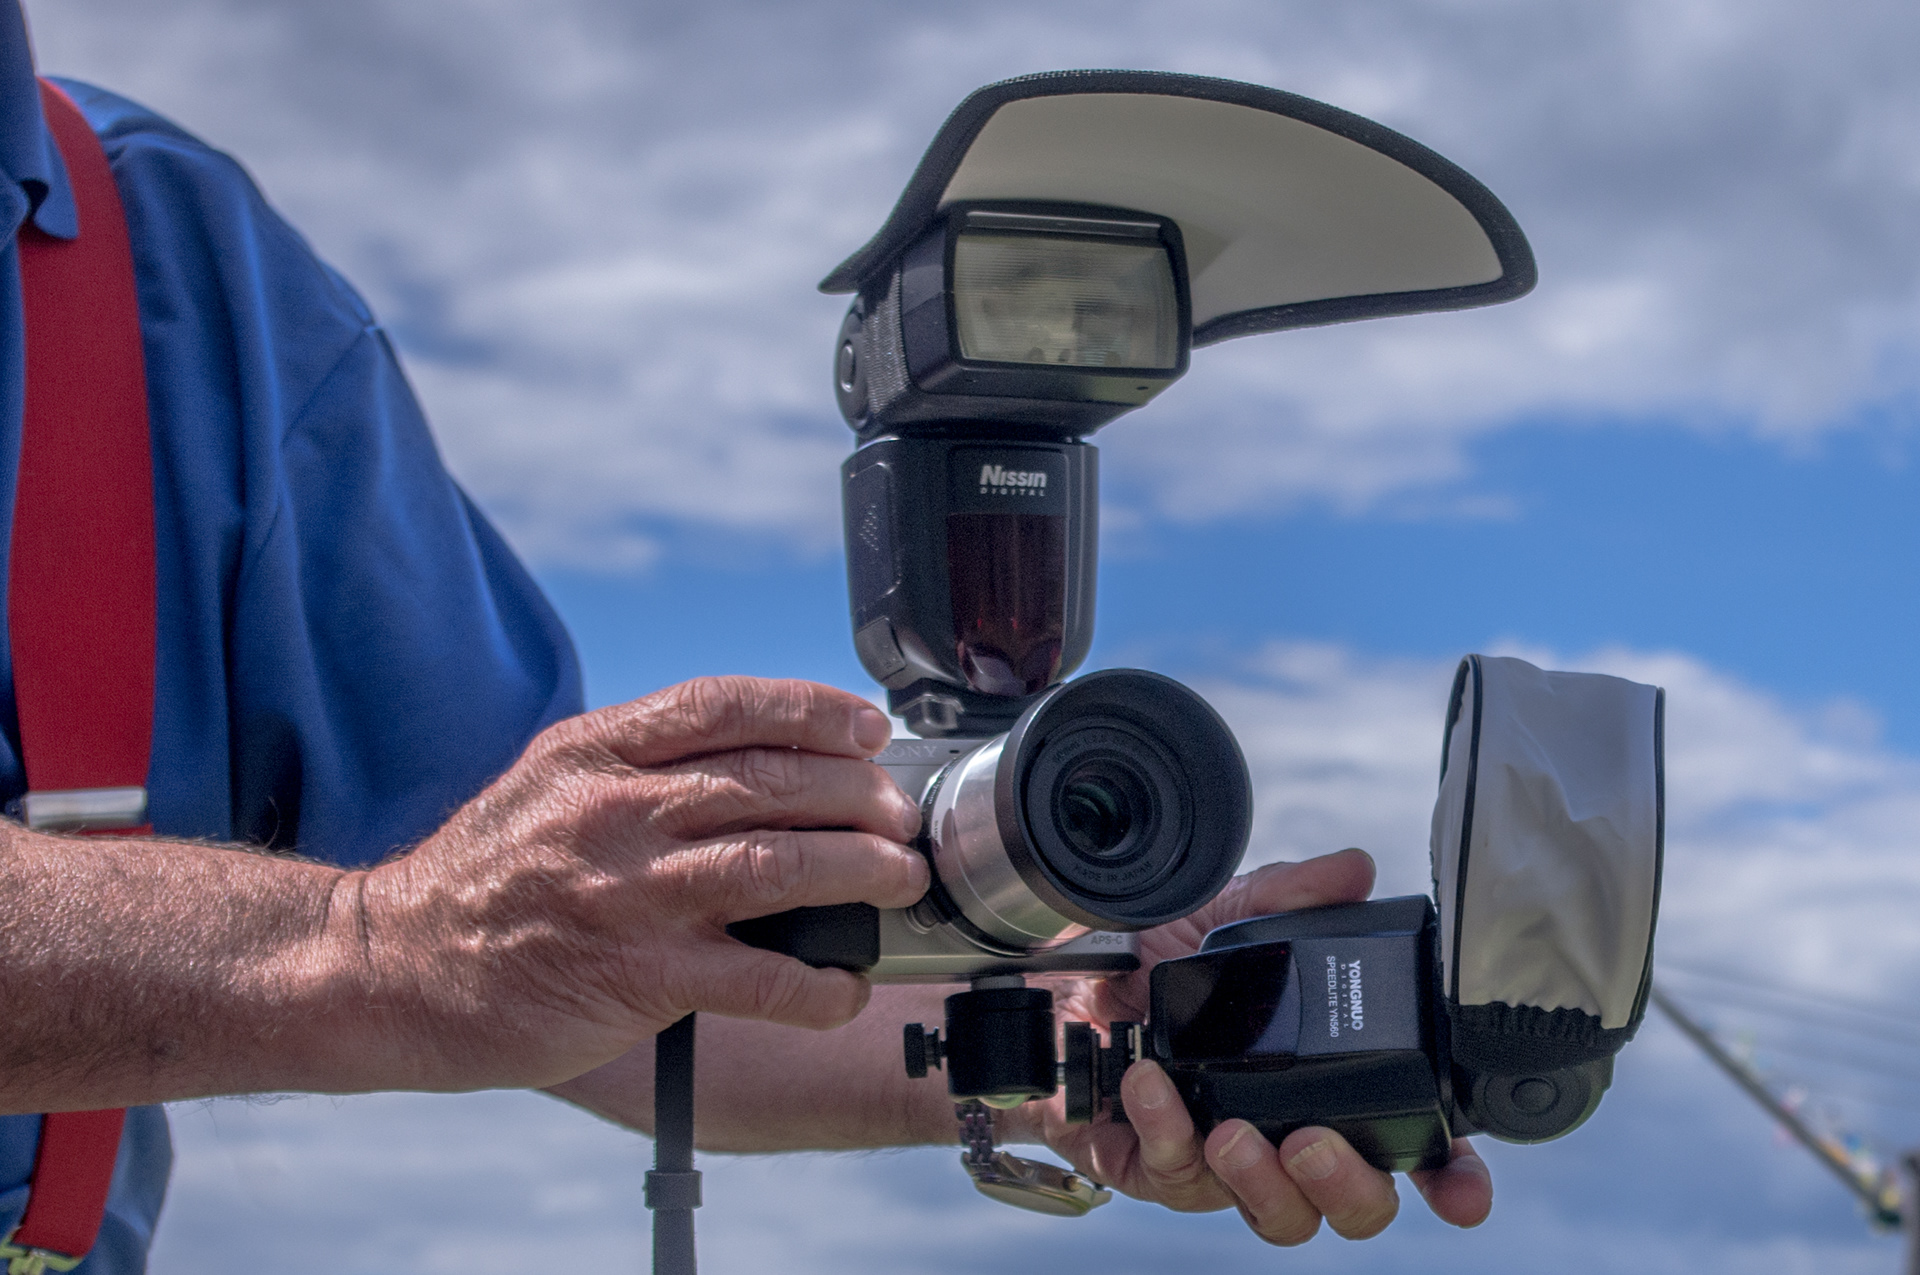
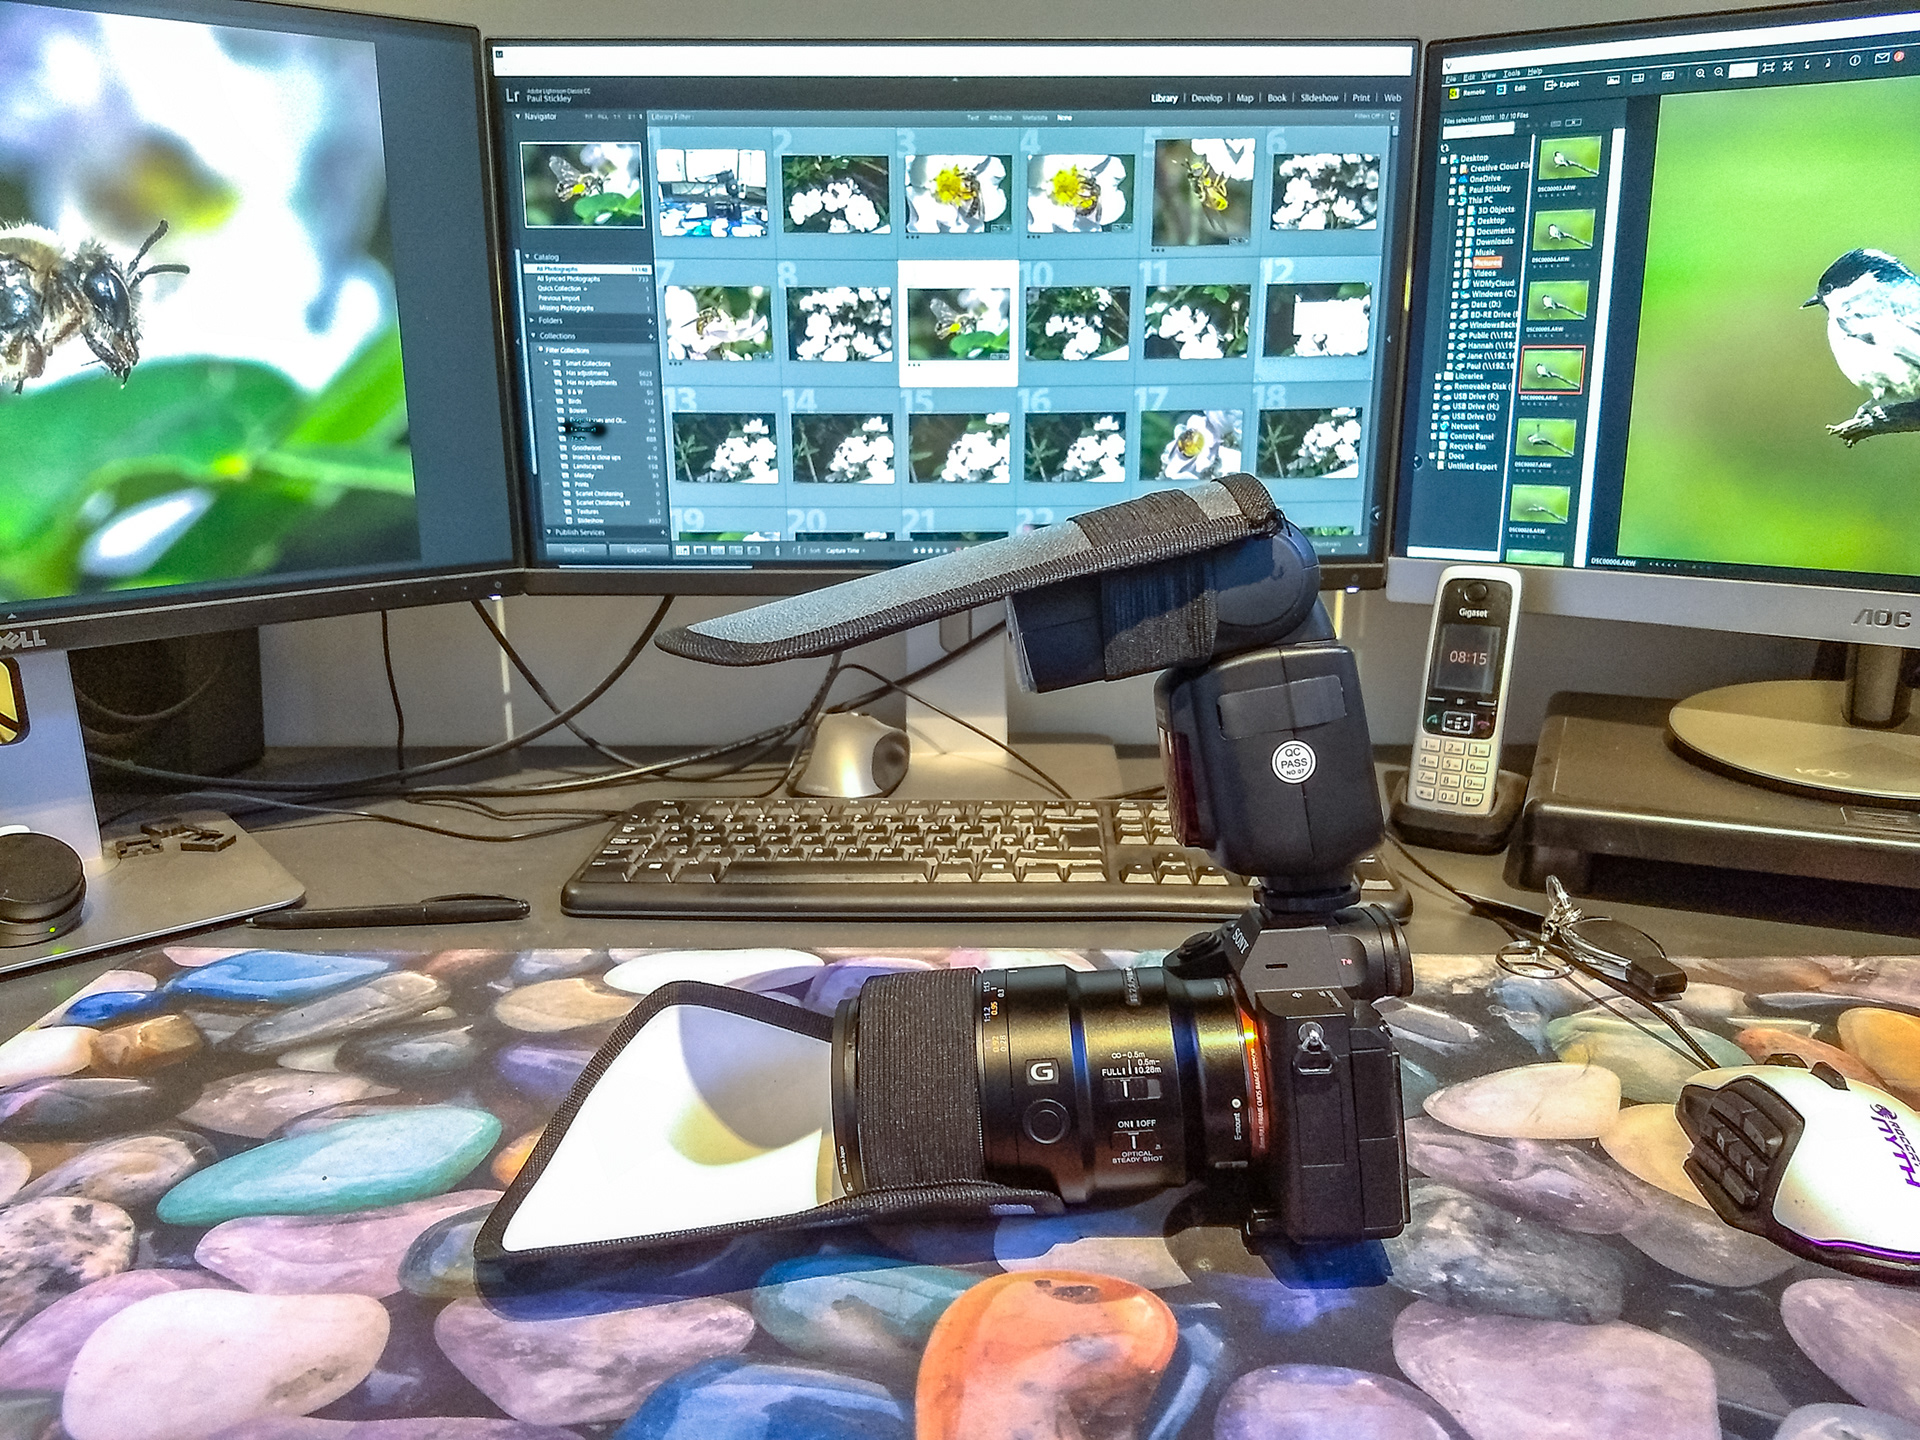
For interest below are a couple of shots taken with My old 24MP Sony A6000 And the Sigma 60mm DN Art lens with extension tubes.
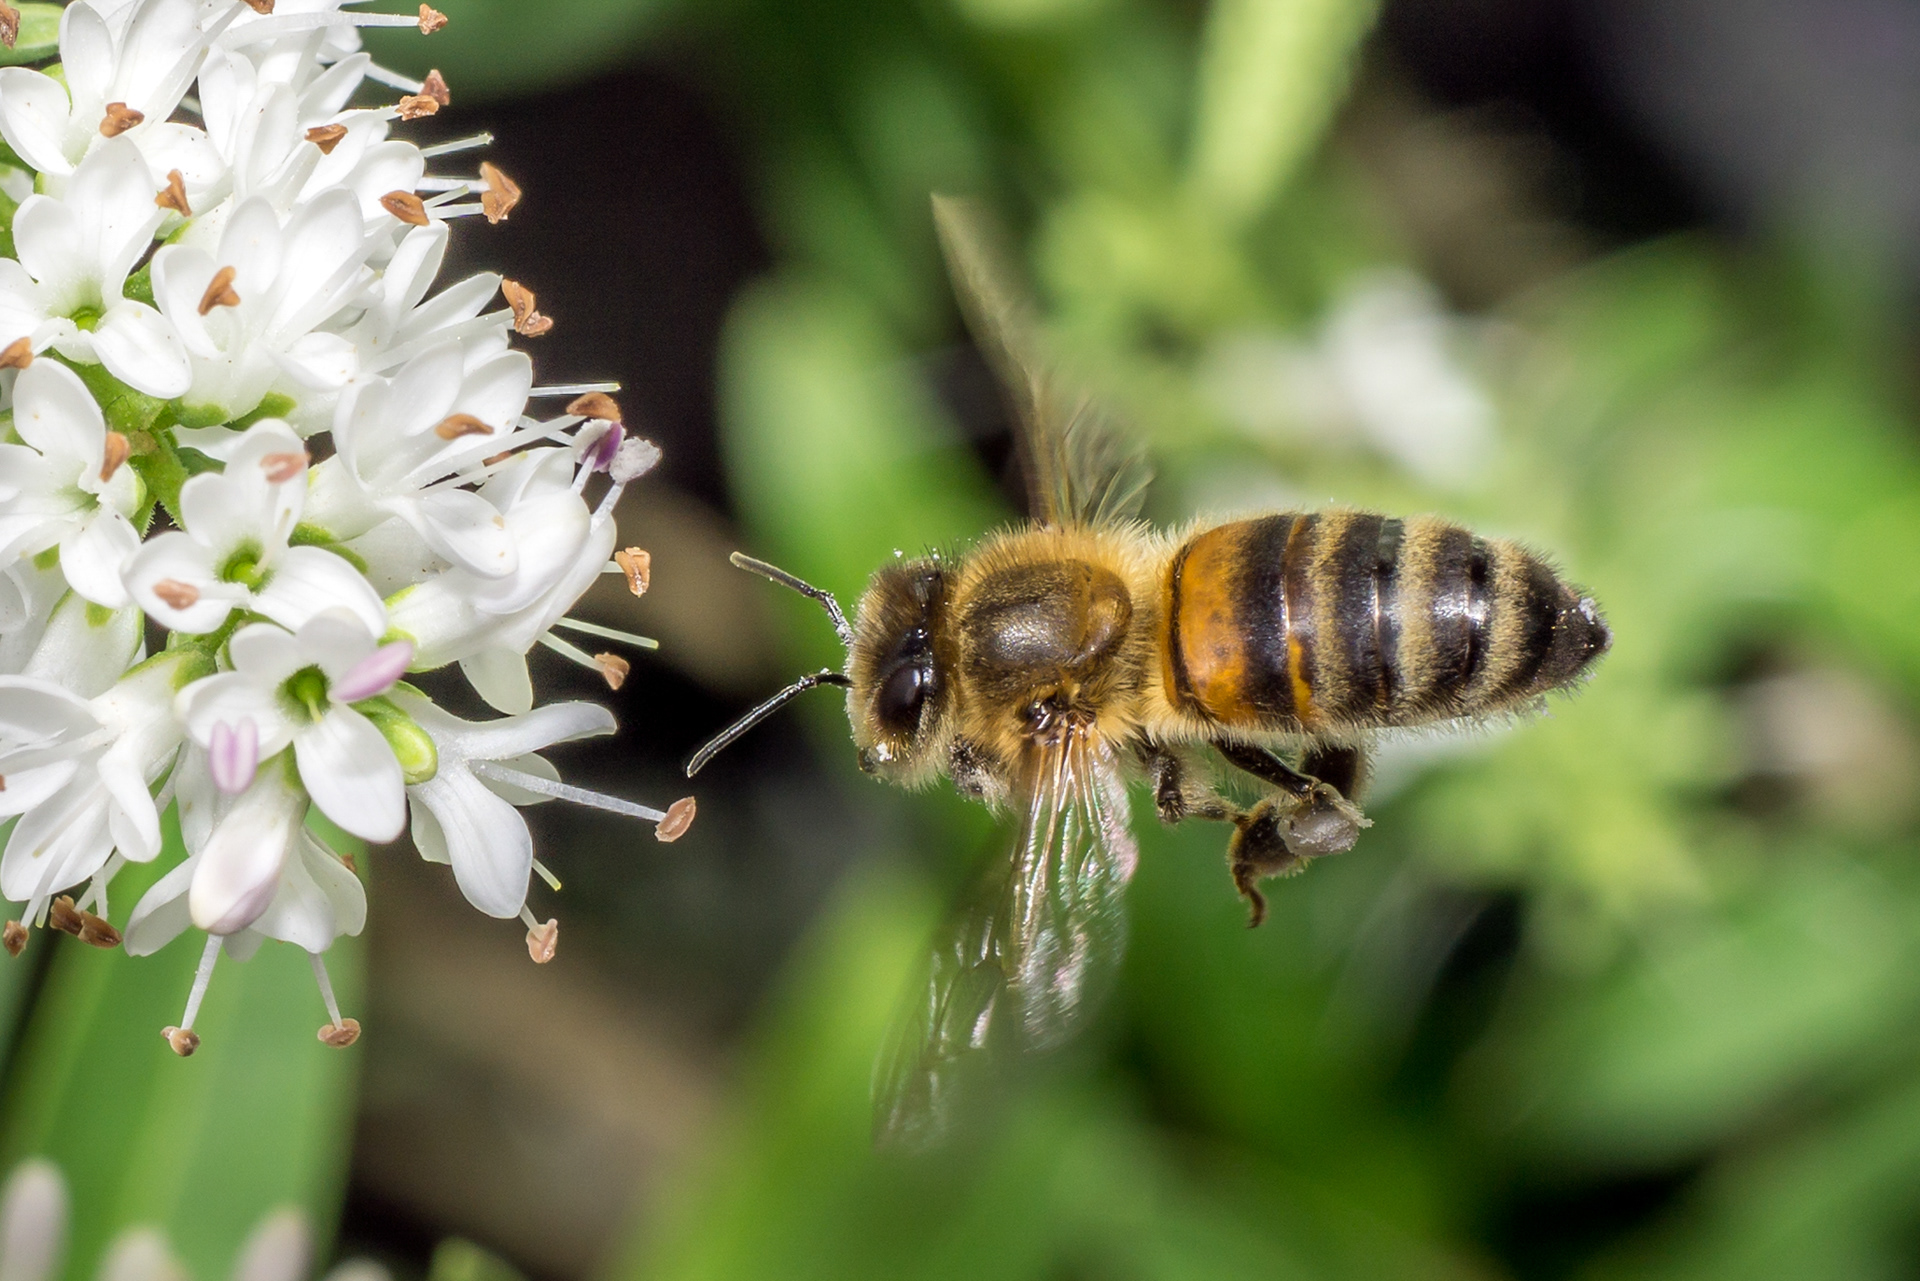

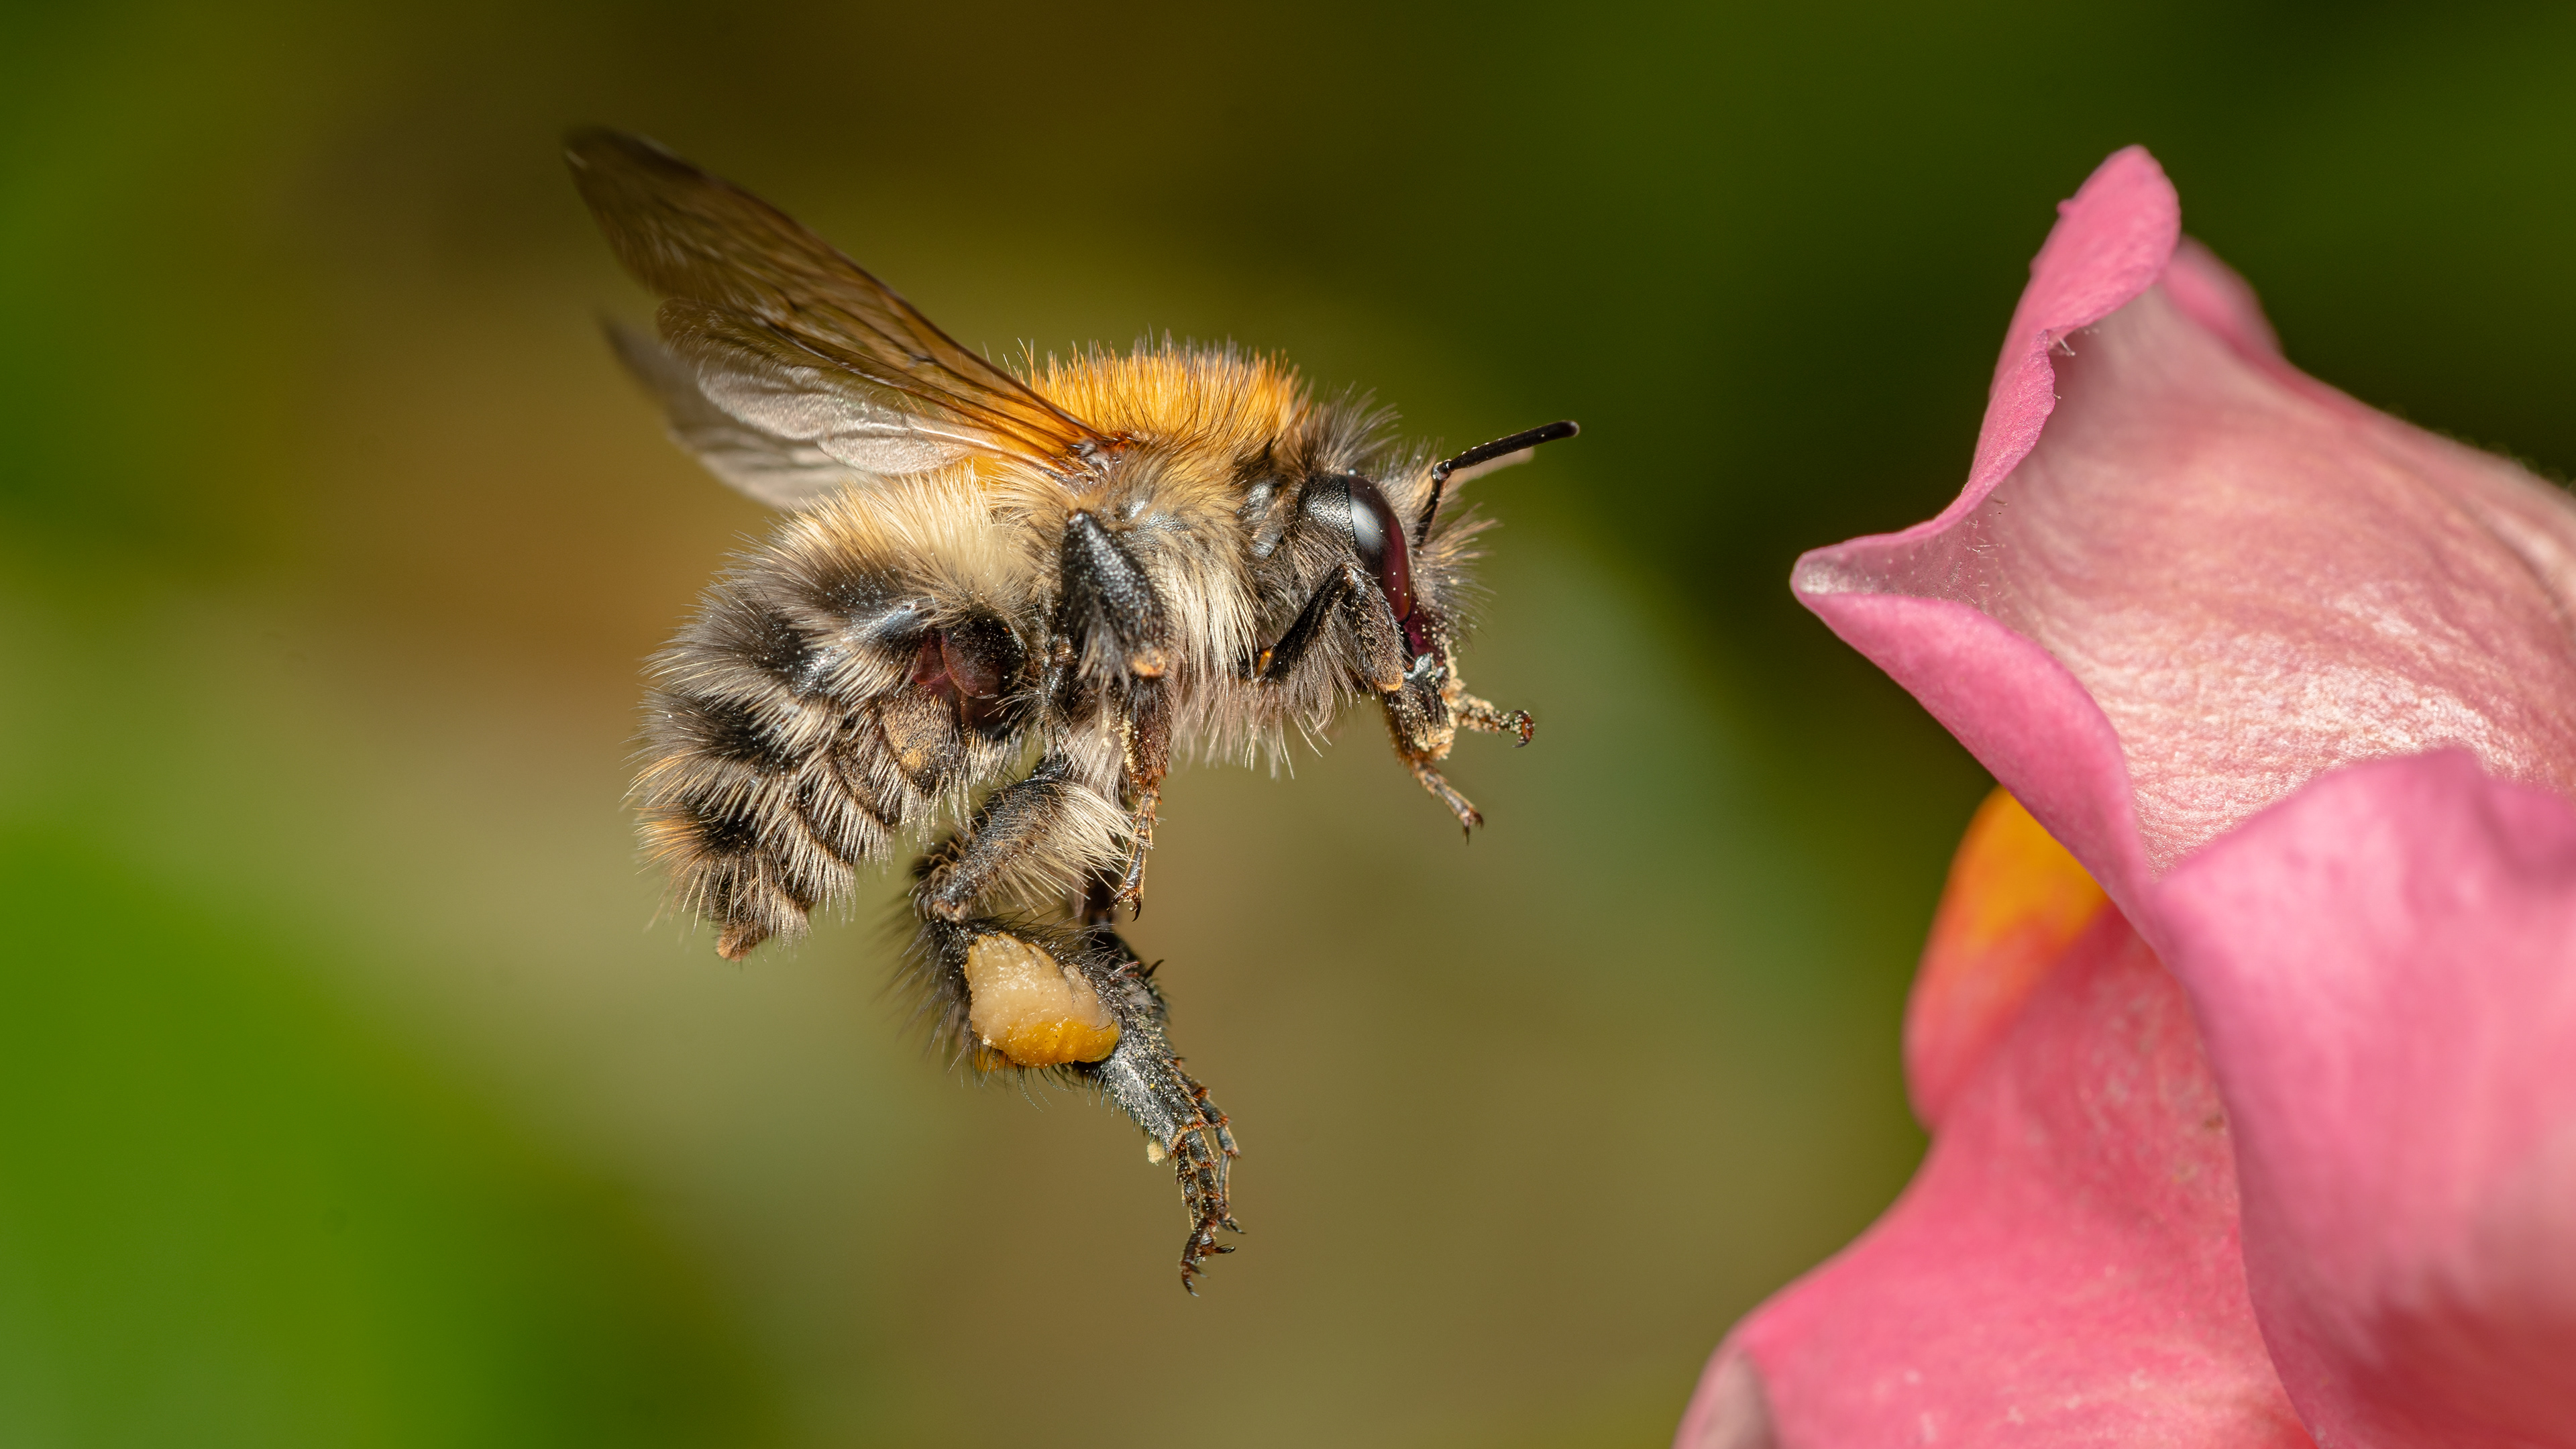
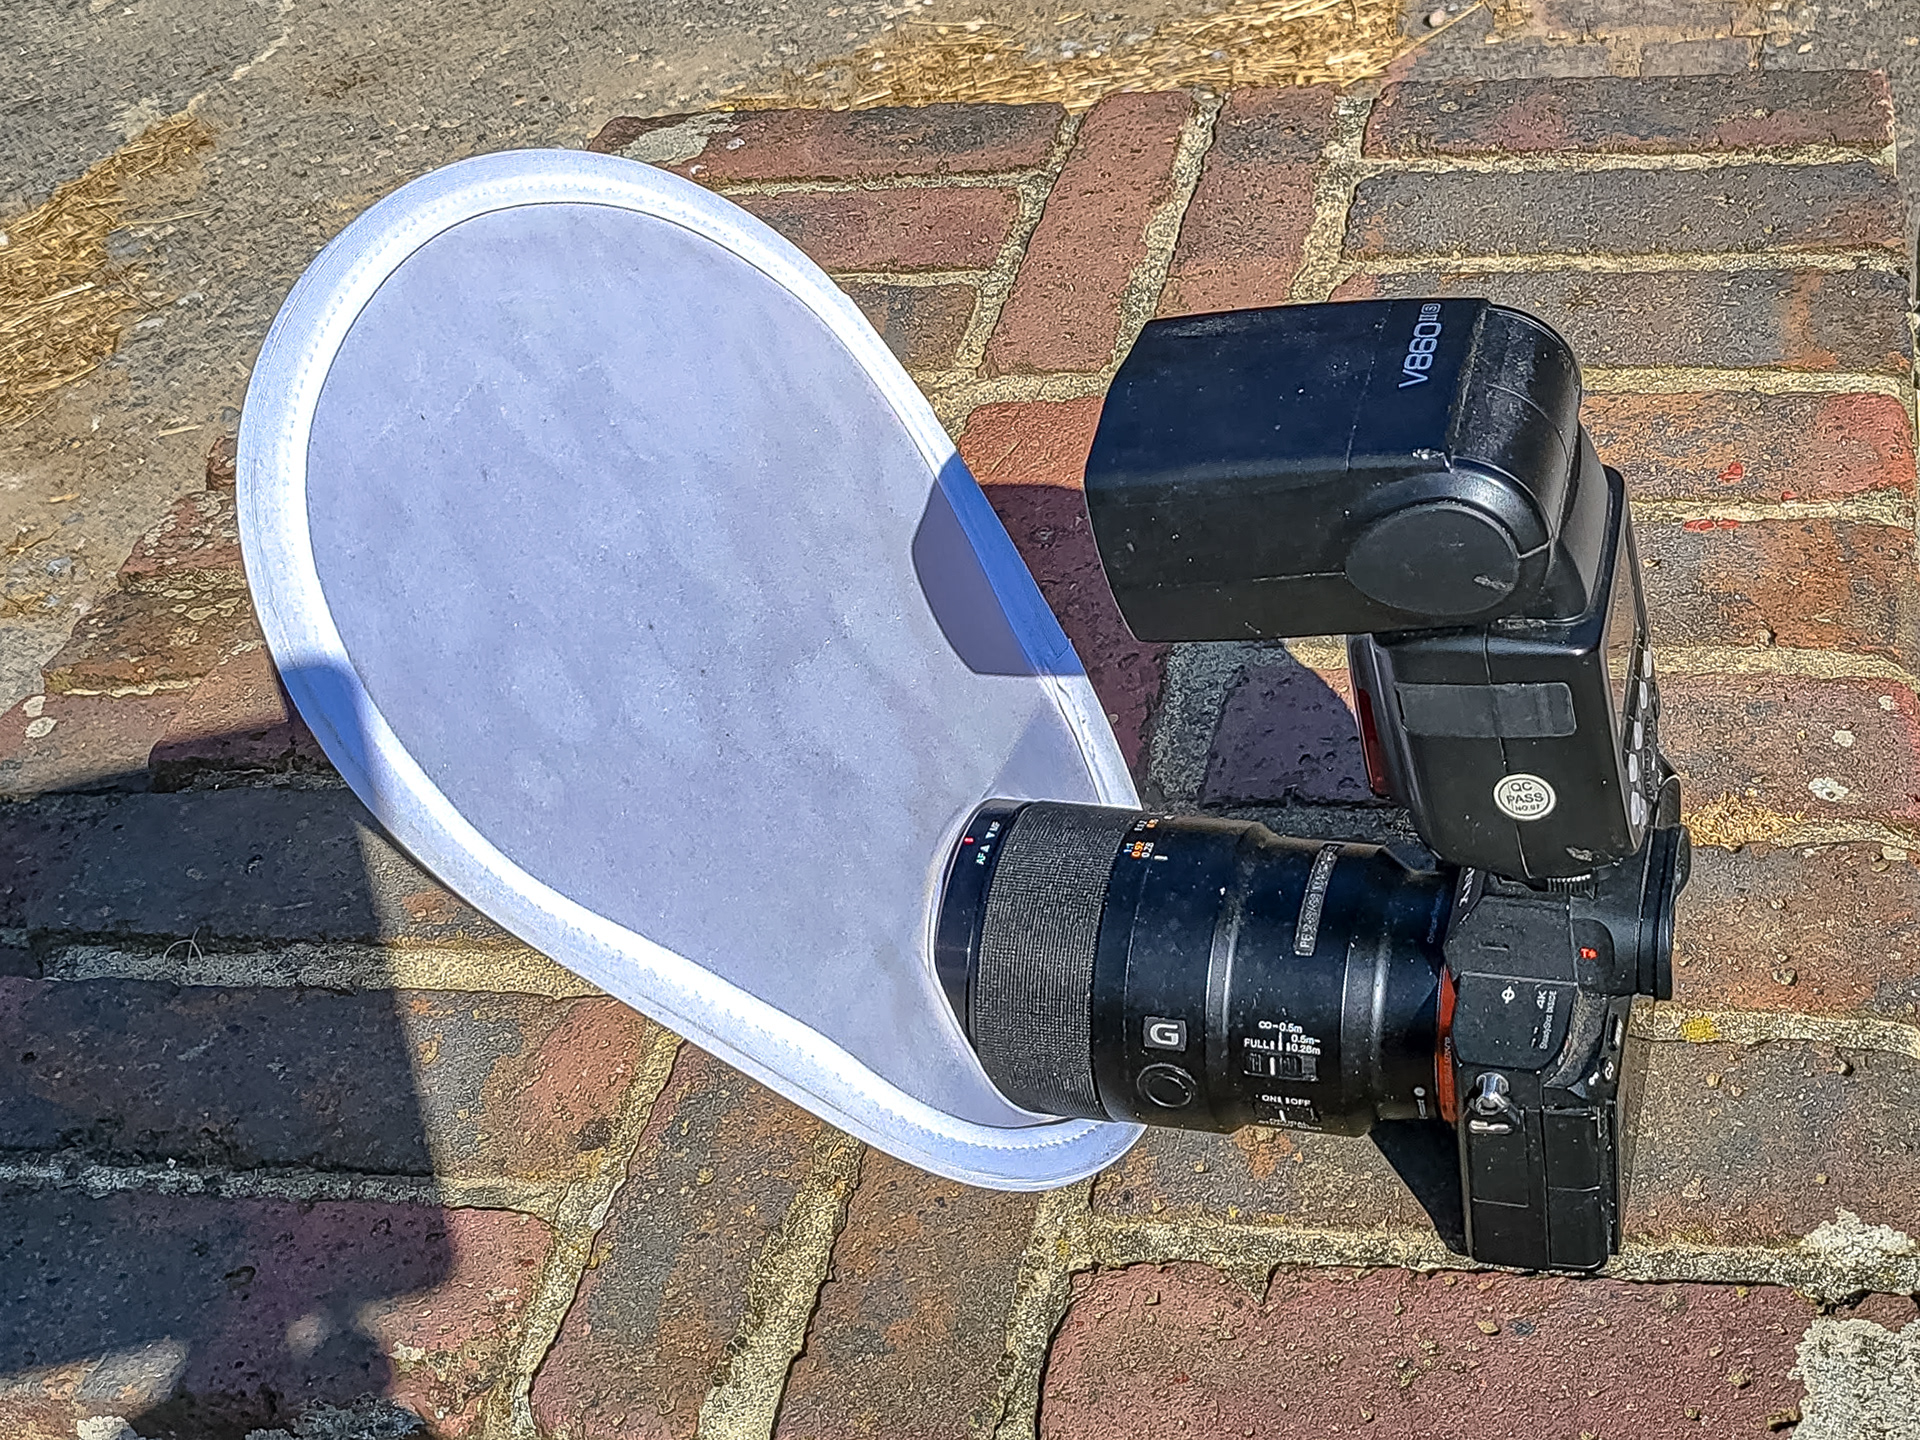
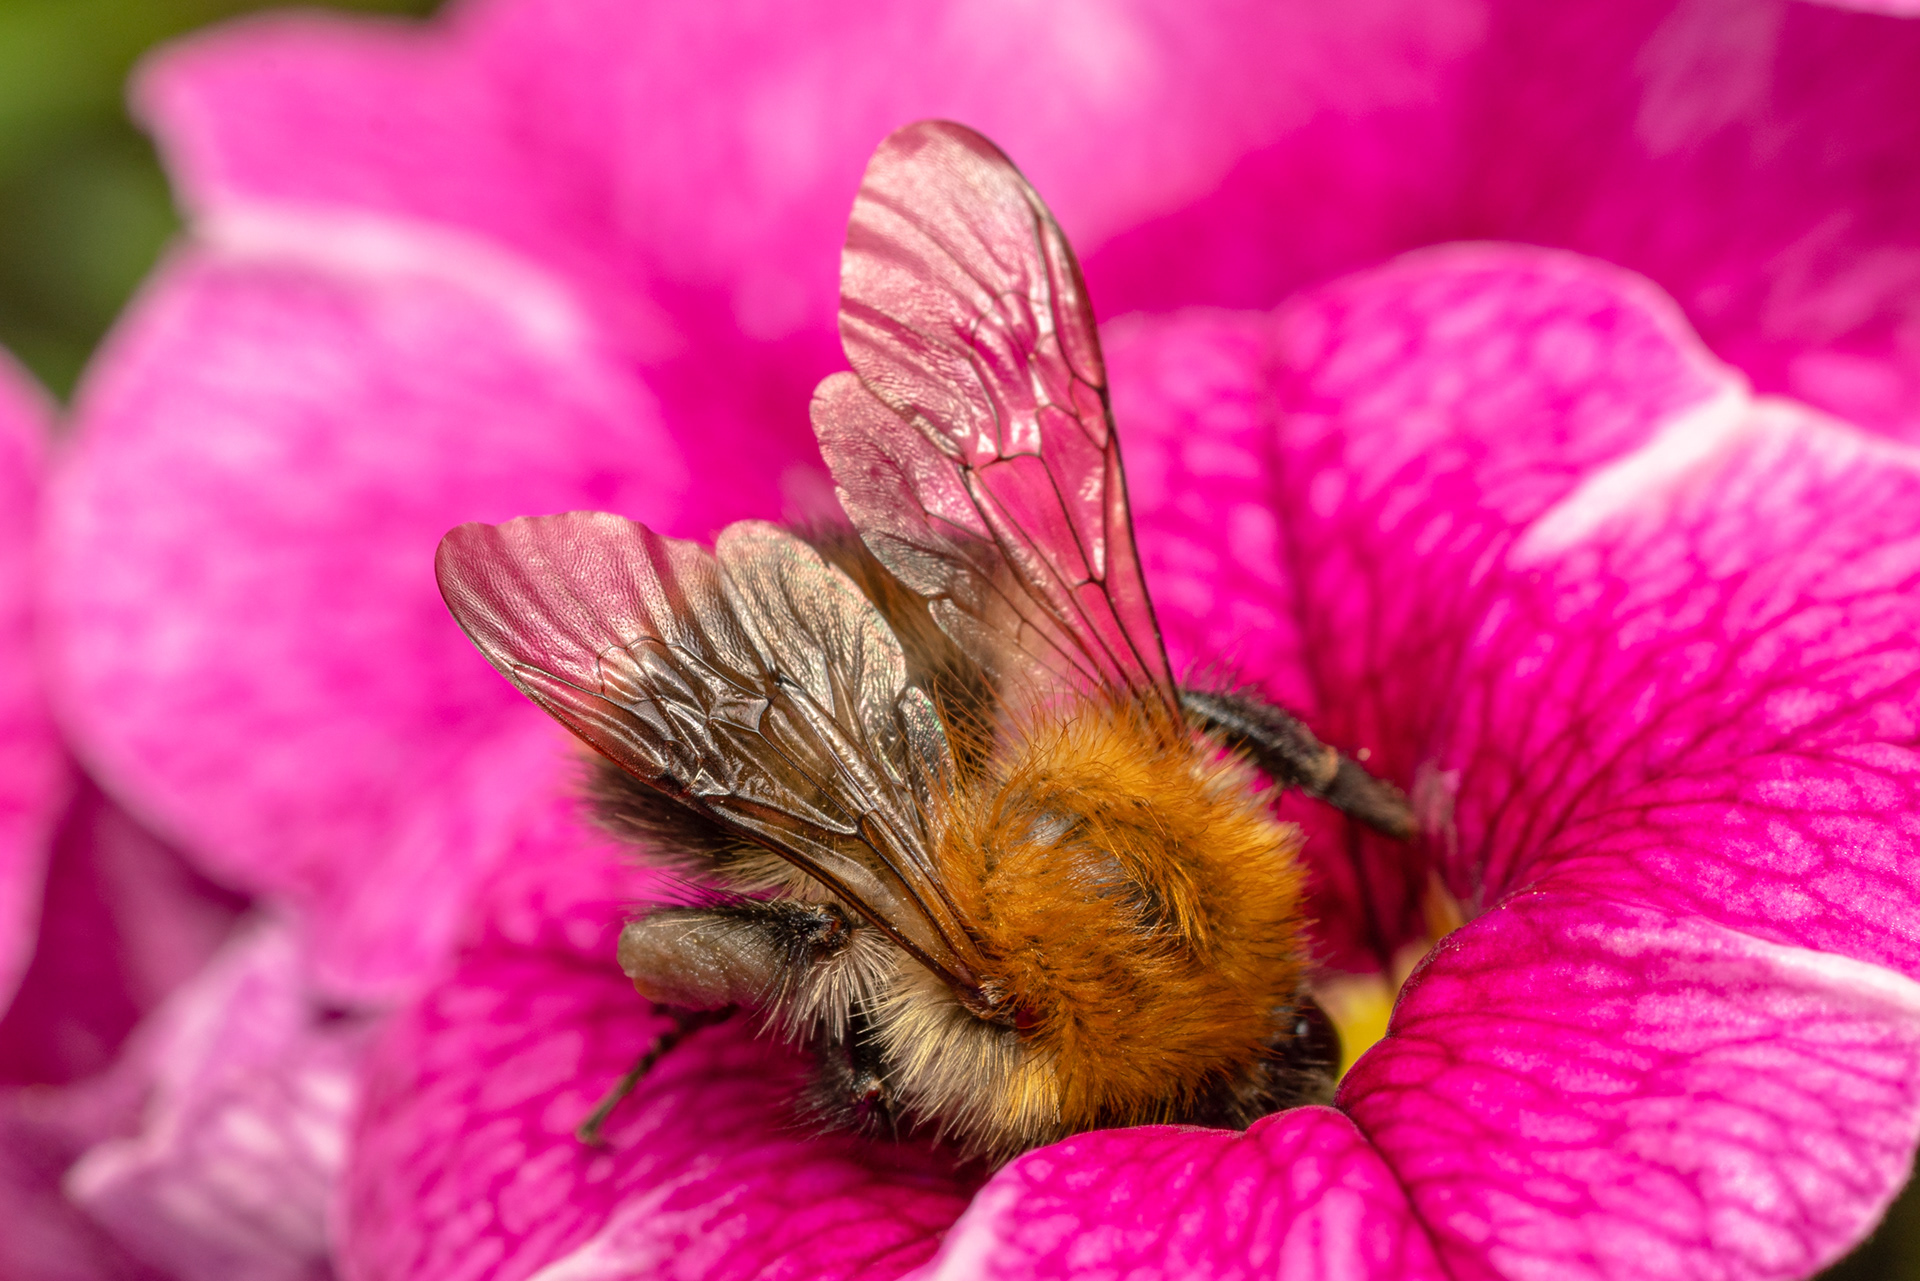
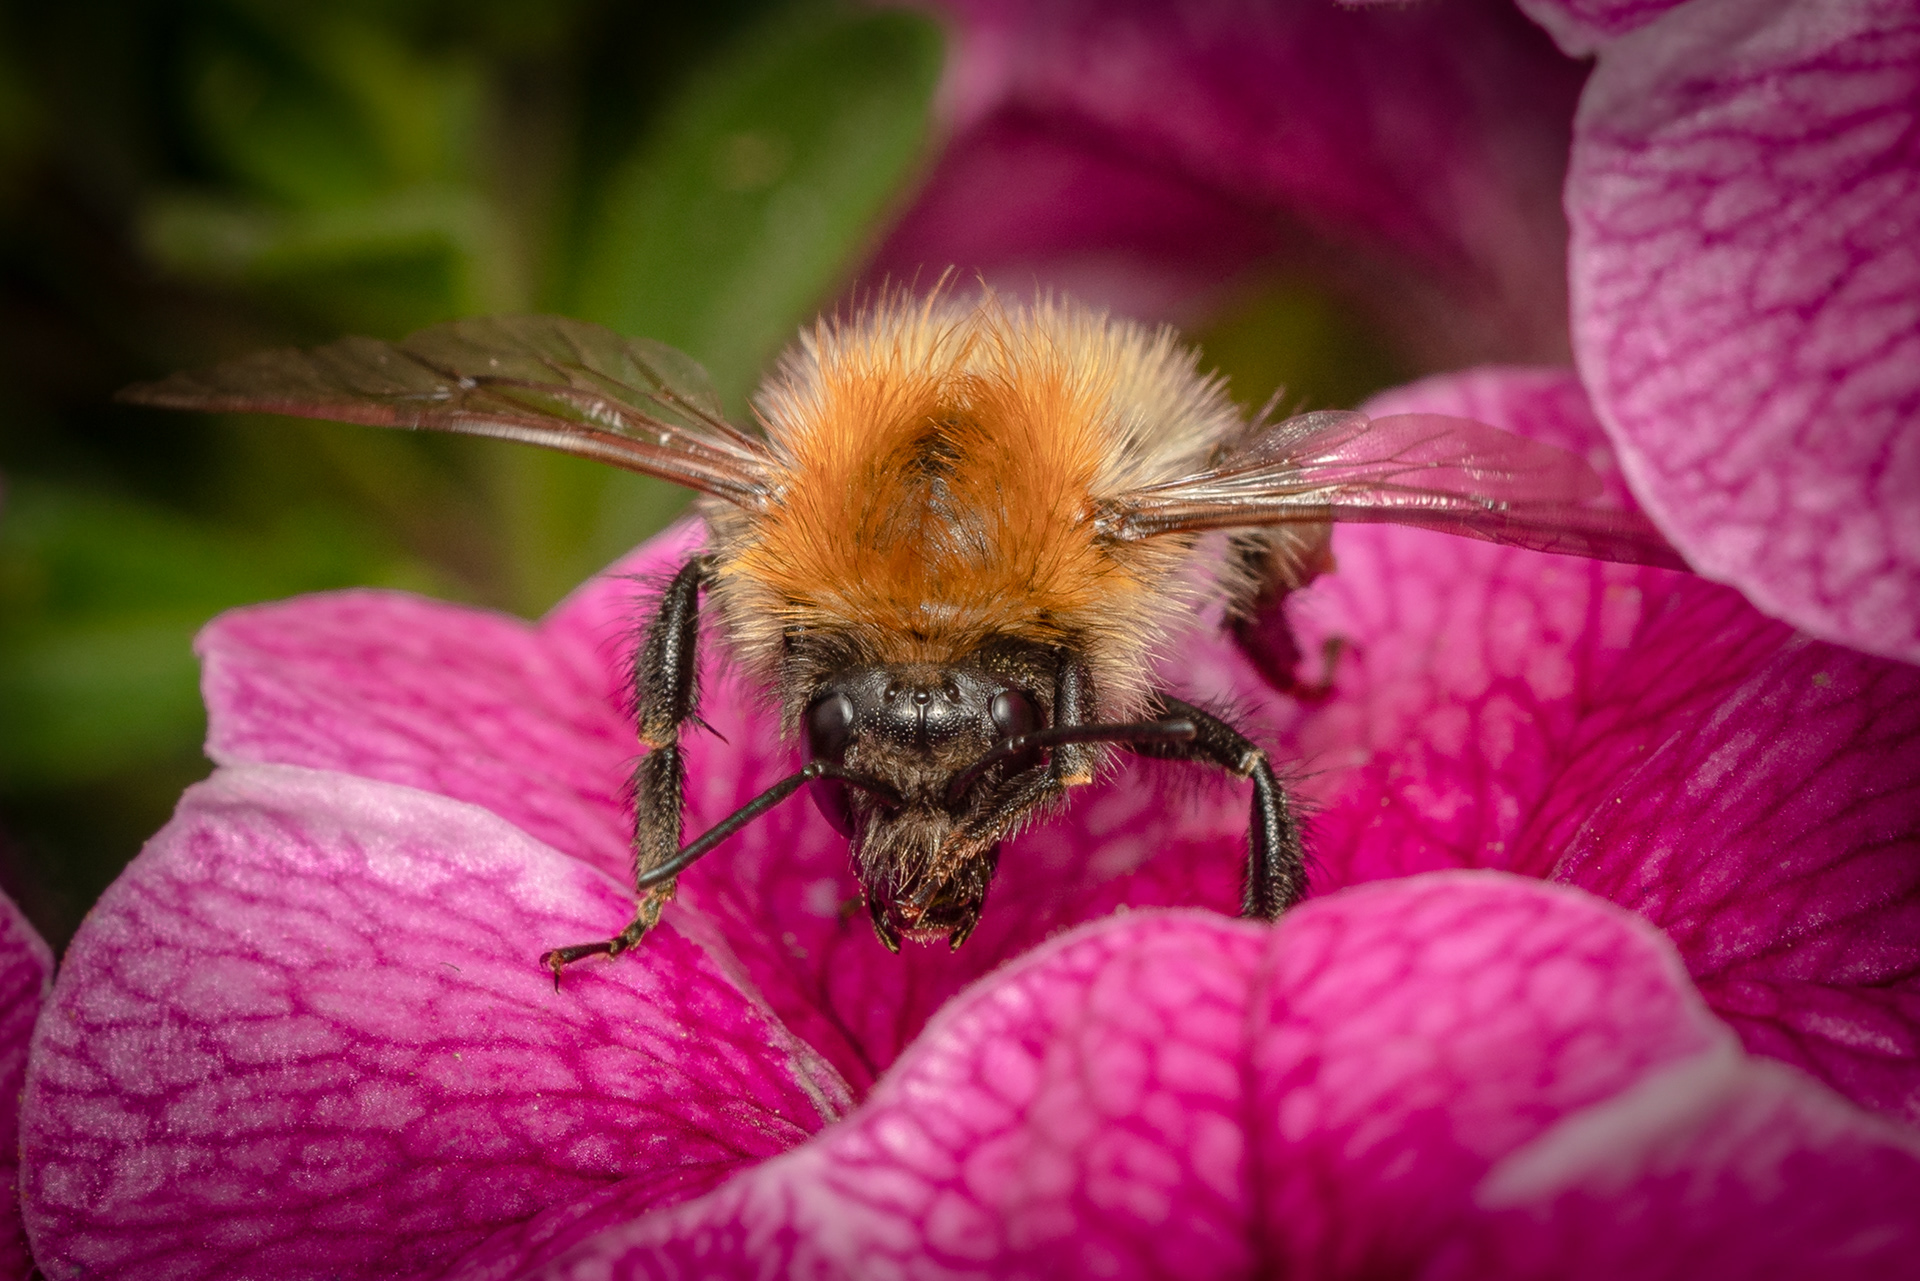
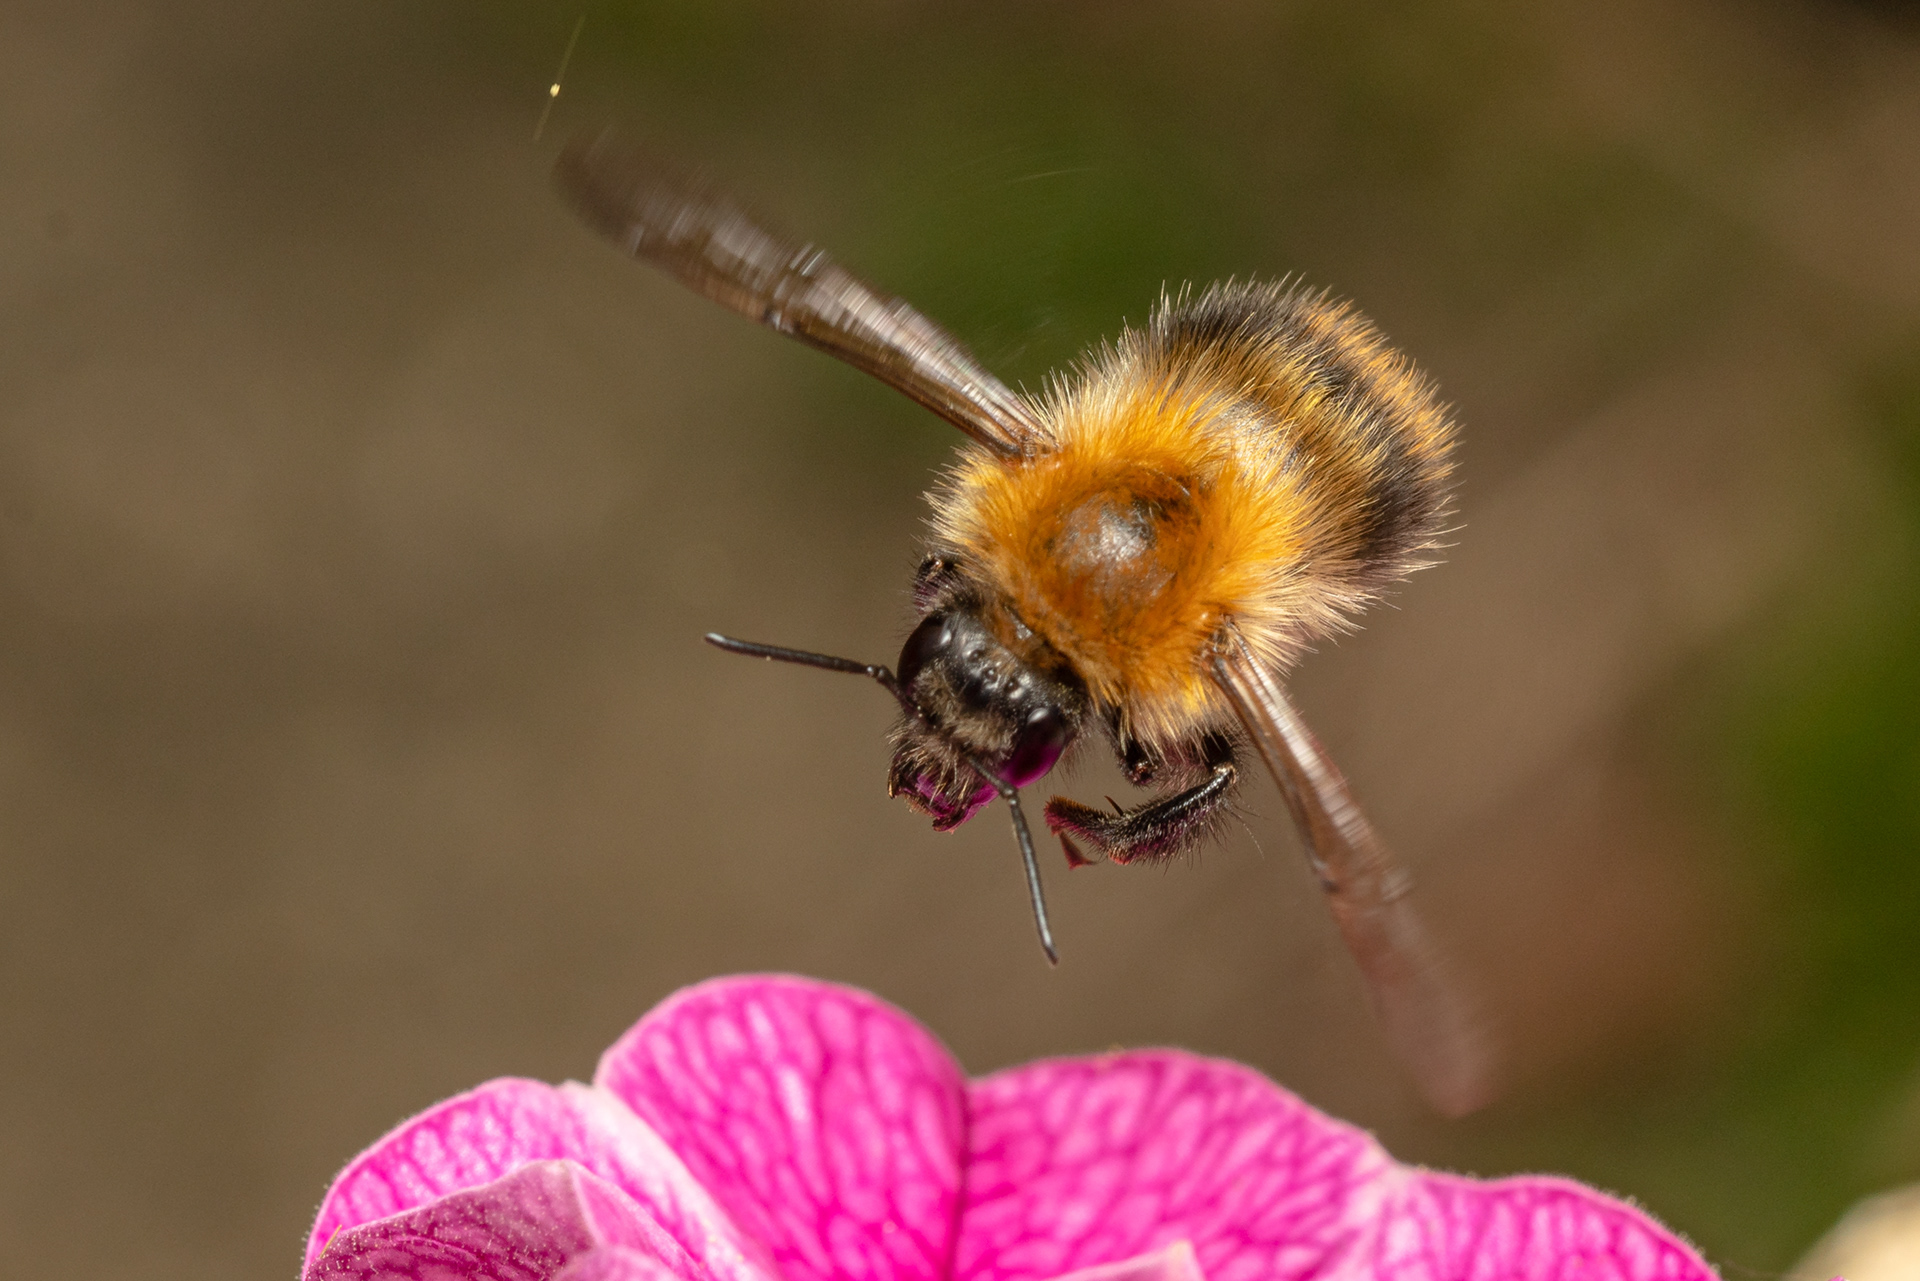
Below is a simple setup many people could use. I tried this out as an experiment and took the three bee pictures within five minutes of going outside. Getting the diffuser to angle downwards is important, maybe use some tape. This can produce good results but the flash will be set to around 1/4 power. To get even better results a high output flash or even two flashes will output the same amount of light at a lower power setting and also have a shorter flash duration and so freeze the action better.. Also a flash with a large battery will recharge faster and fire faster enabling better bursts.
Below are some of the setups I have tried. I also tried setups with older cameras but do not have images of them. The last six images are what I shoot with now. Note I am not using a diffuser but a reflector, it is quite large and close to the subject. The reflector is also good at focusing the light towards the subject.
Some of these setups were not very successful, particularly because the image became blasted with harsh light. Getting a lot of light on the subject but making the light soft is what is desired. Soft light is produced by having a large light source close to the subject. The diffuser/reflector becomes the light source when used correctly, much like bouncing light from a flash of the ceiling.

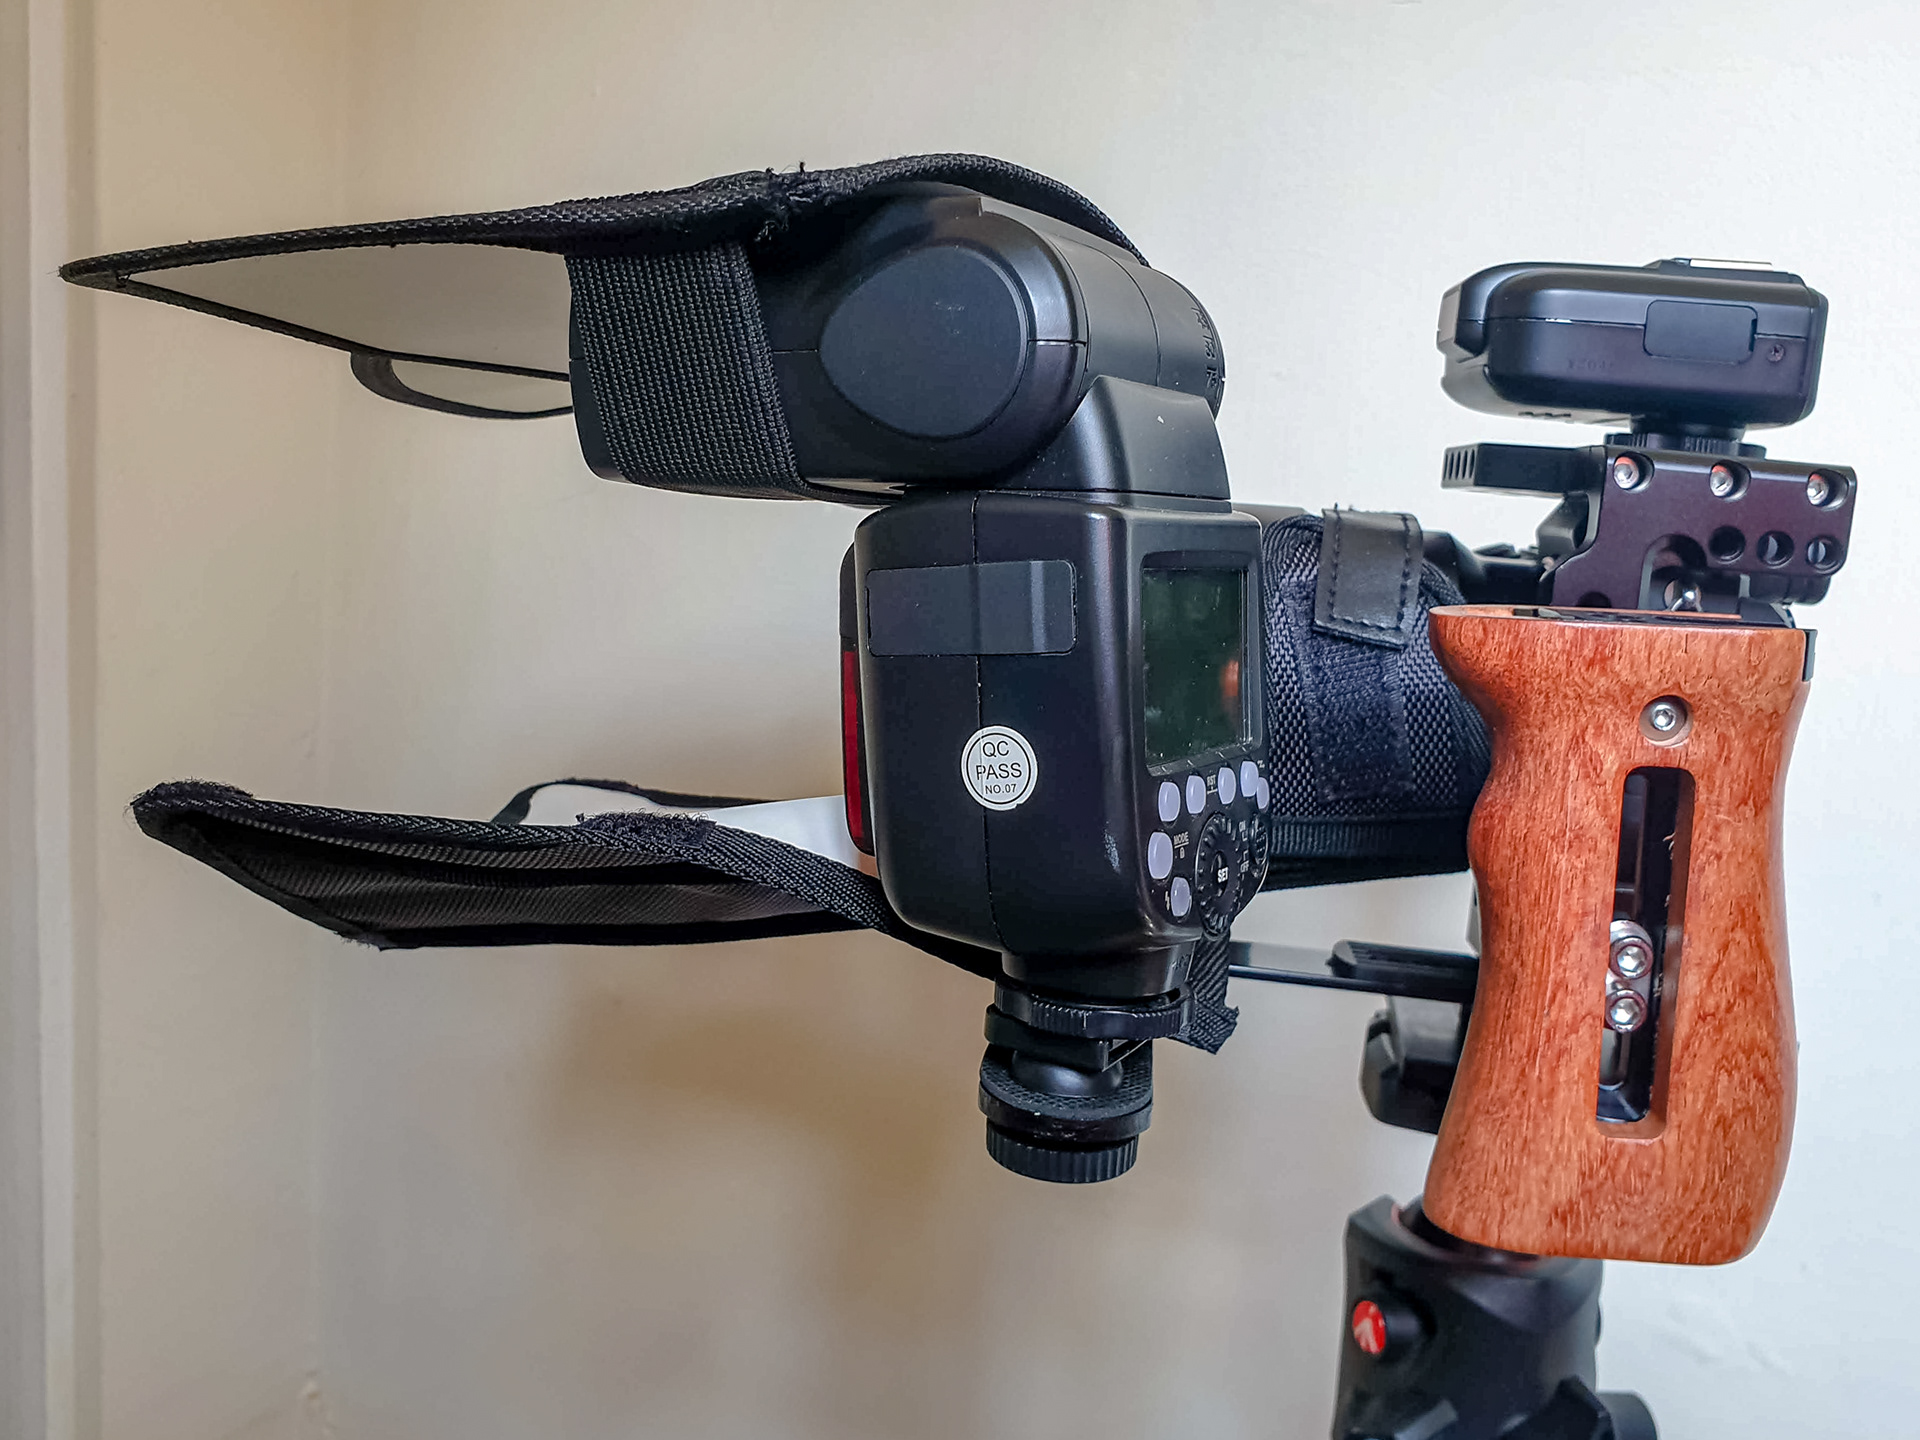

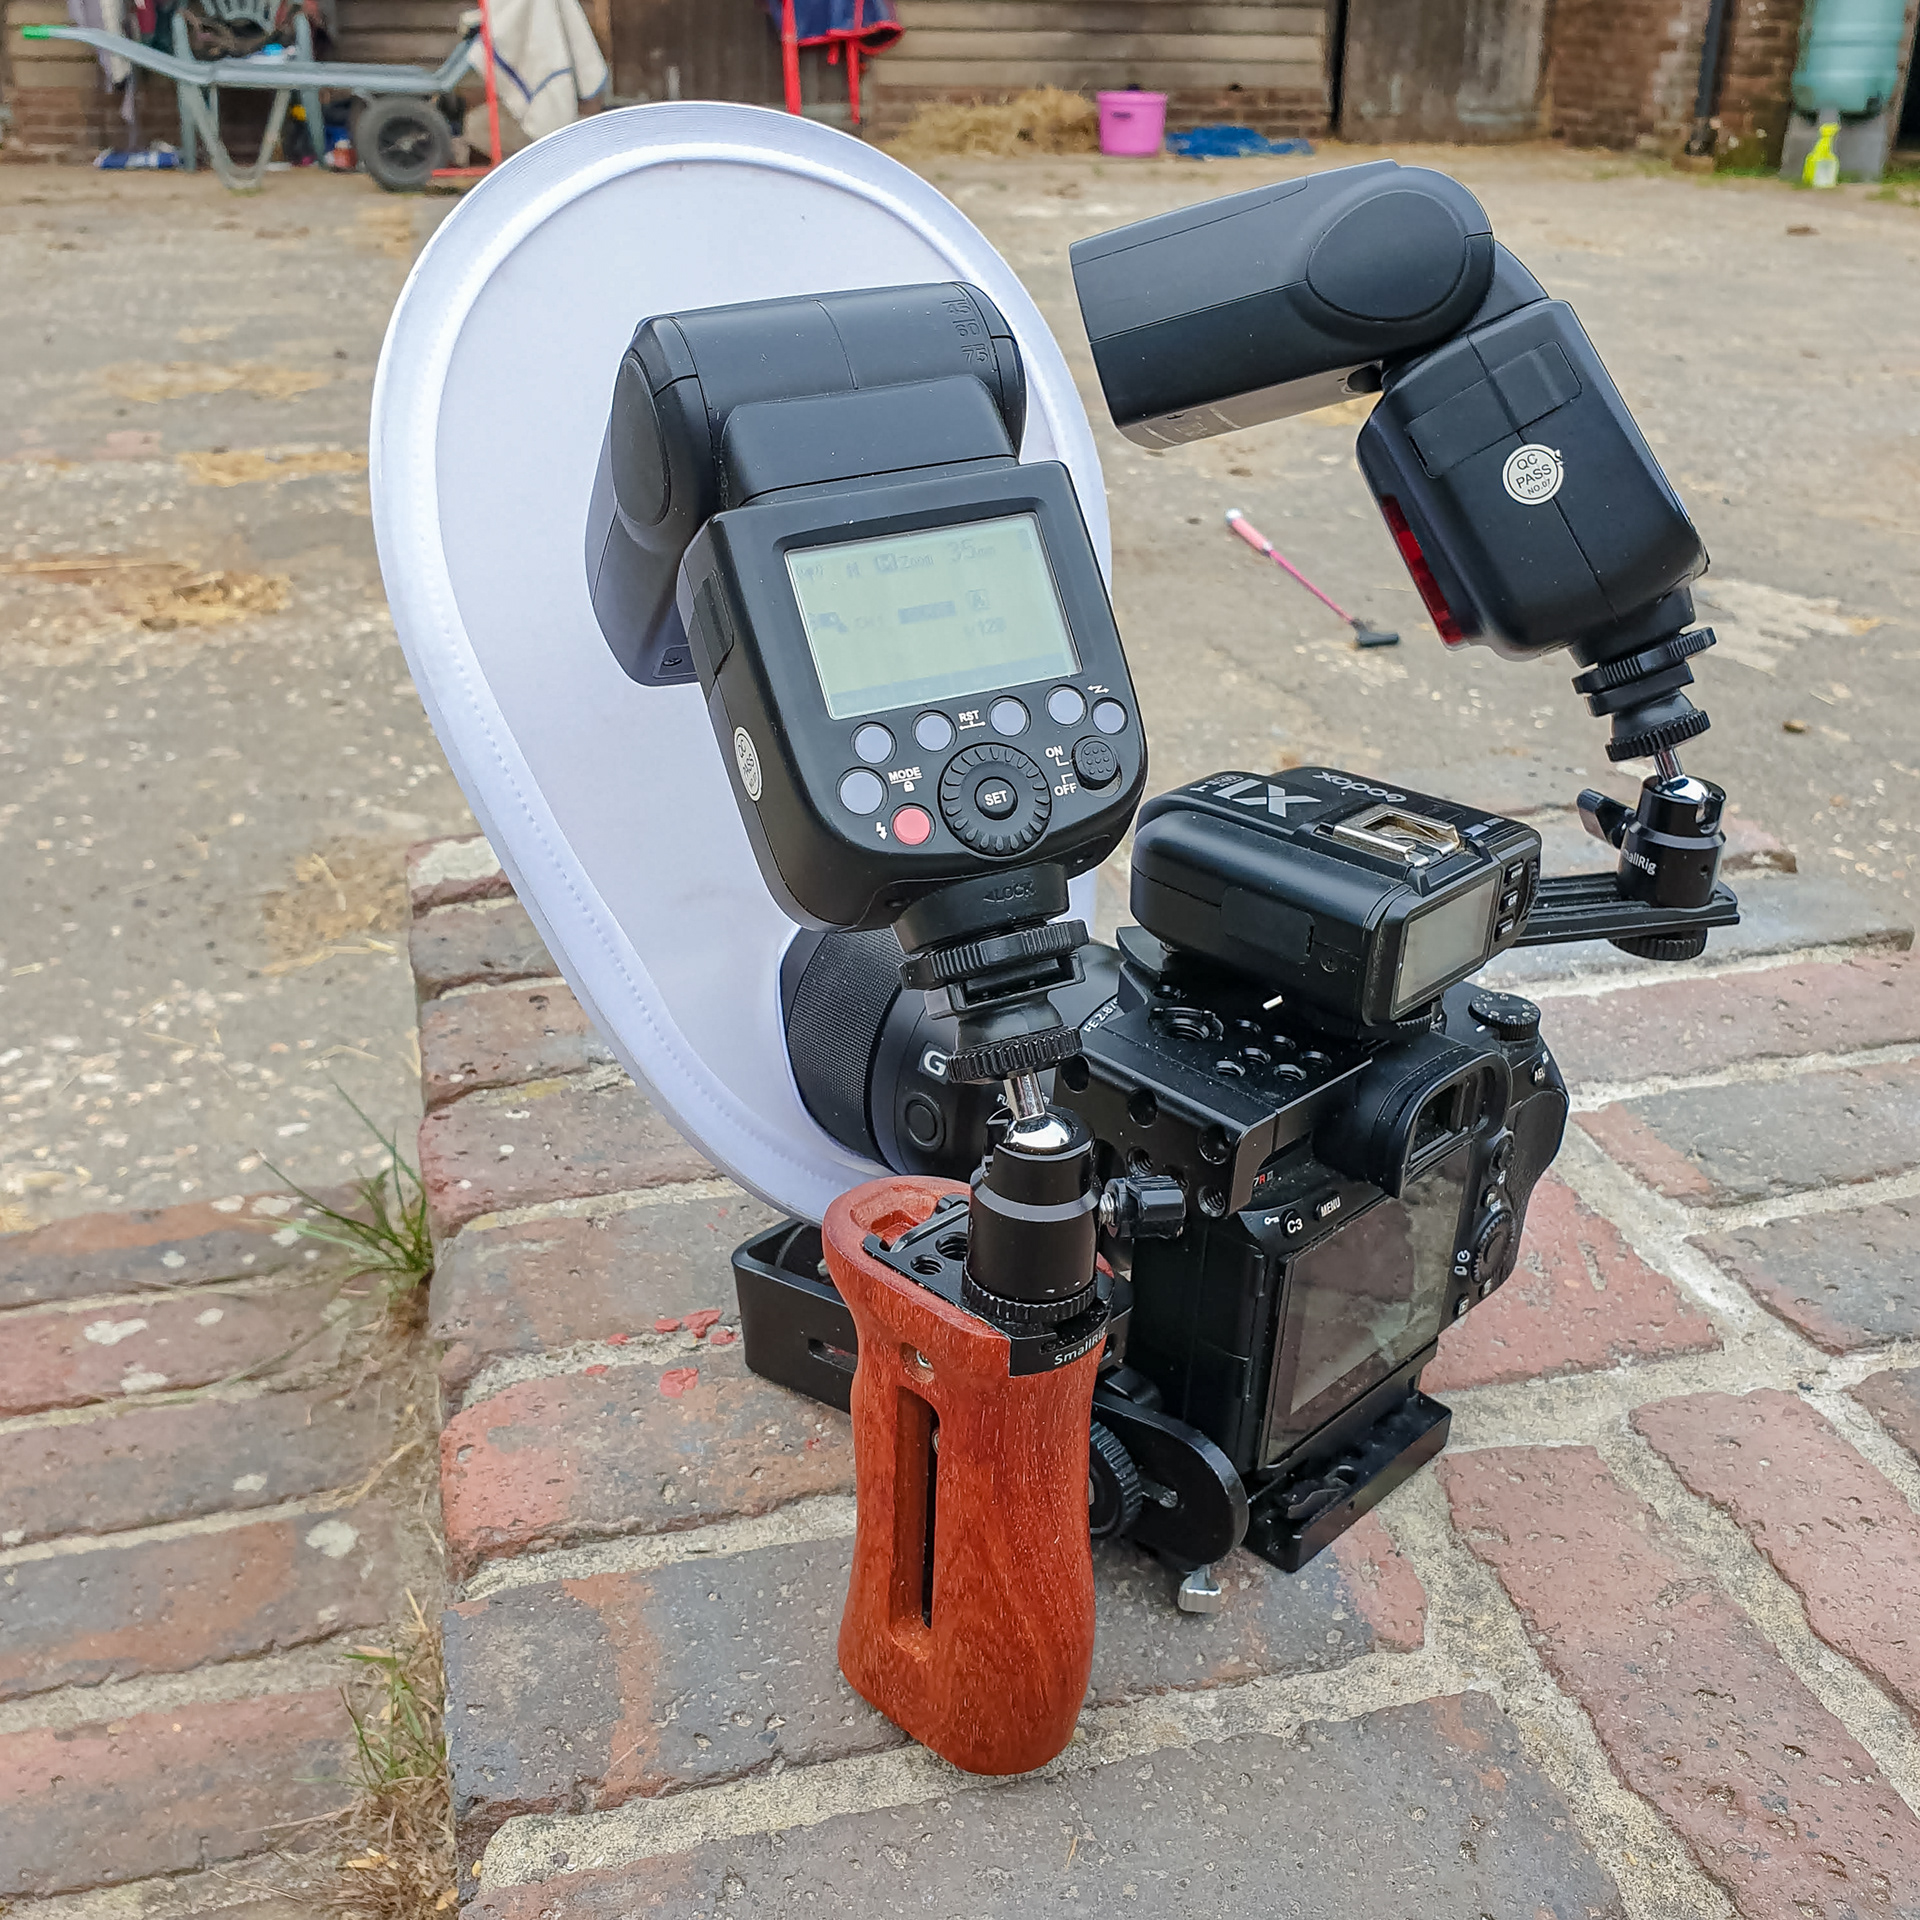
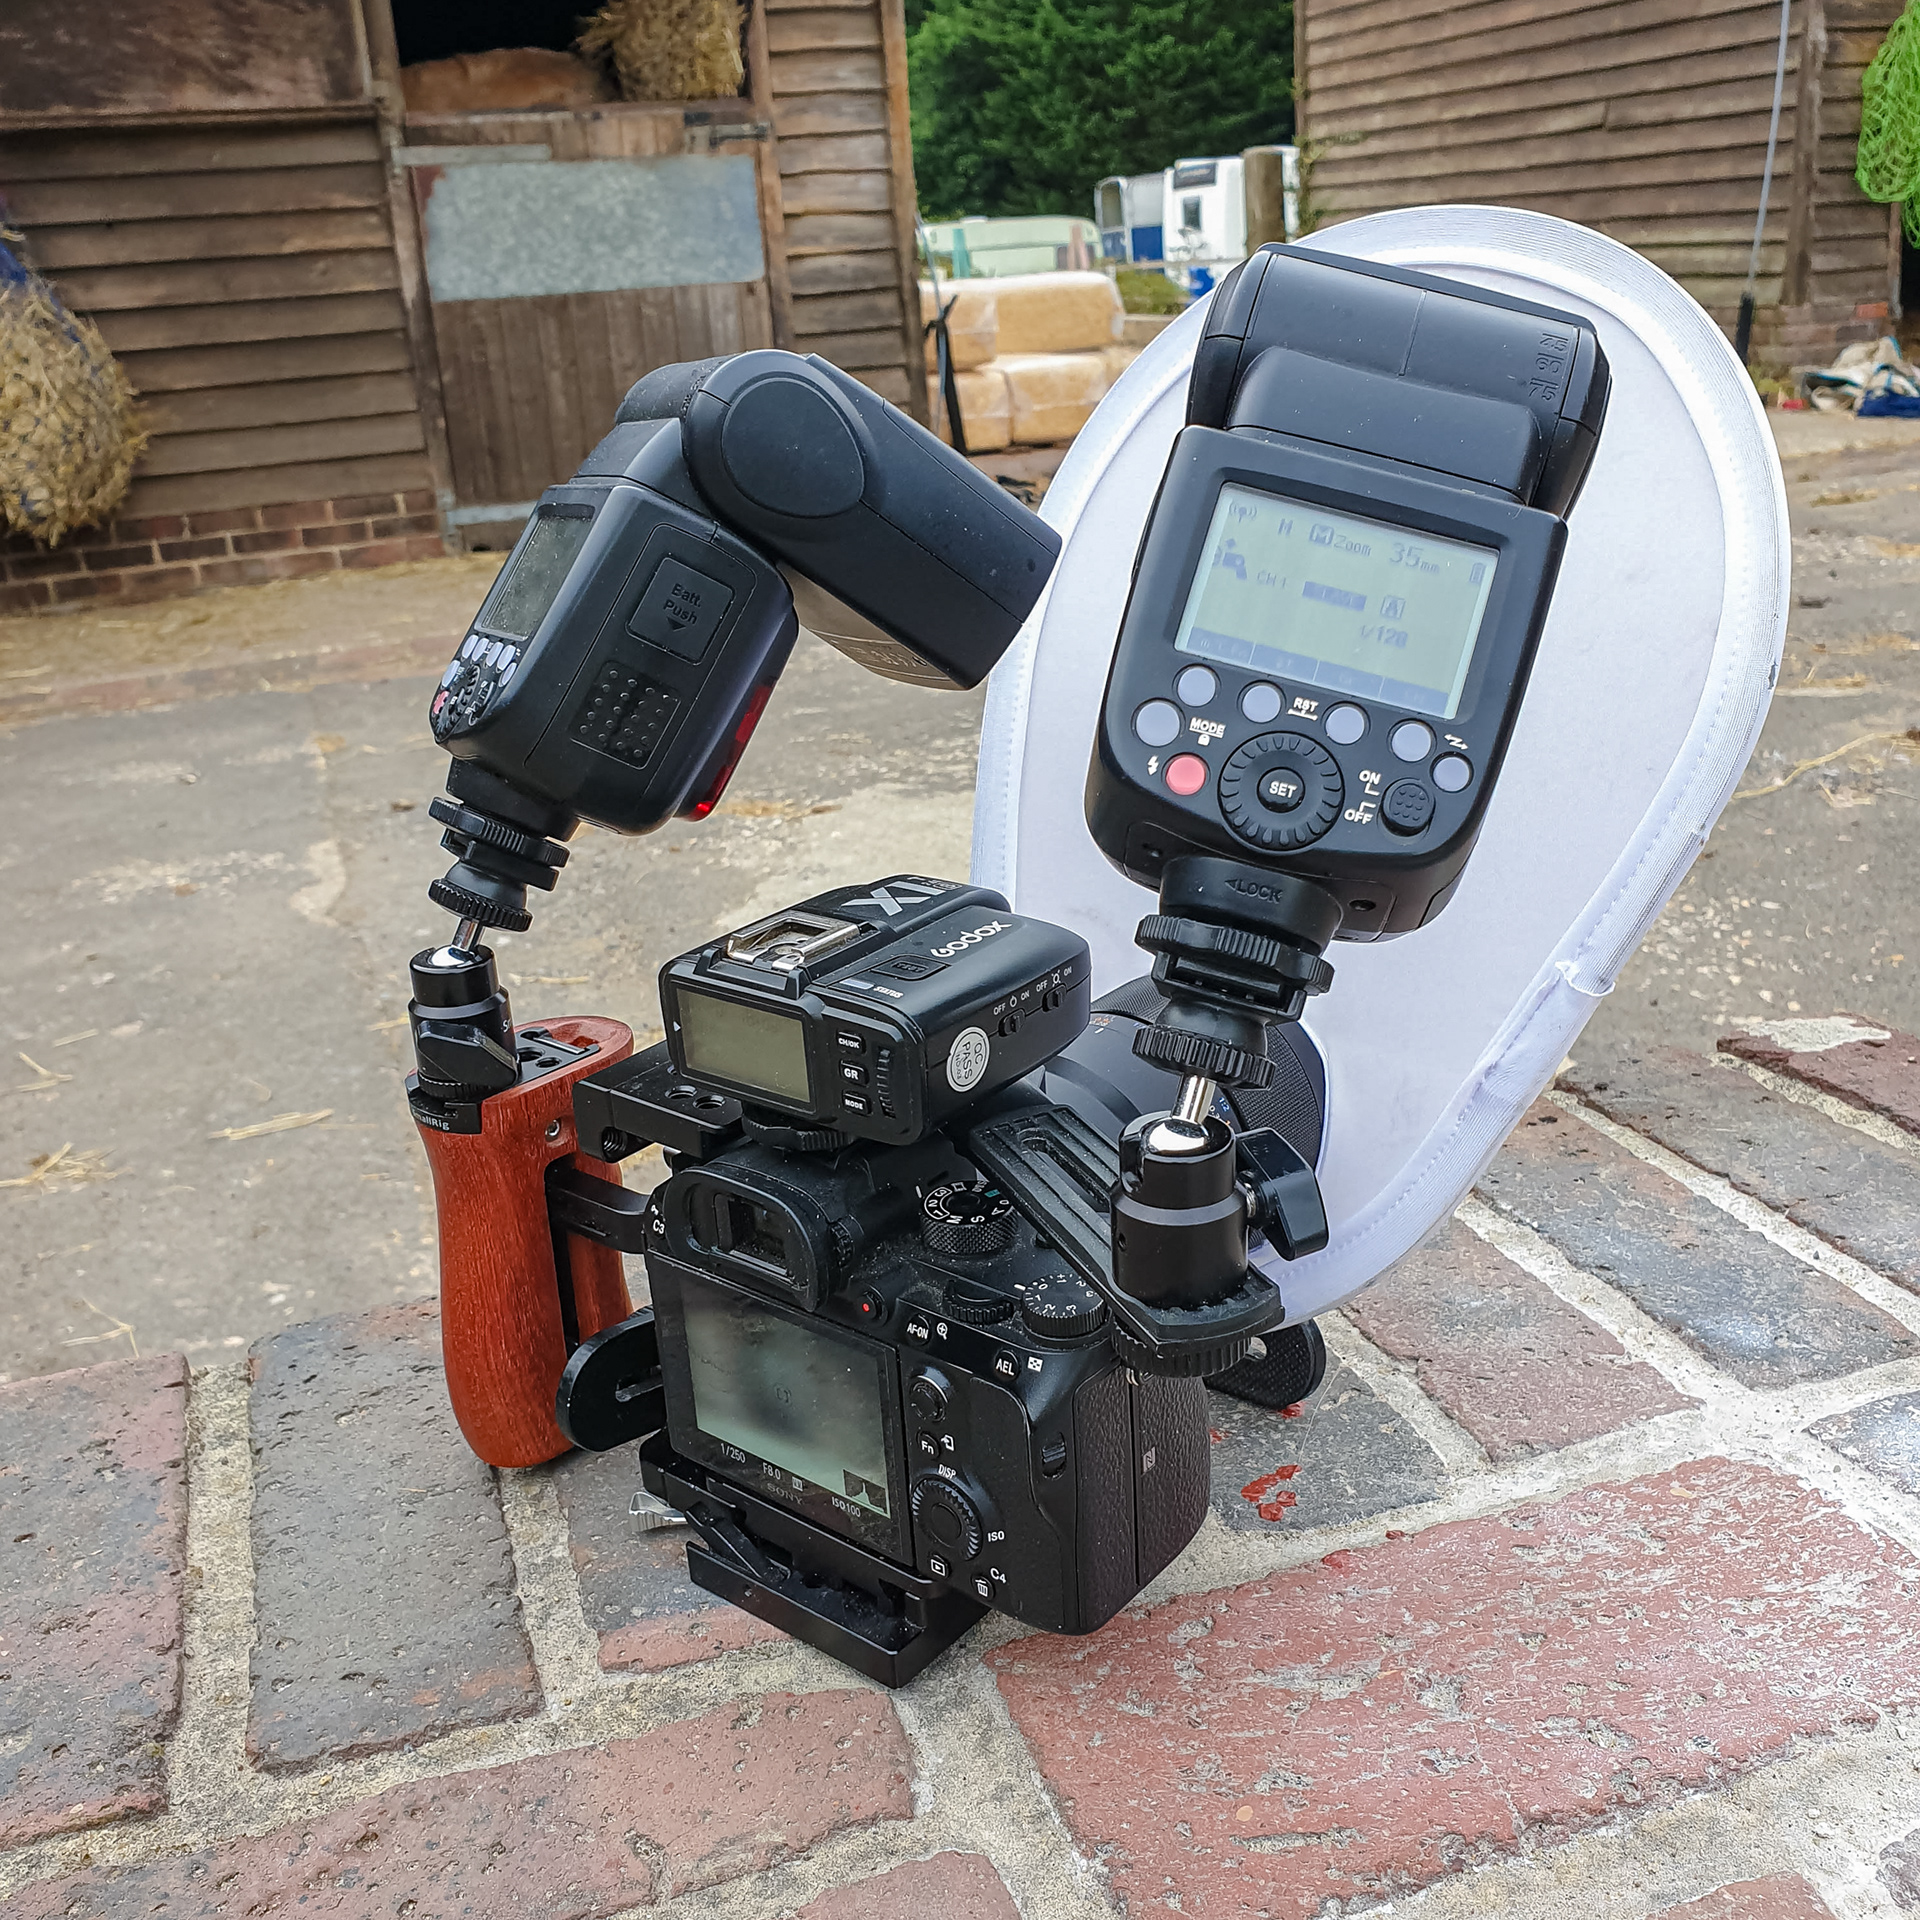
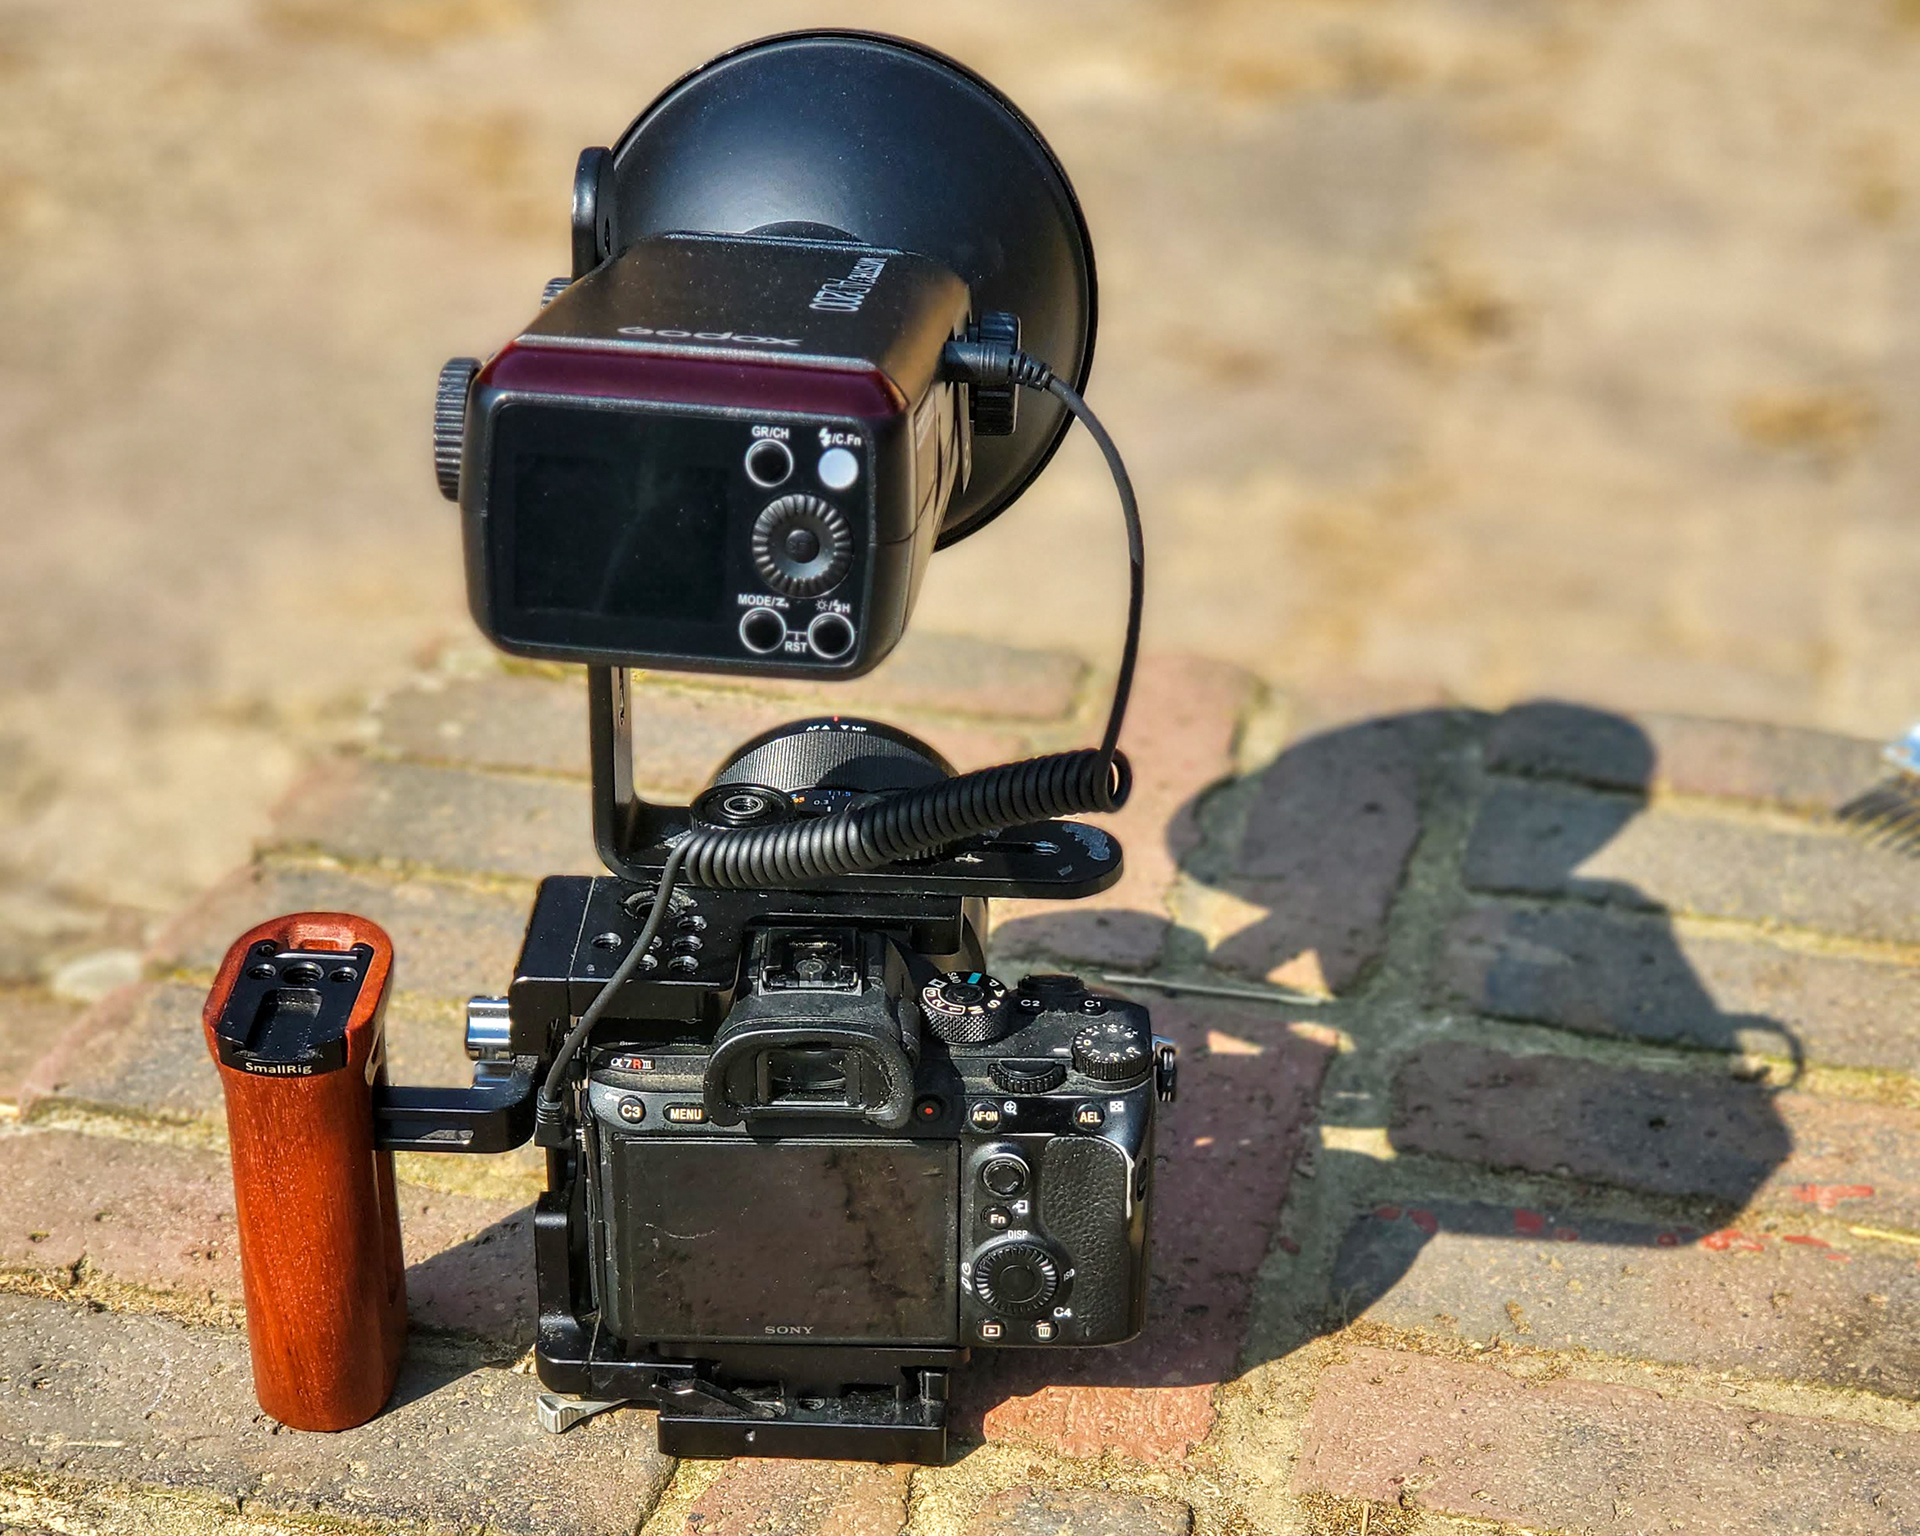
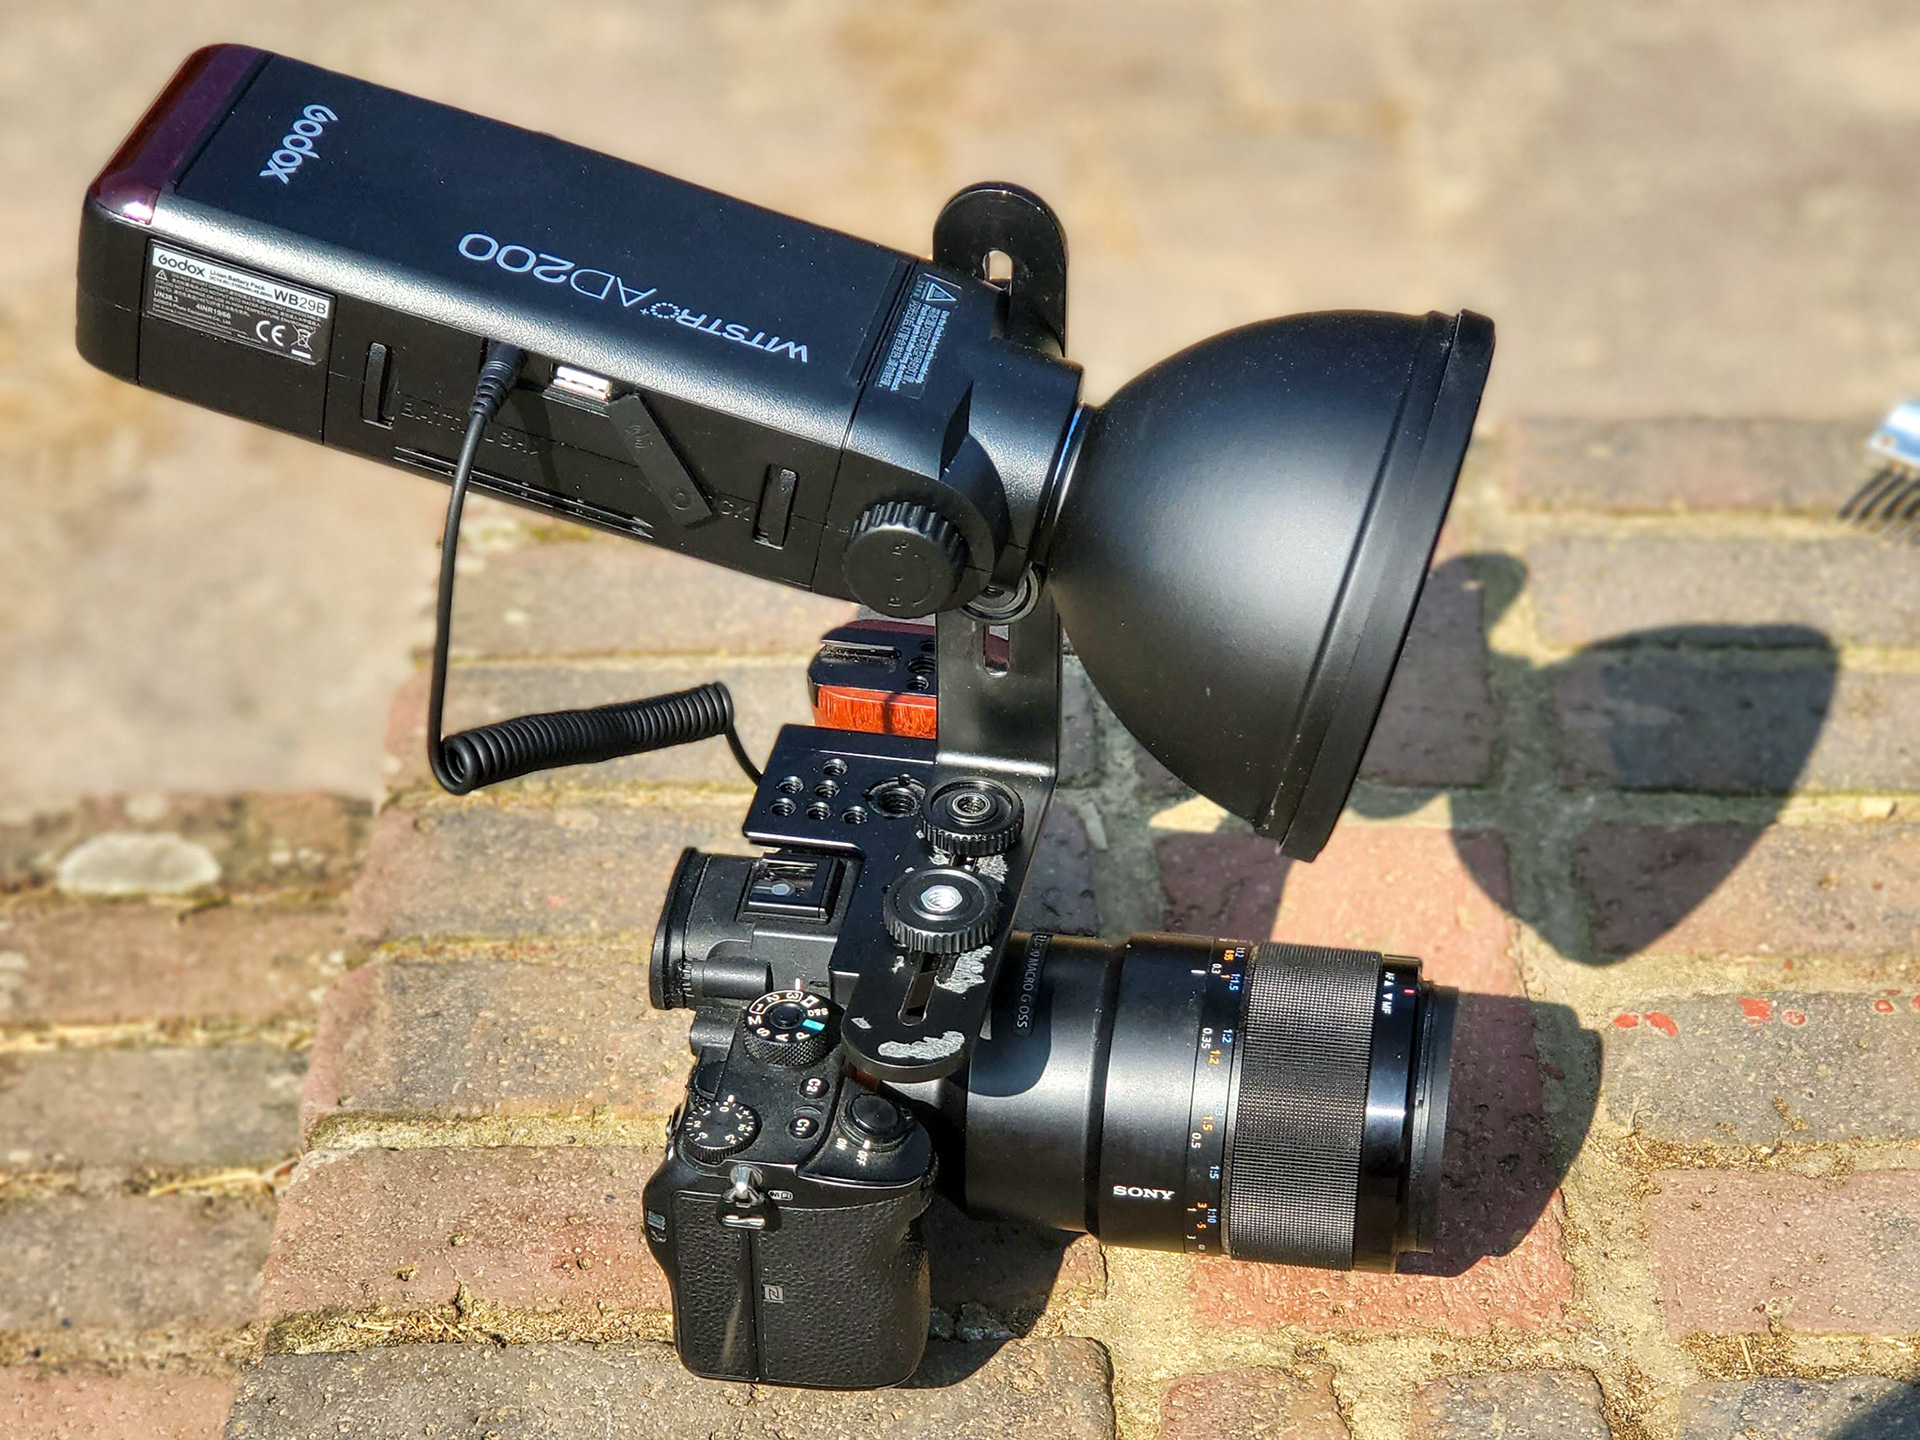
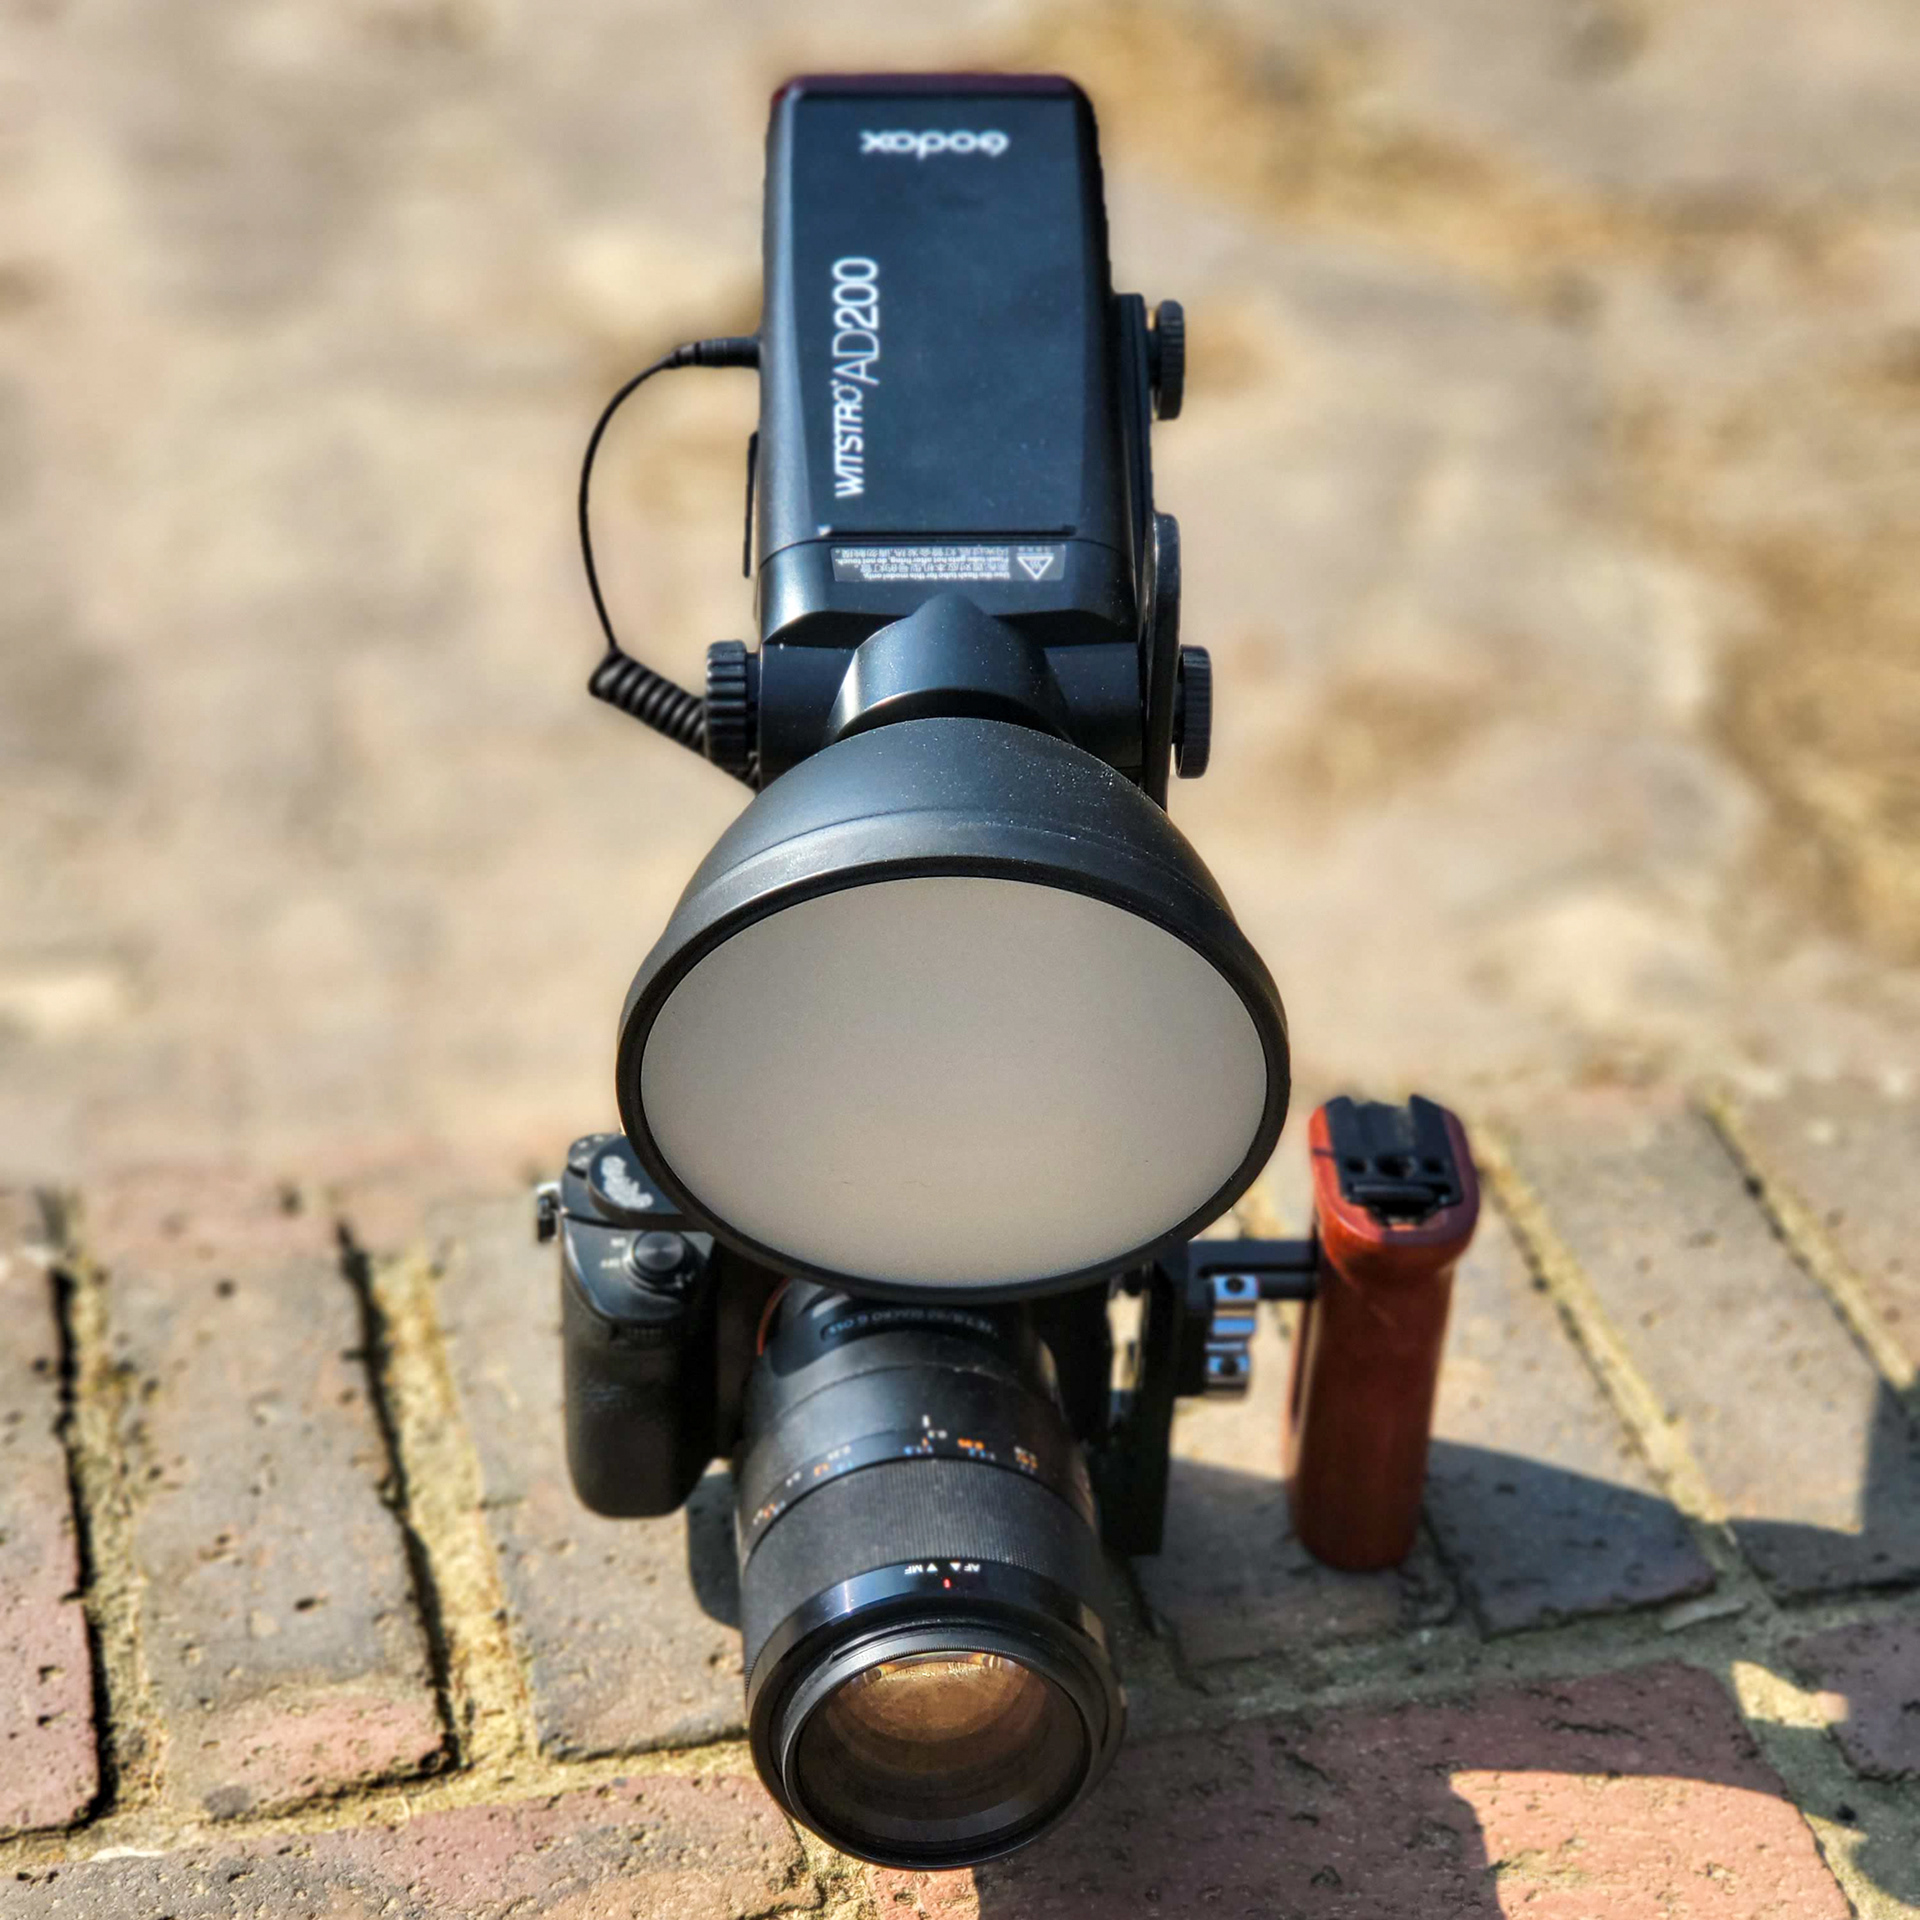
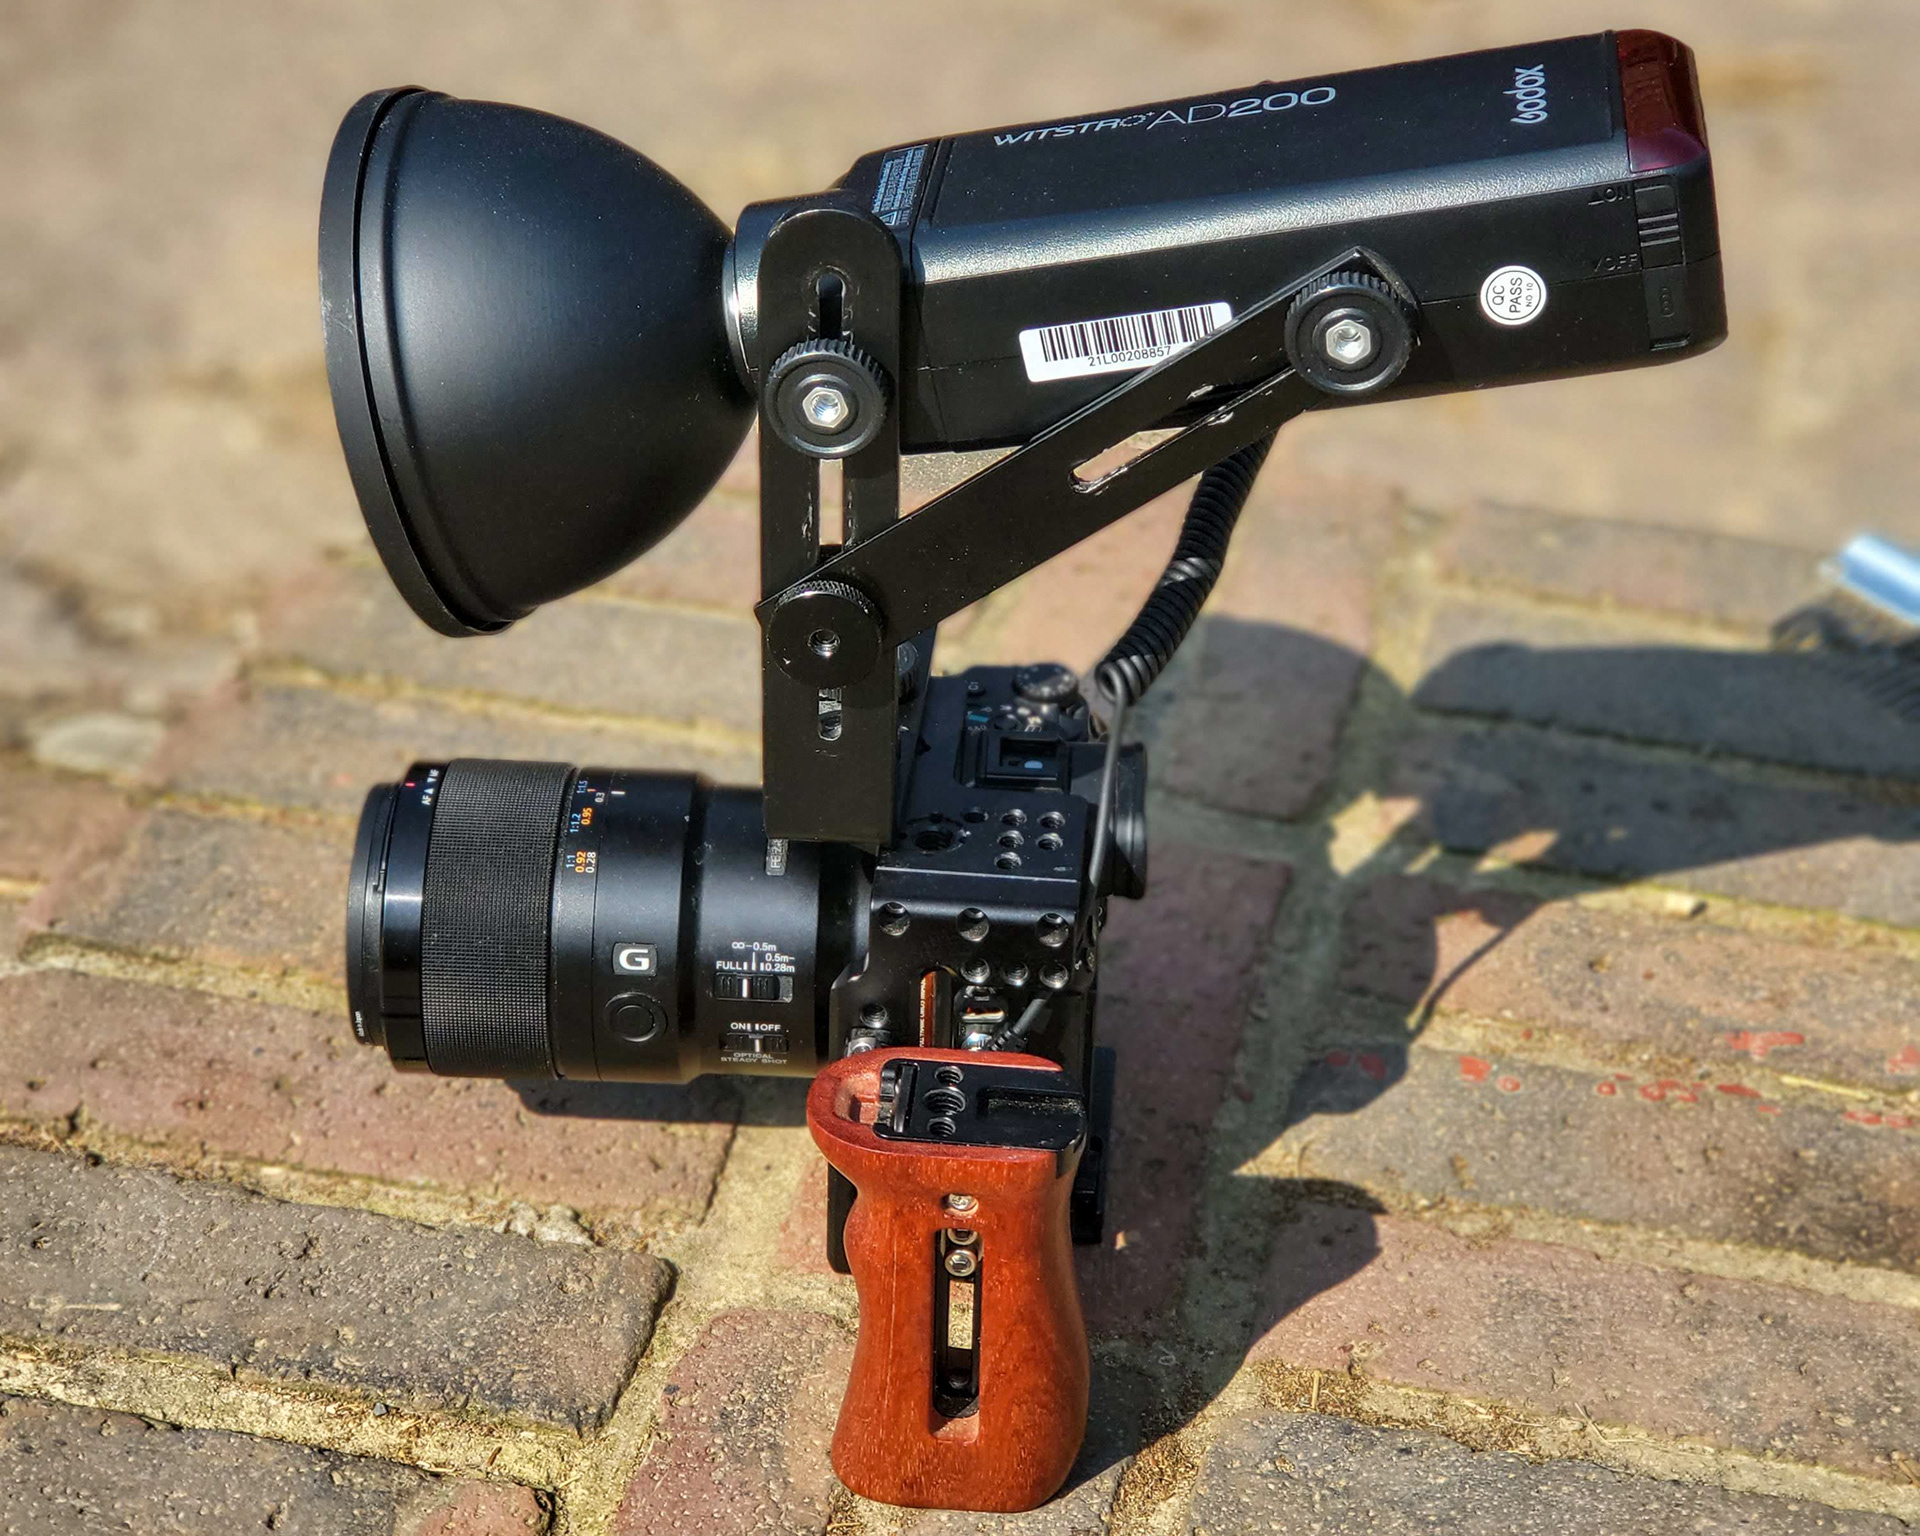
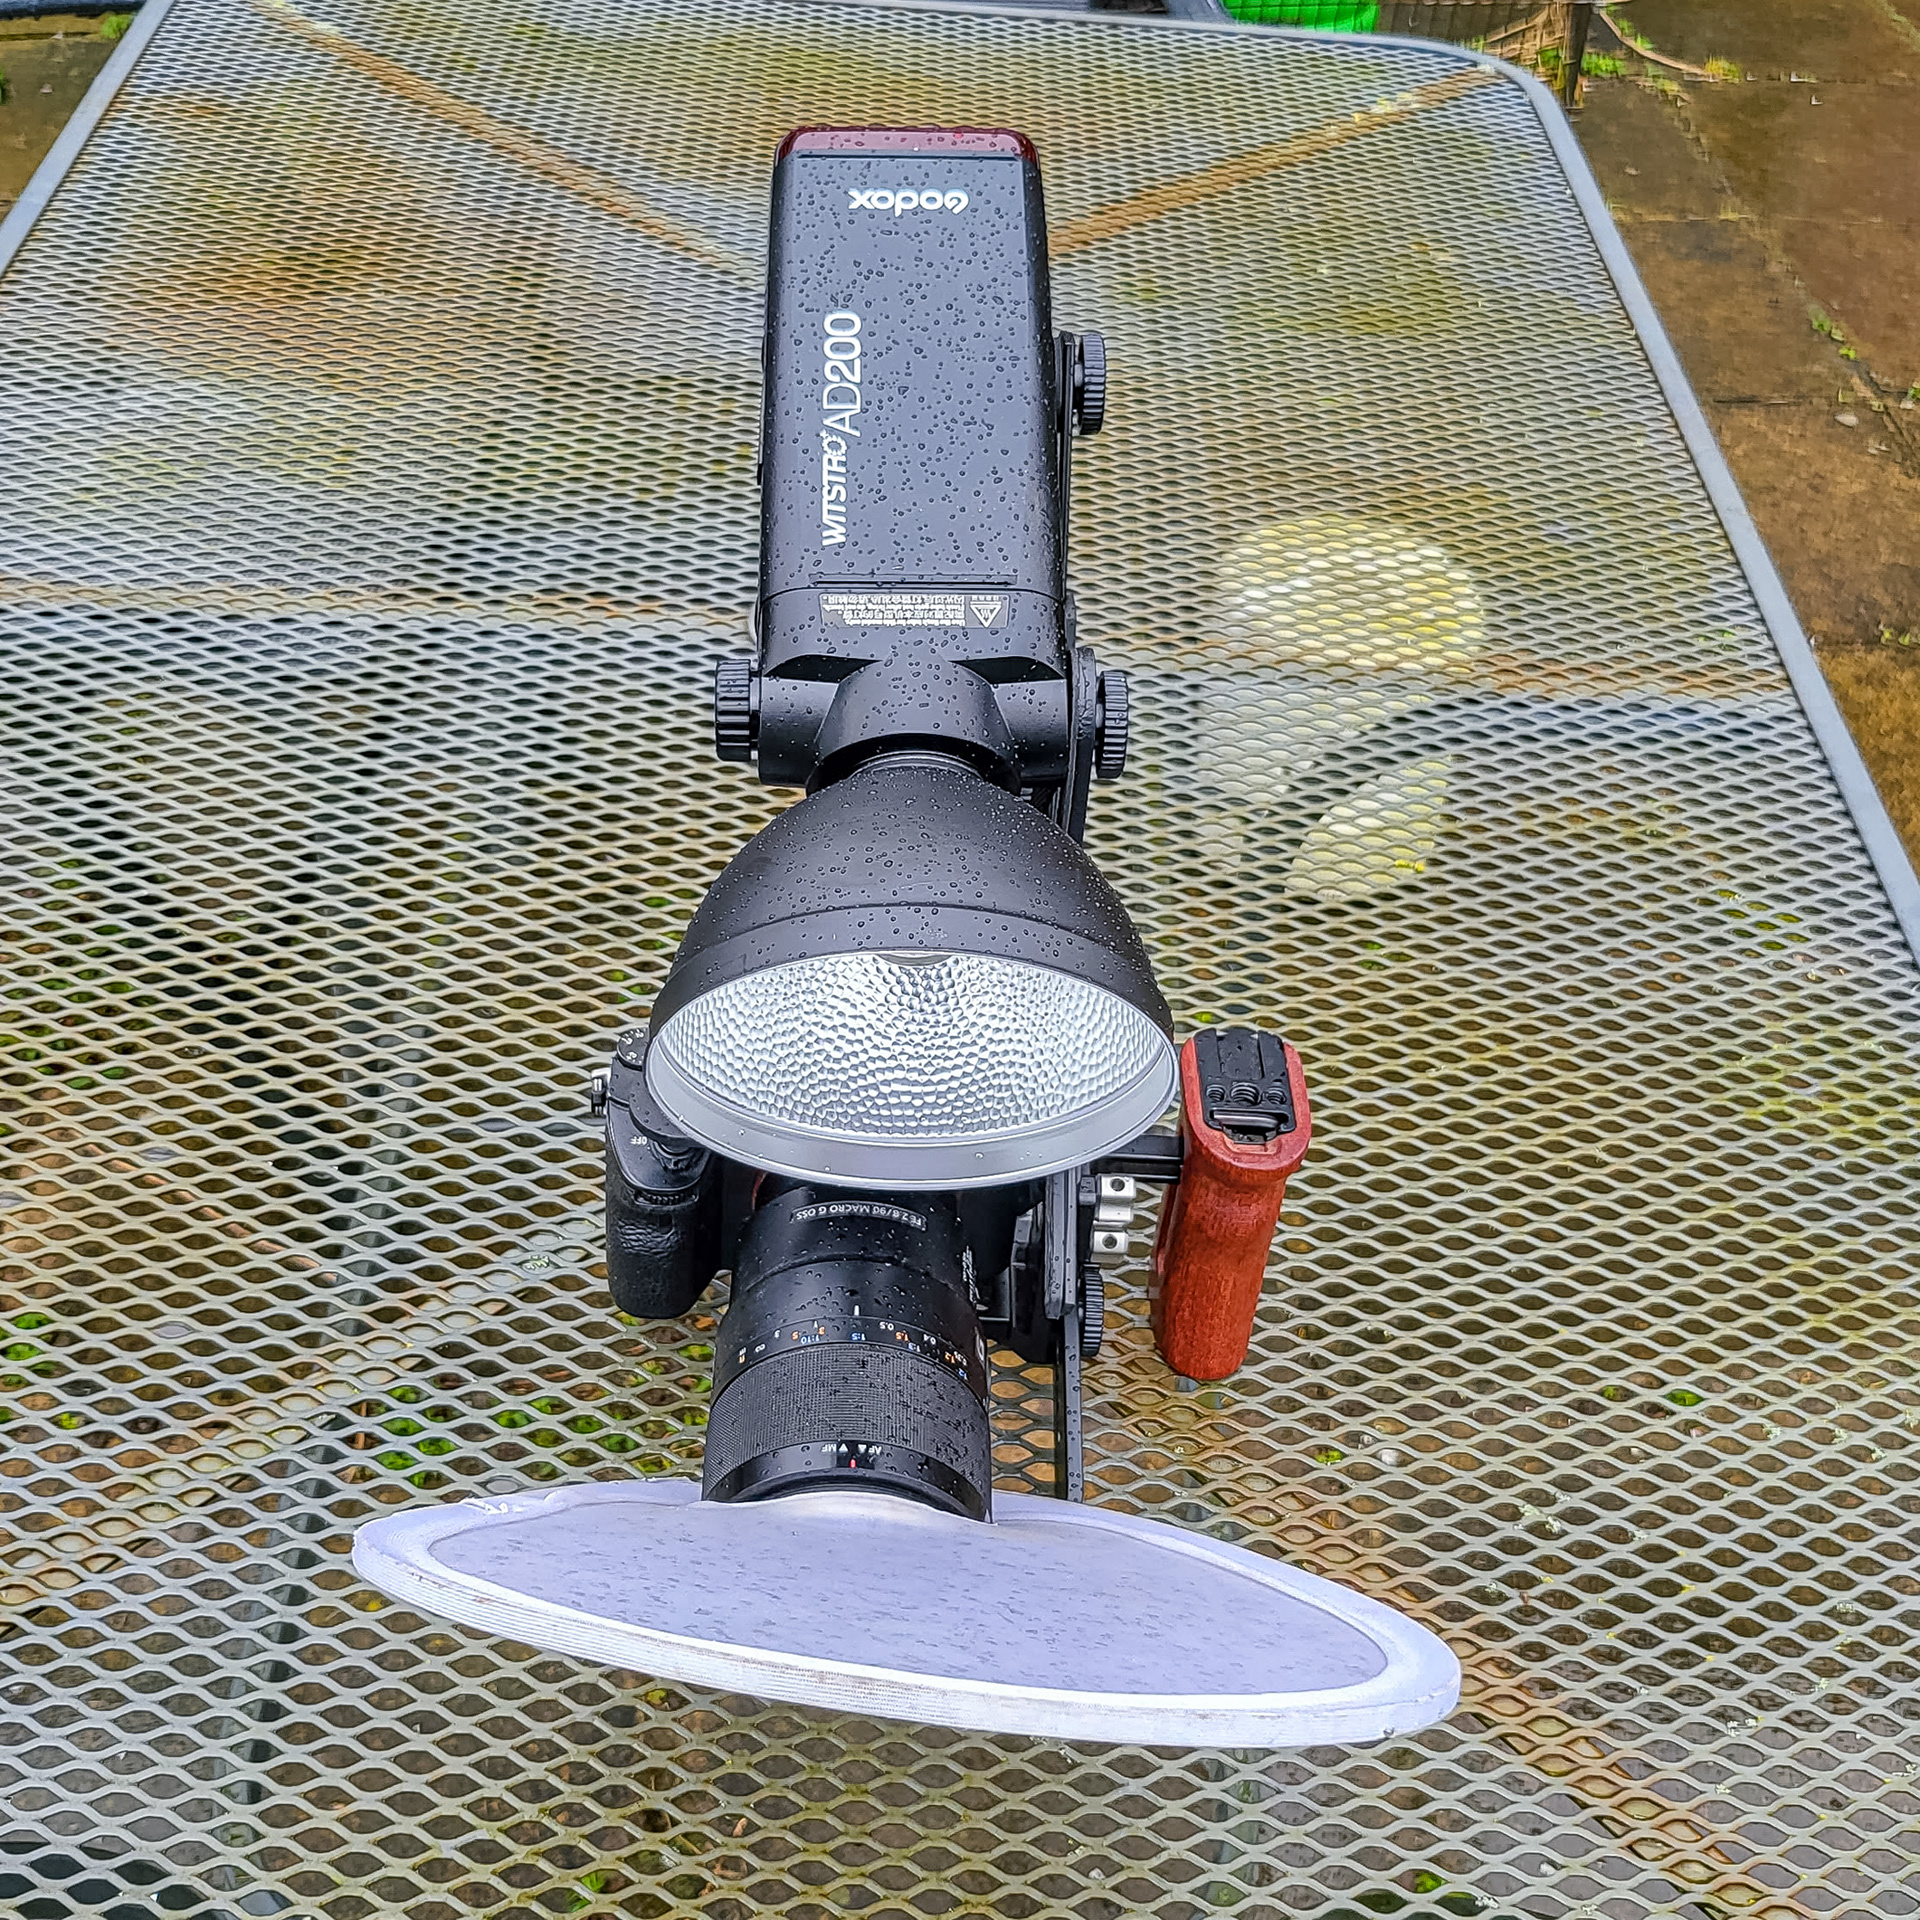
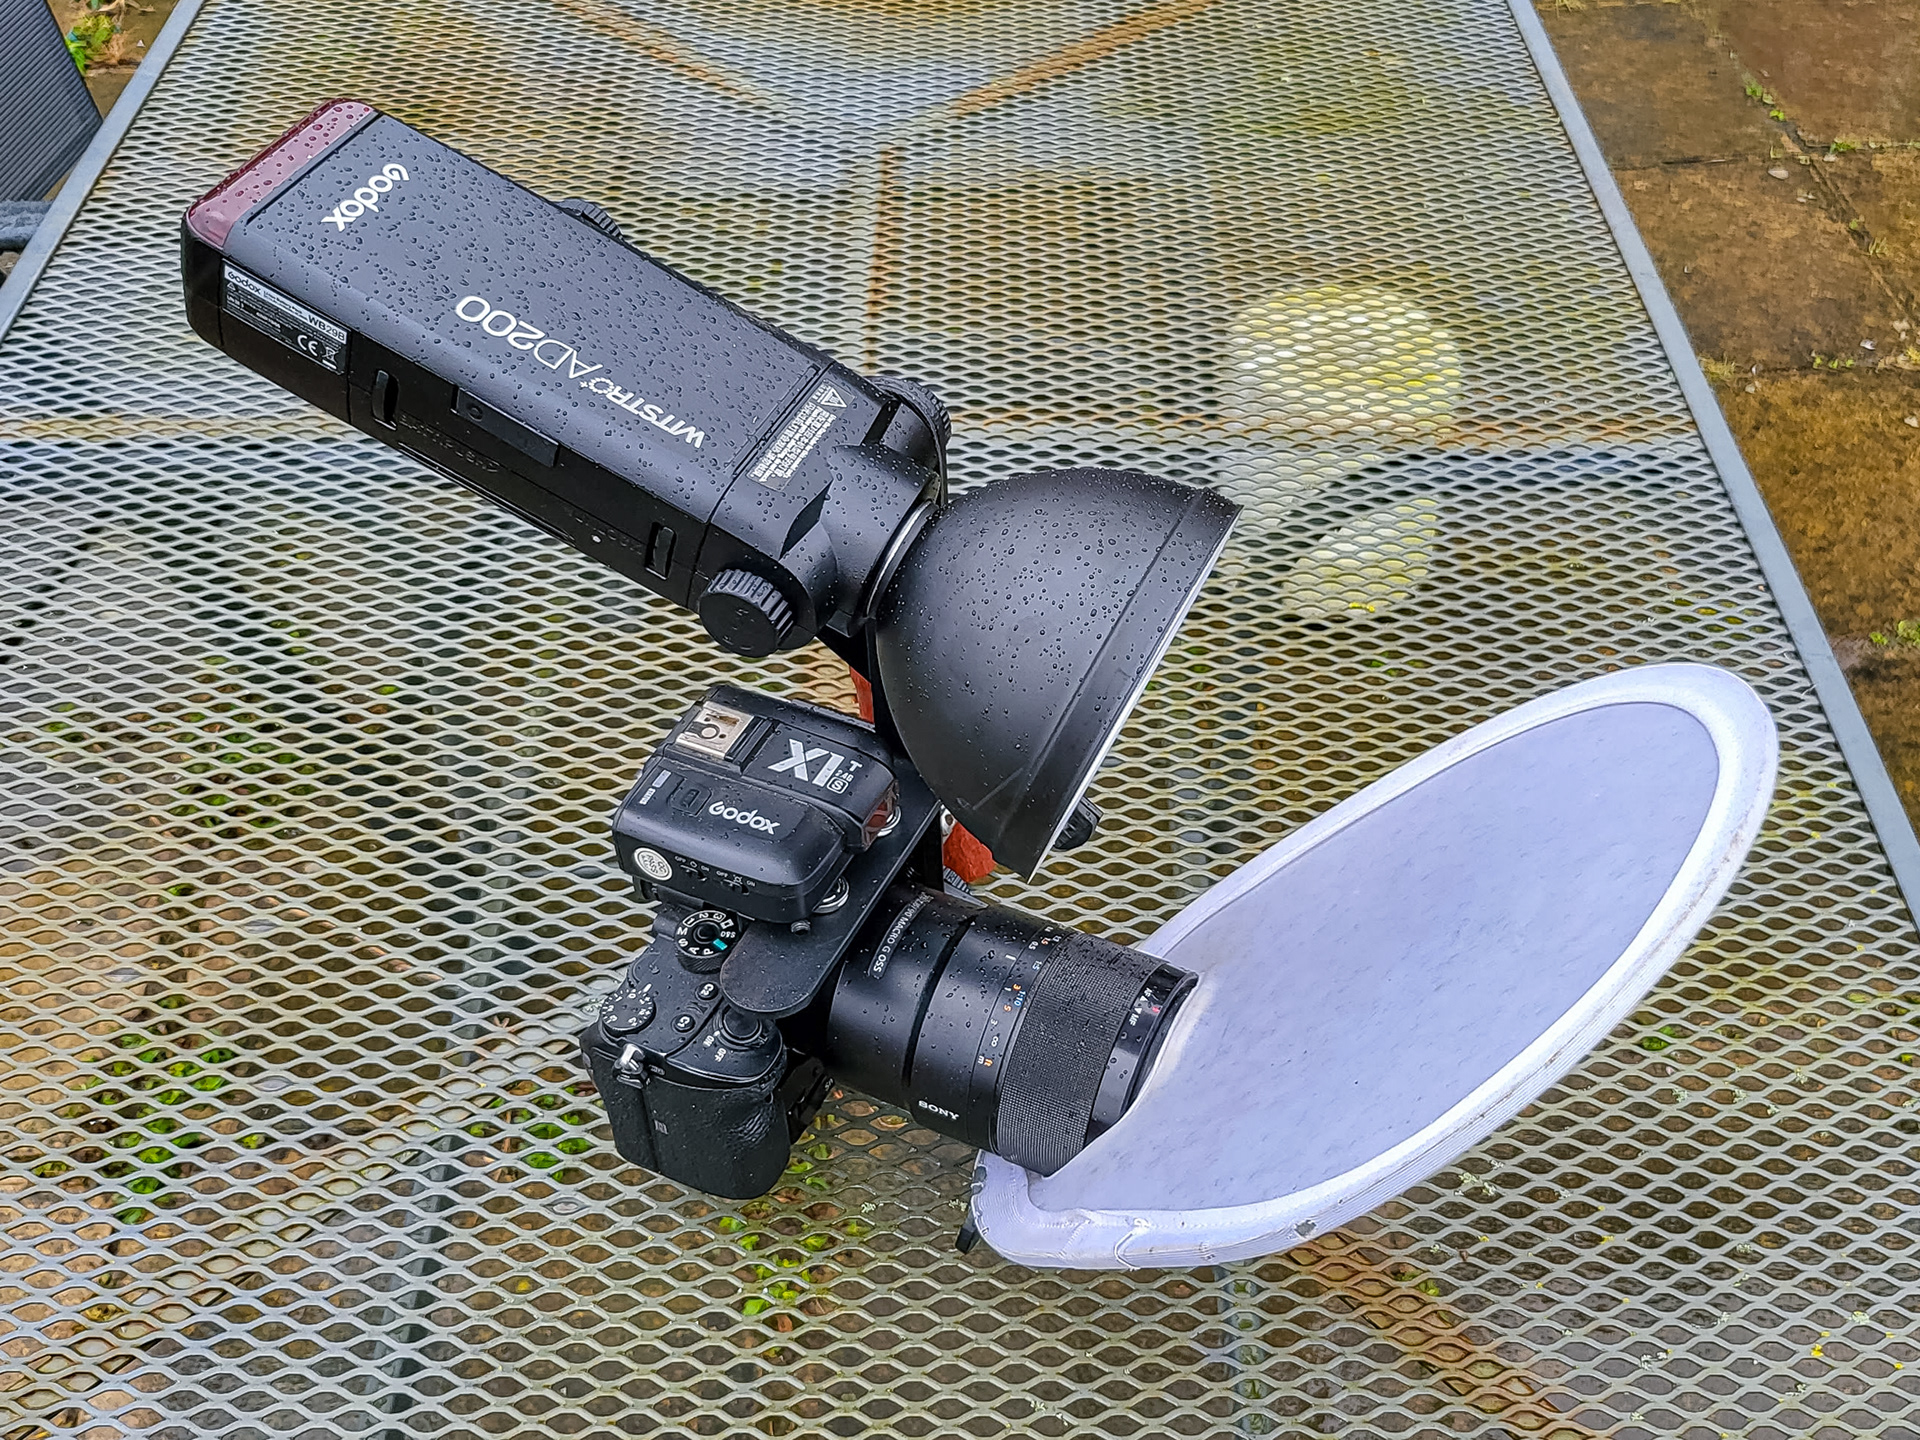
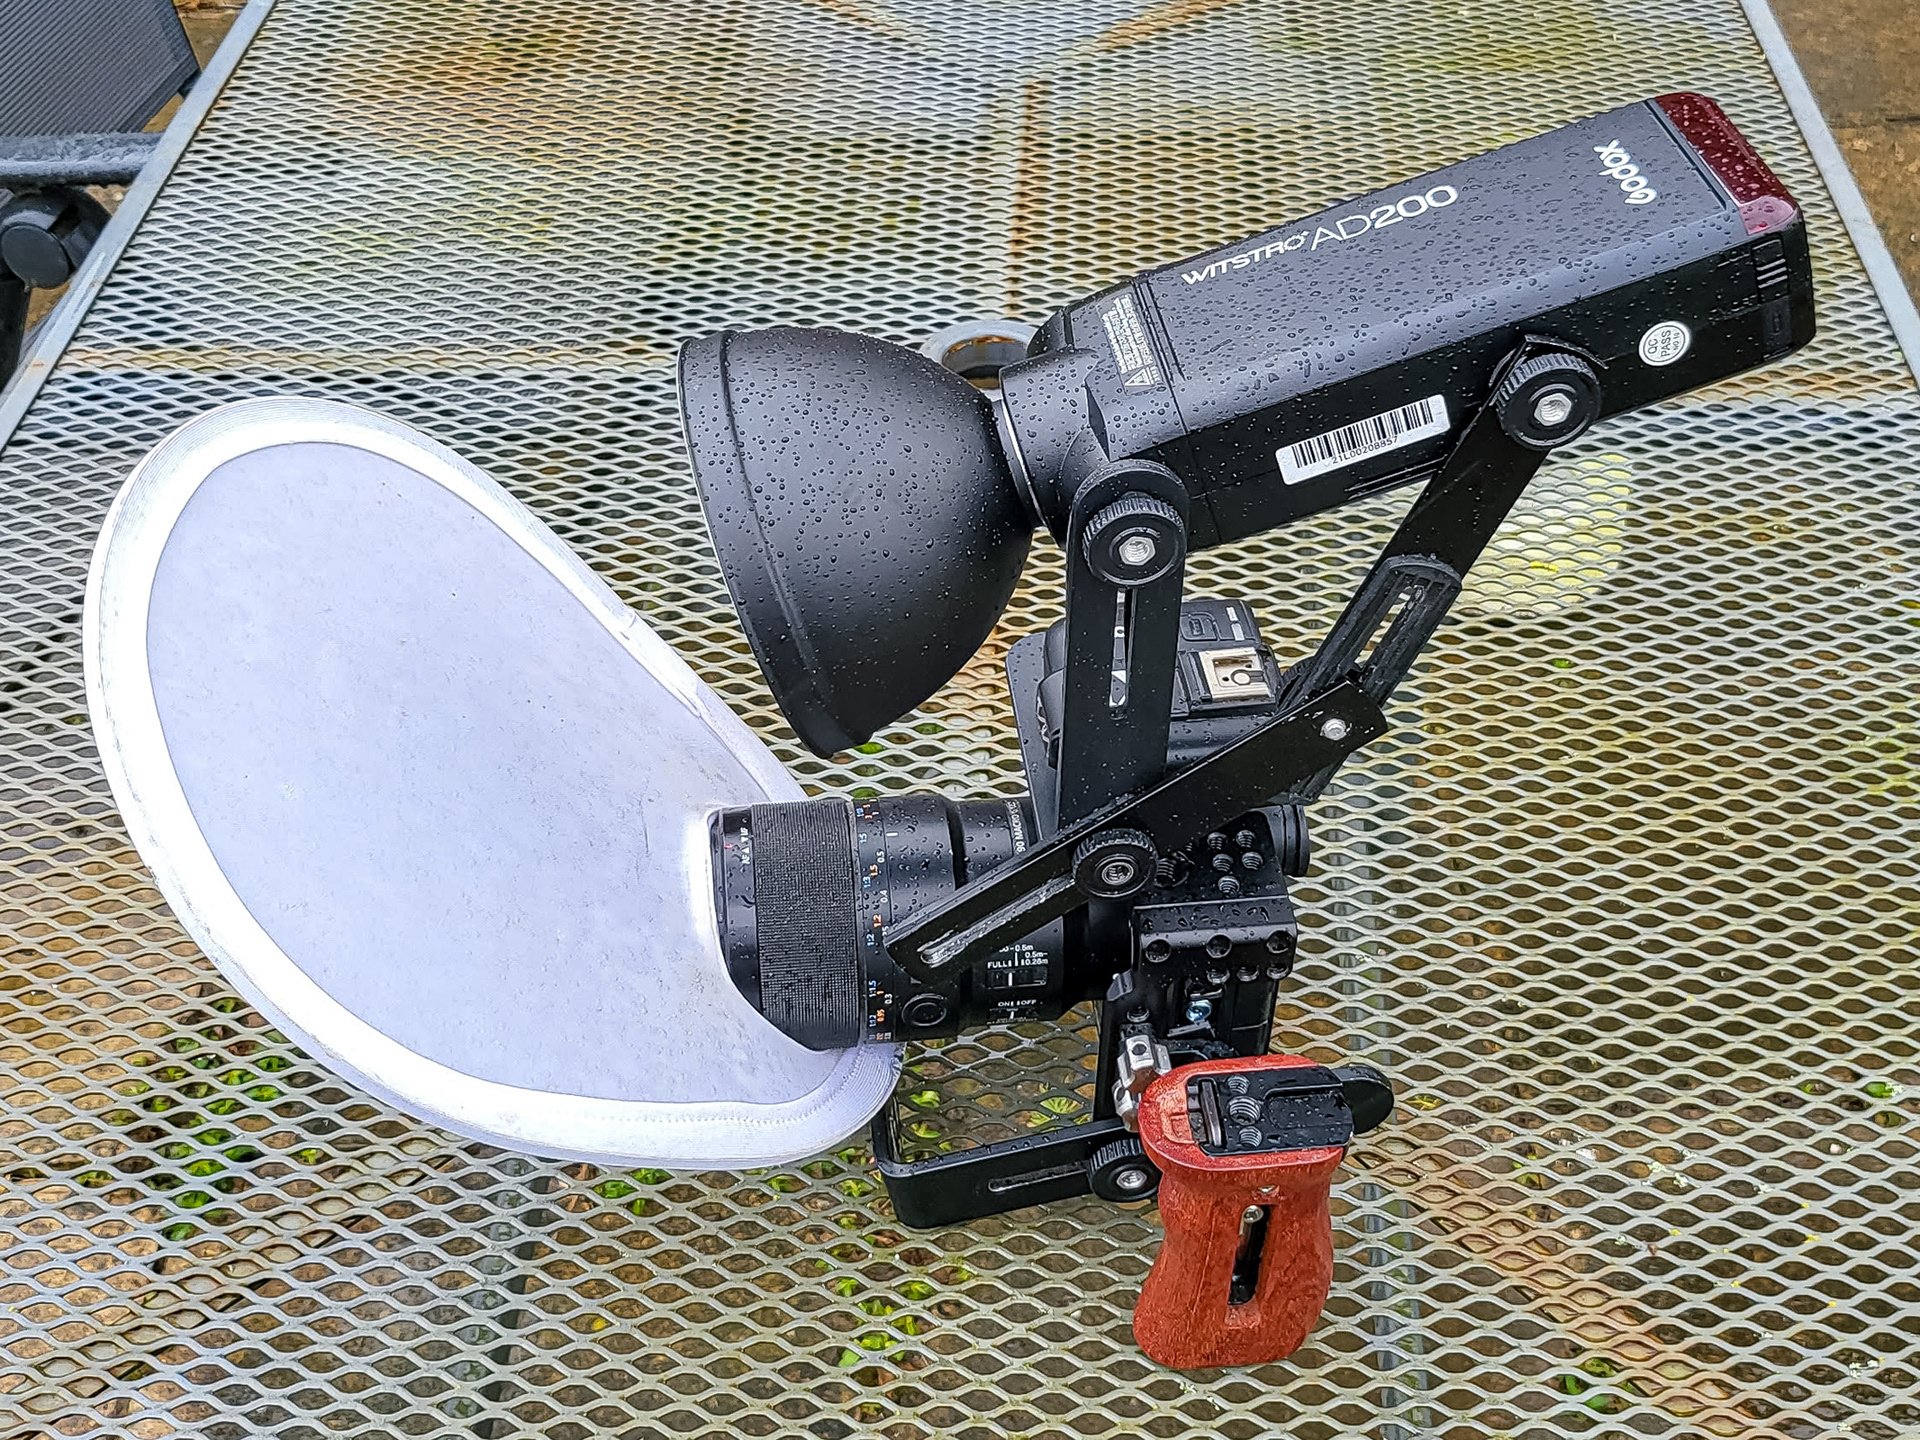
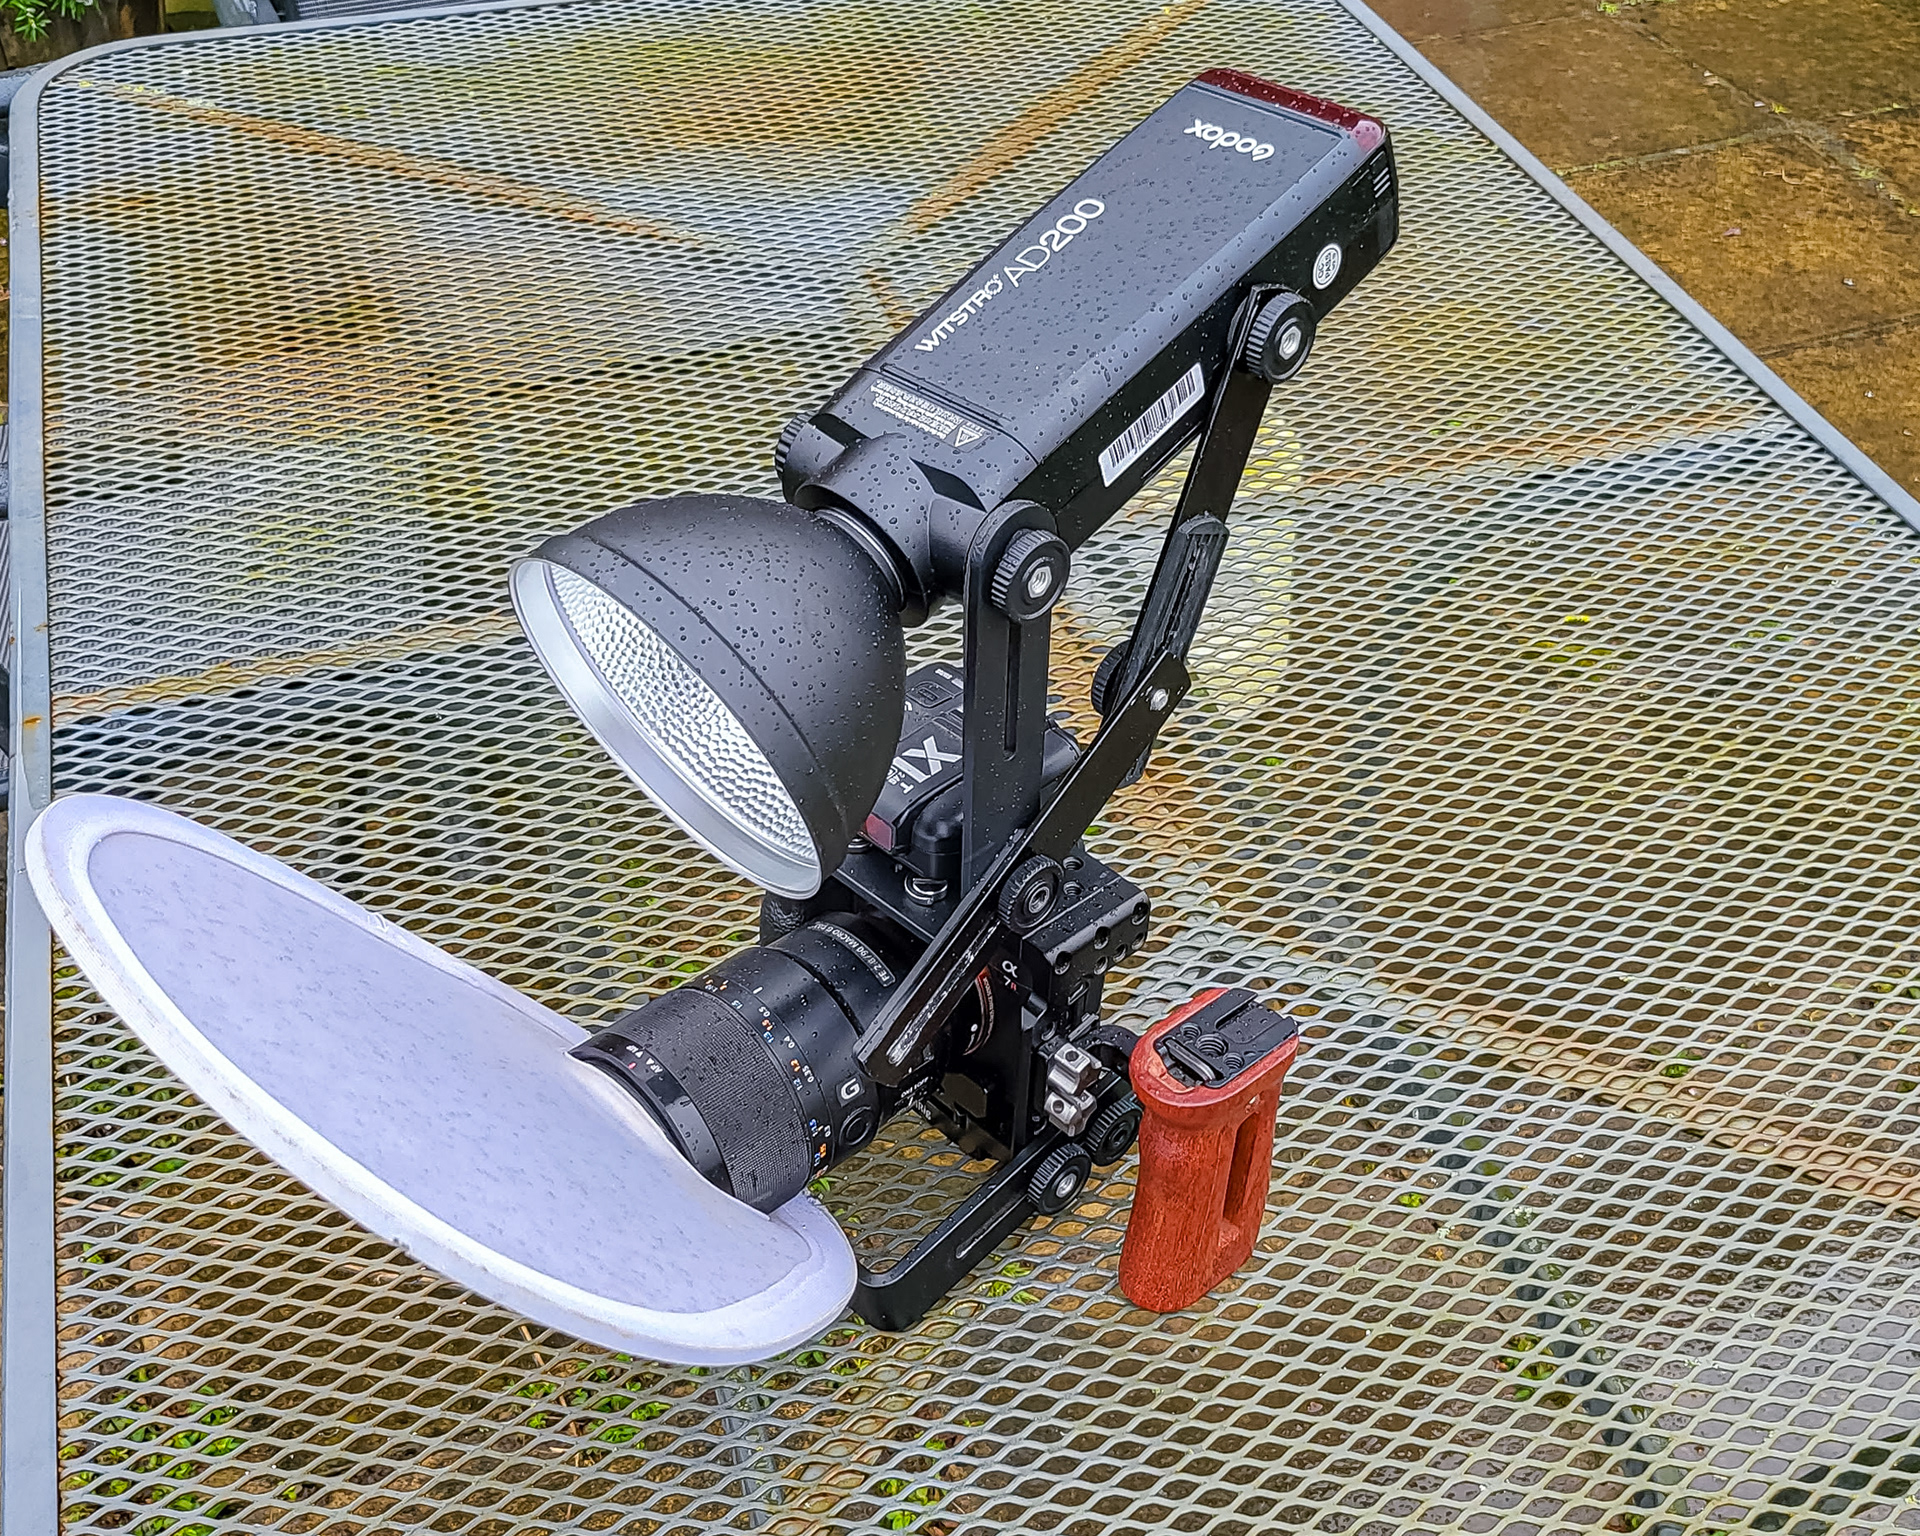
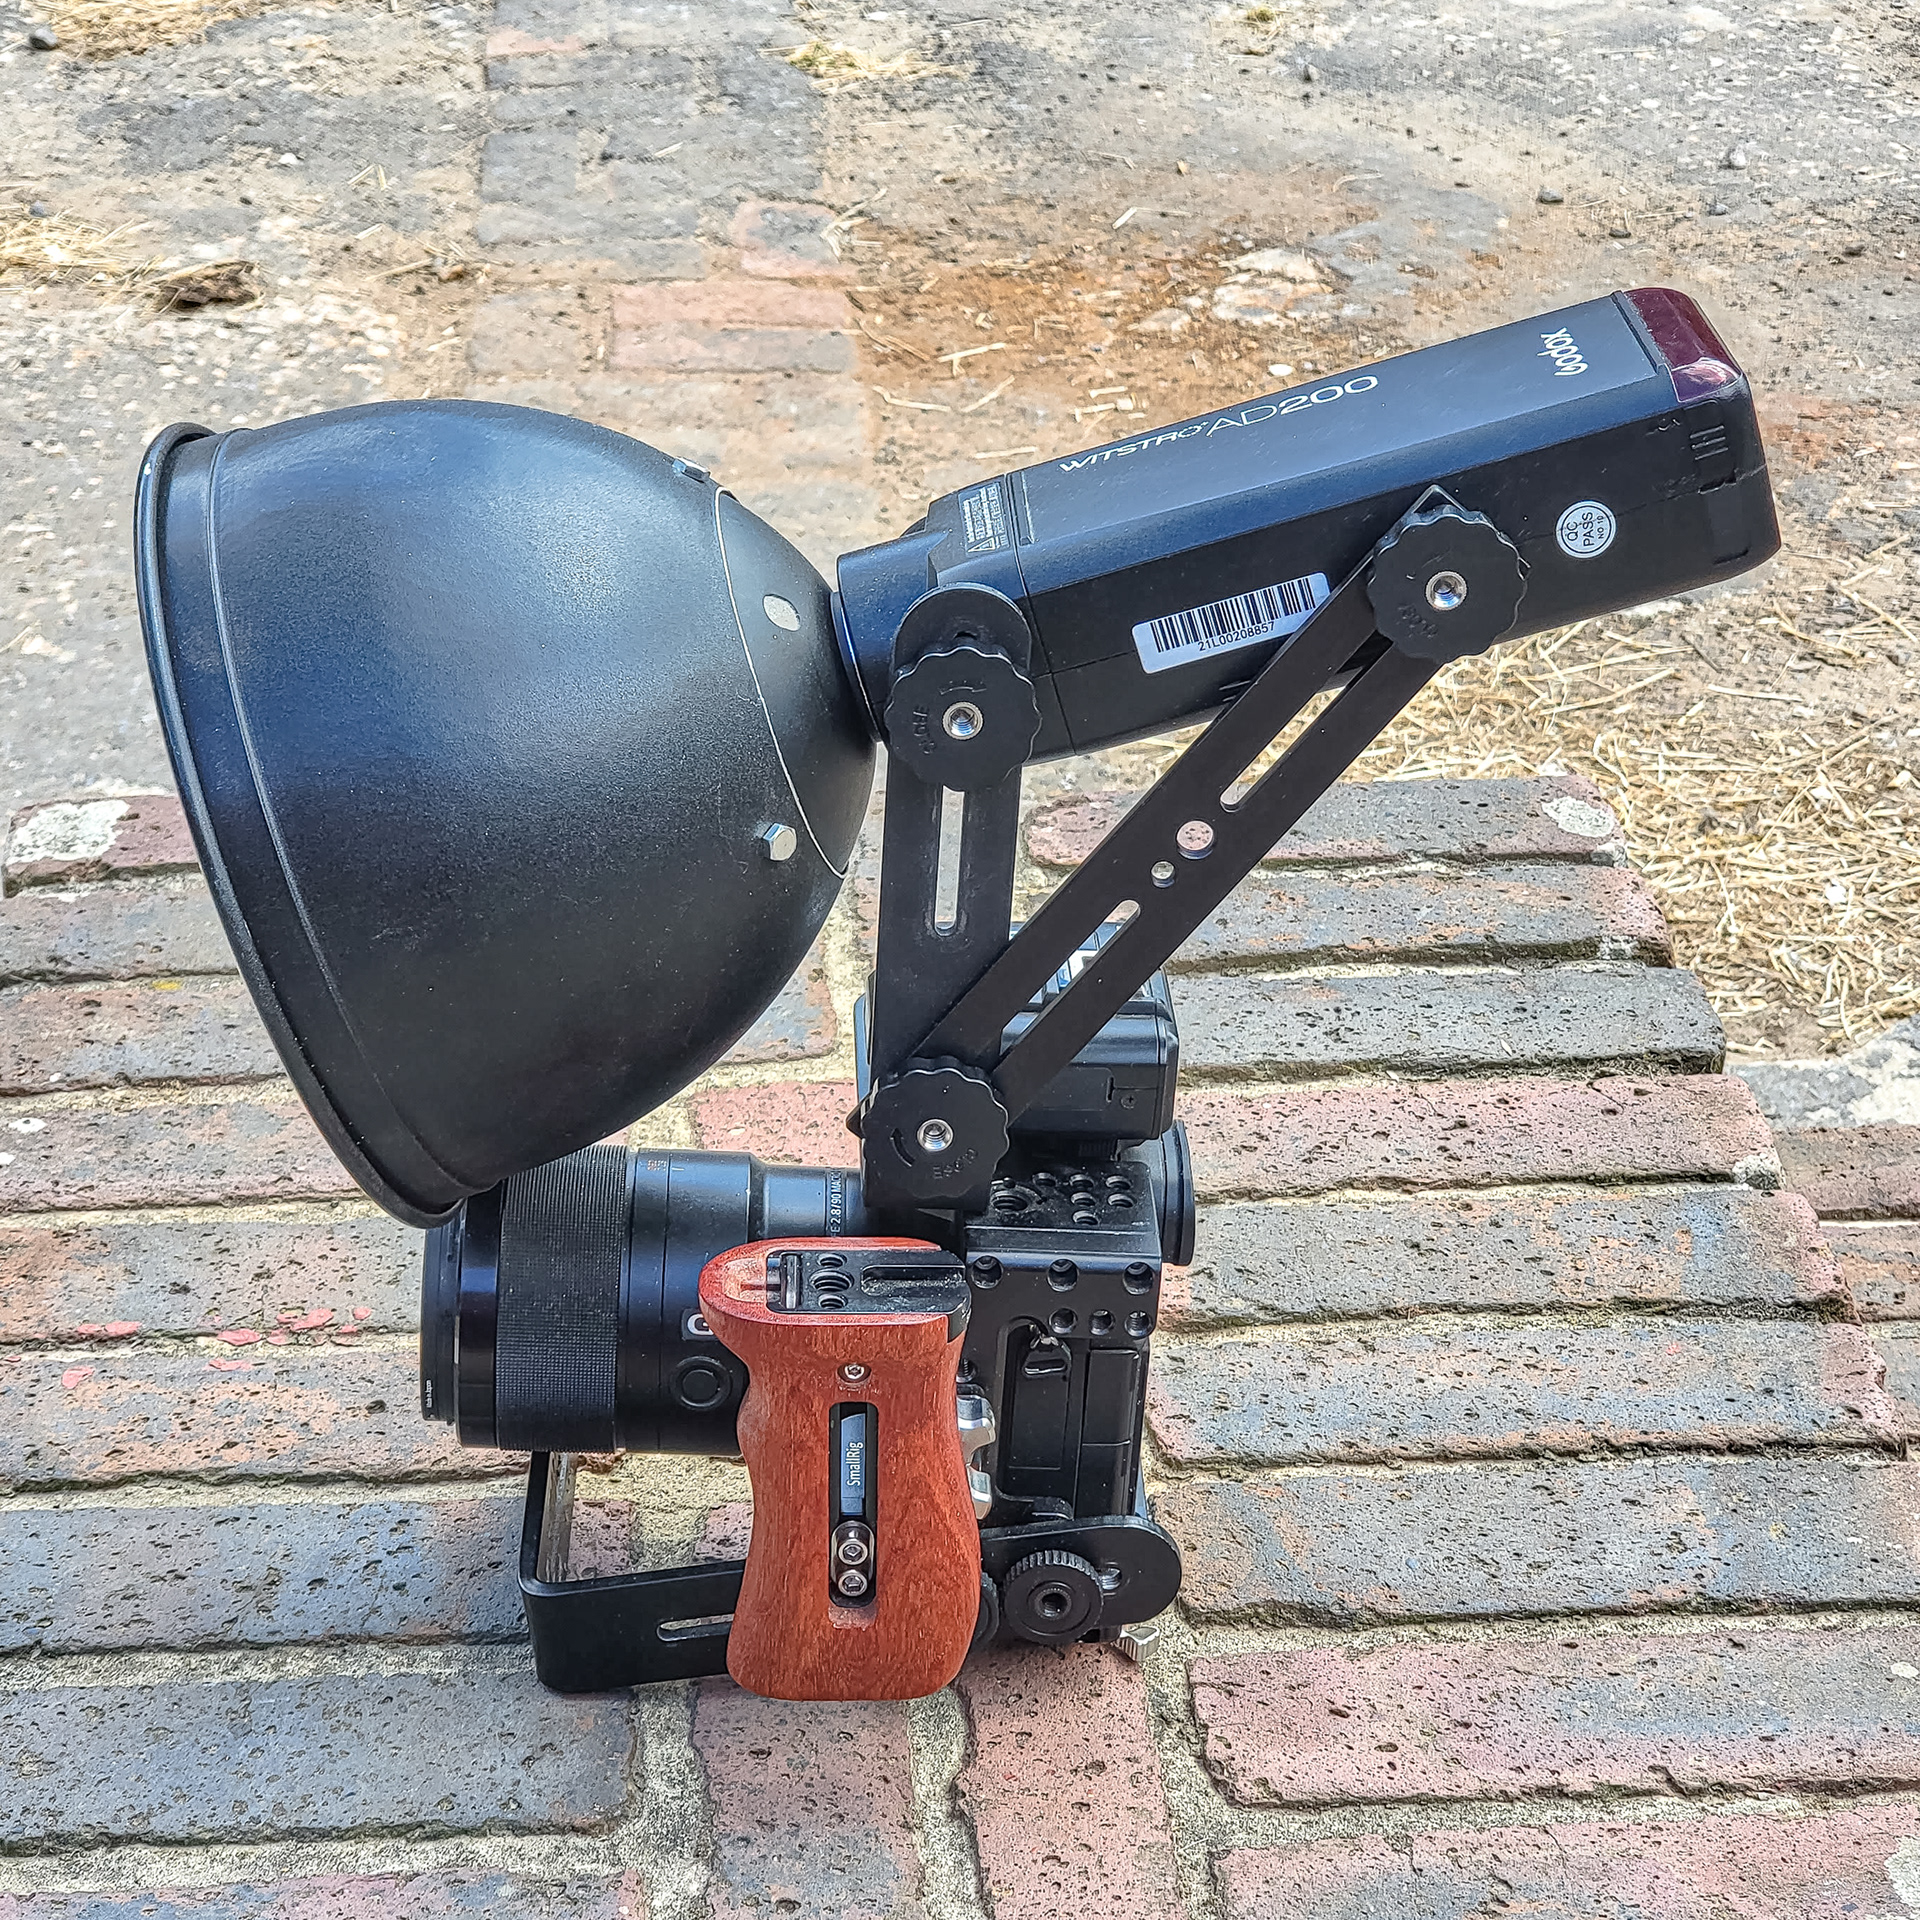
Below is my current setup. I tried many combinations of flash position, diffuser and/or reflector. The above reflector was good but I wanted a bigger reflector that would put most of the light forwards and also fit easily onto the Godox AD200. I used the original reflector (Godox AD-S2) and I purchased a 20cm Bowens mount reflector which is larger. I cut the mount off the Bowens reflector and bolted it to the original Godox AD-S2 reflector. I now have a large 20 cm reflector that fits perfectly onto the flash. I use the flash tube/bare bulb as this fills the the reflector with light better than the Fresnel head.
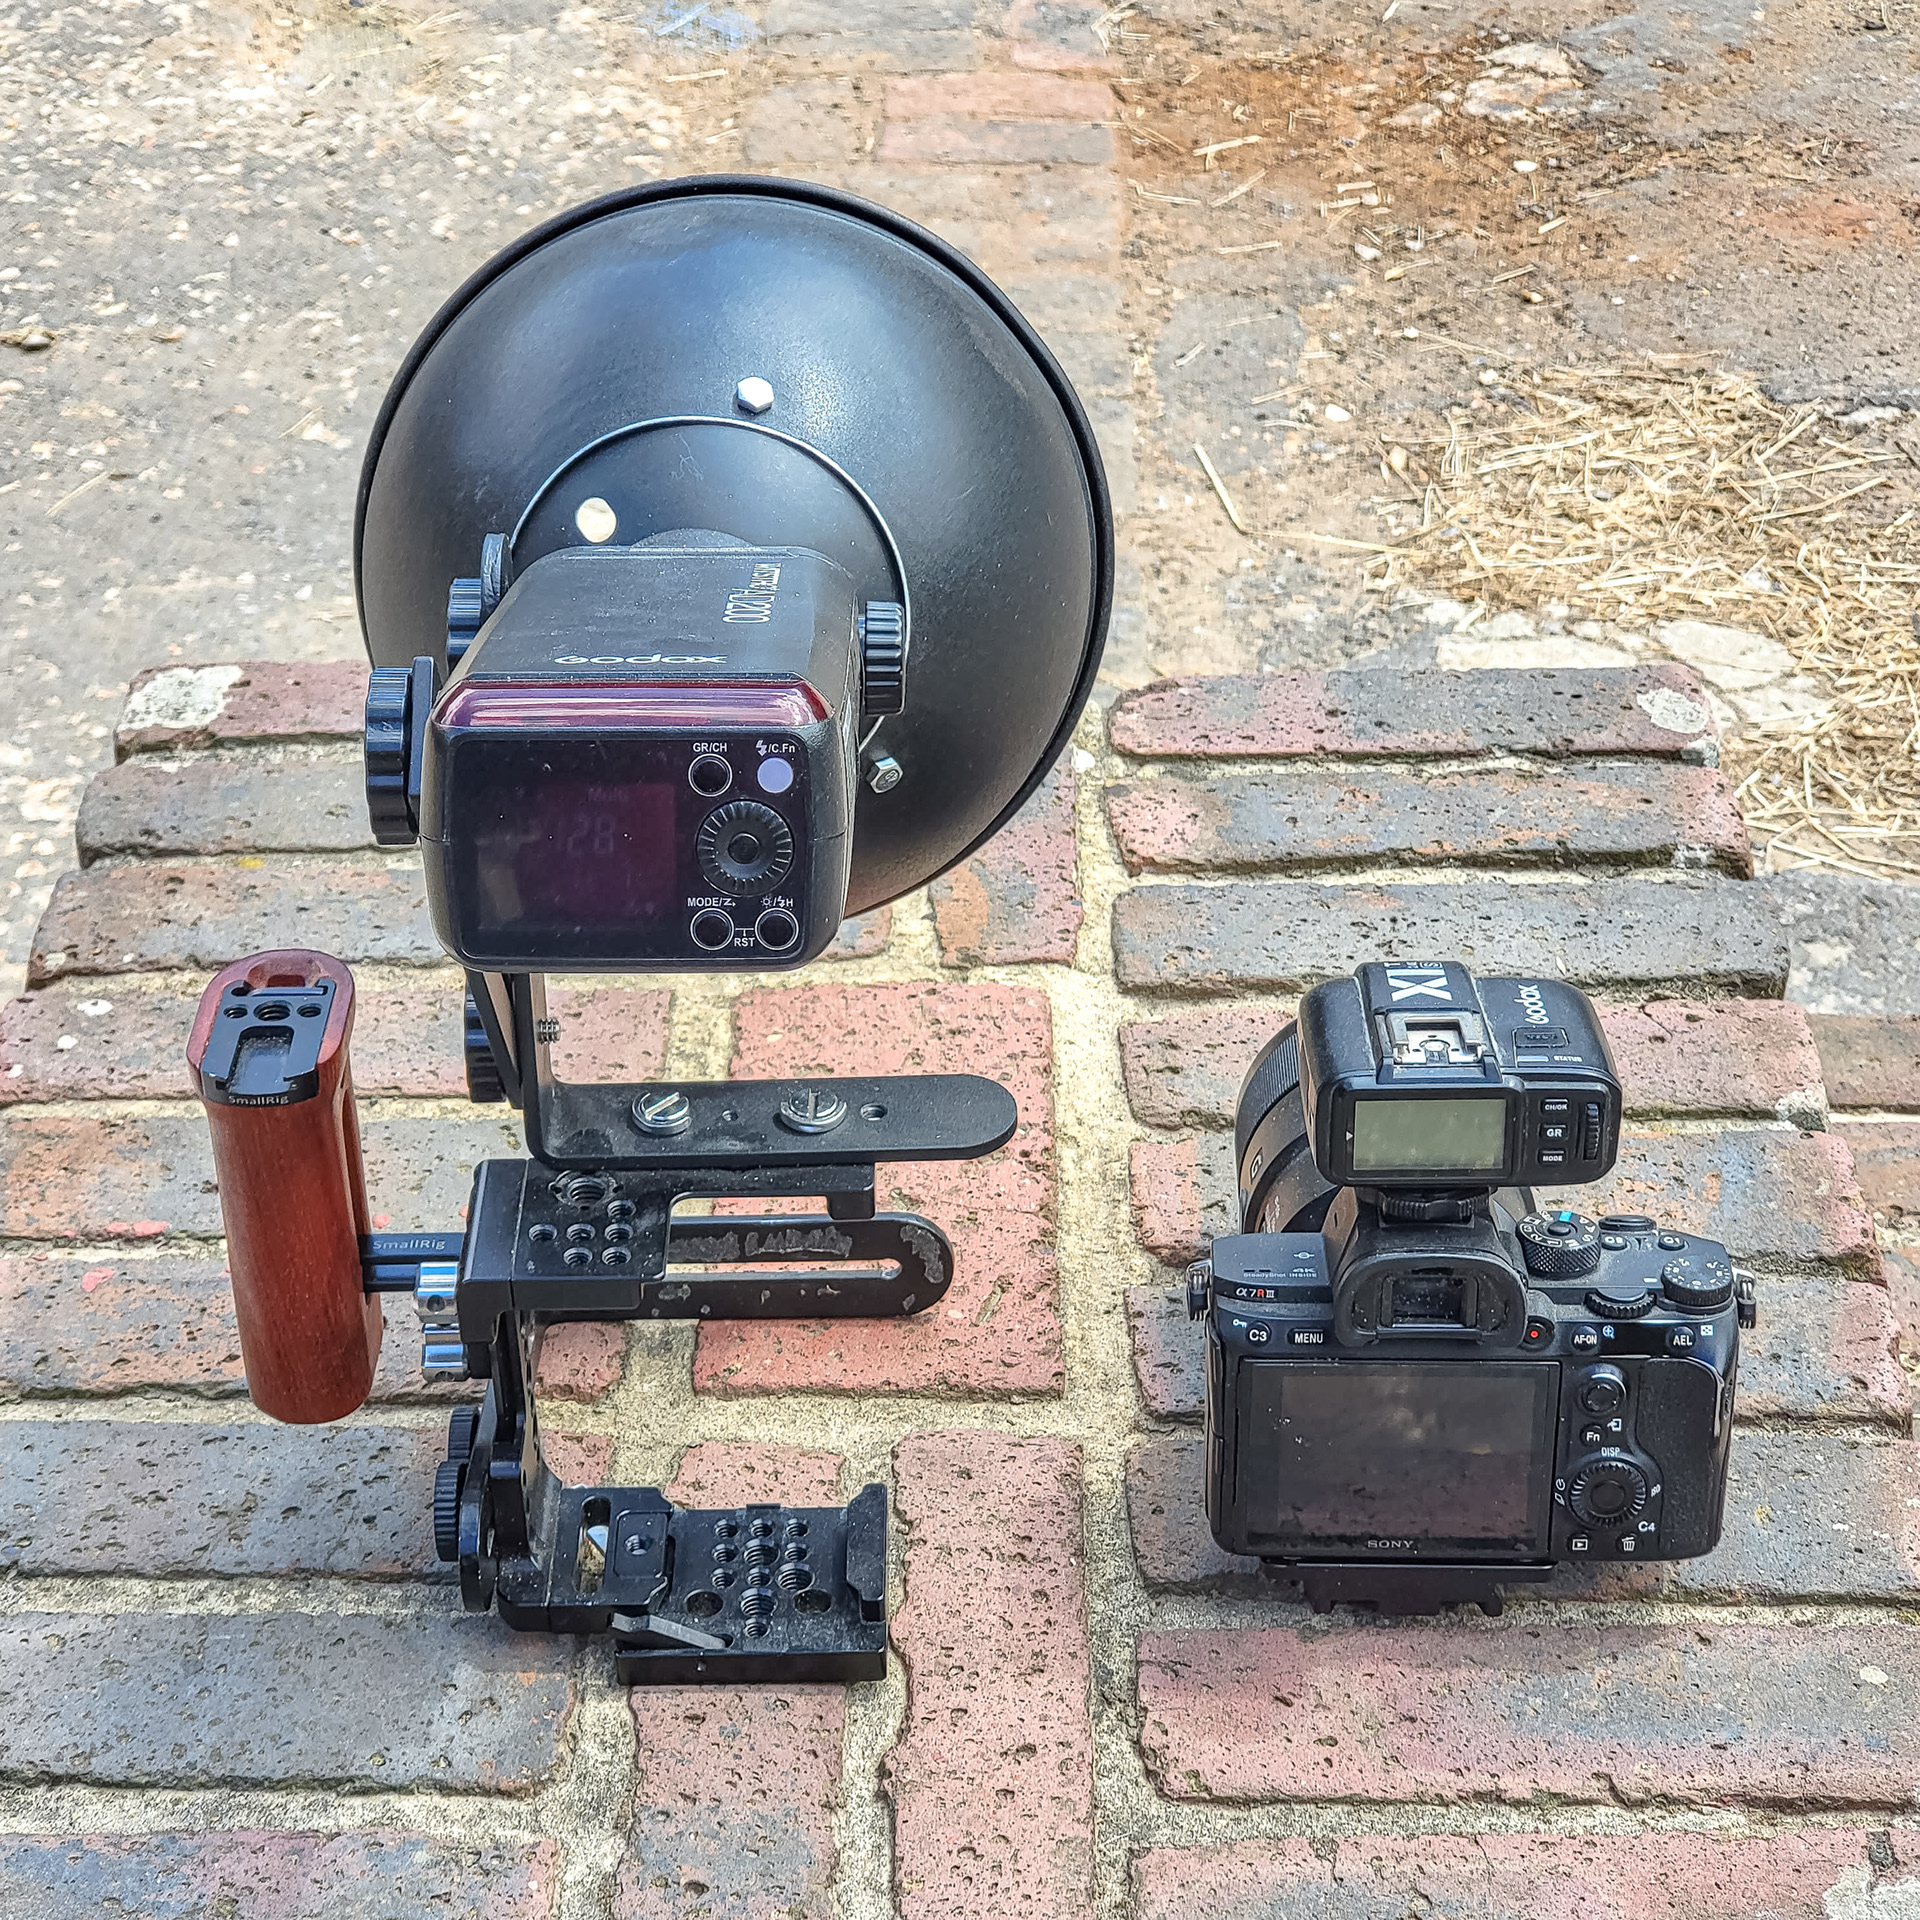
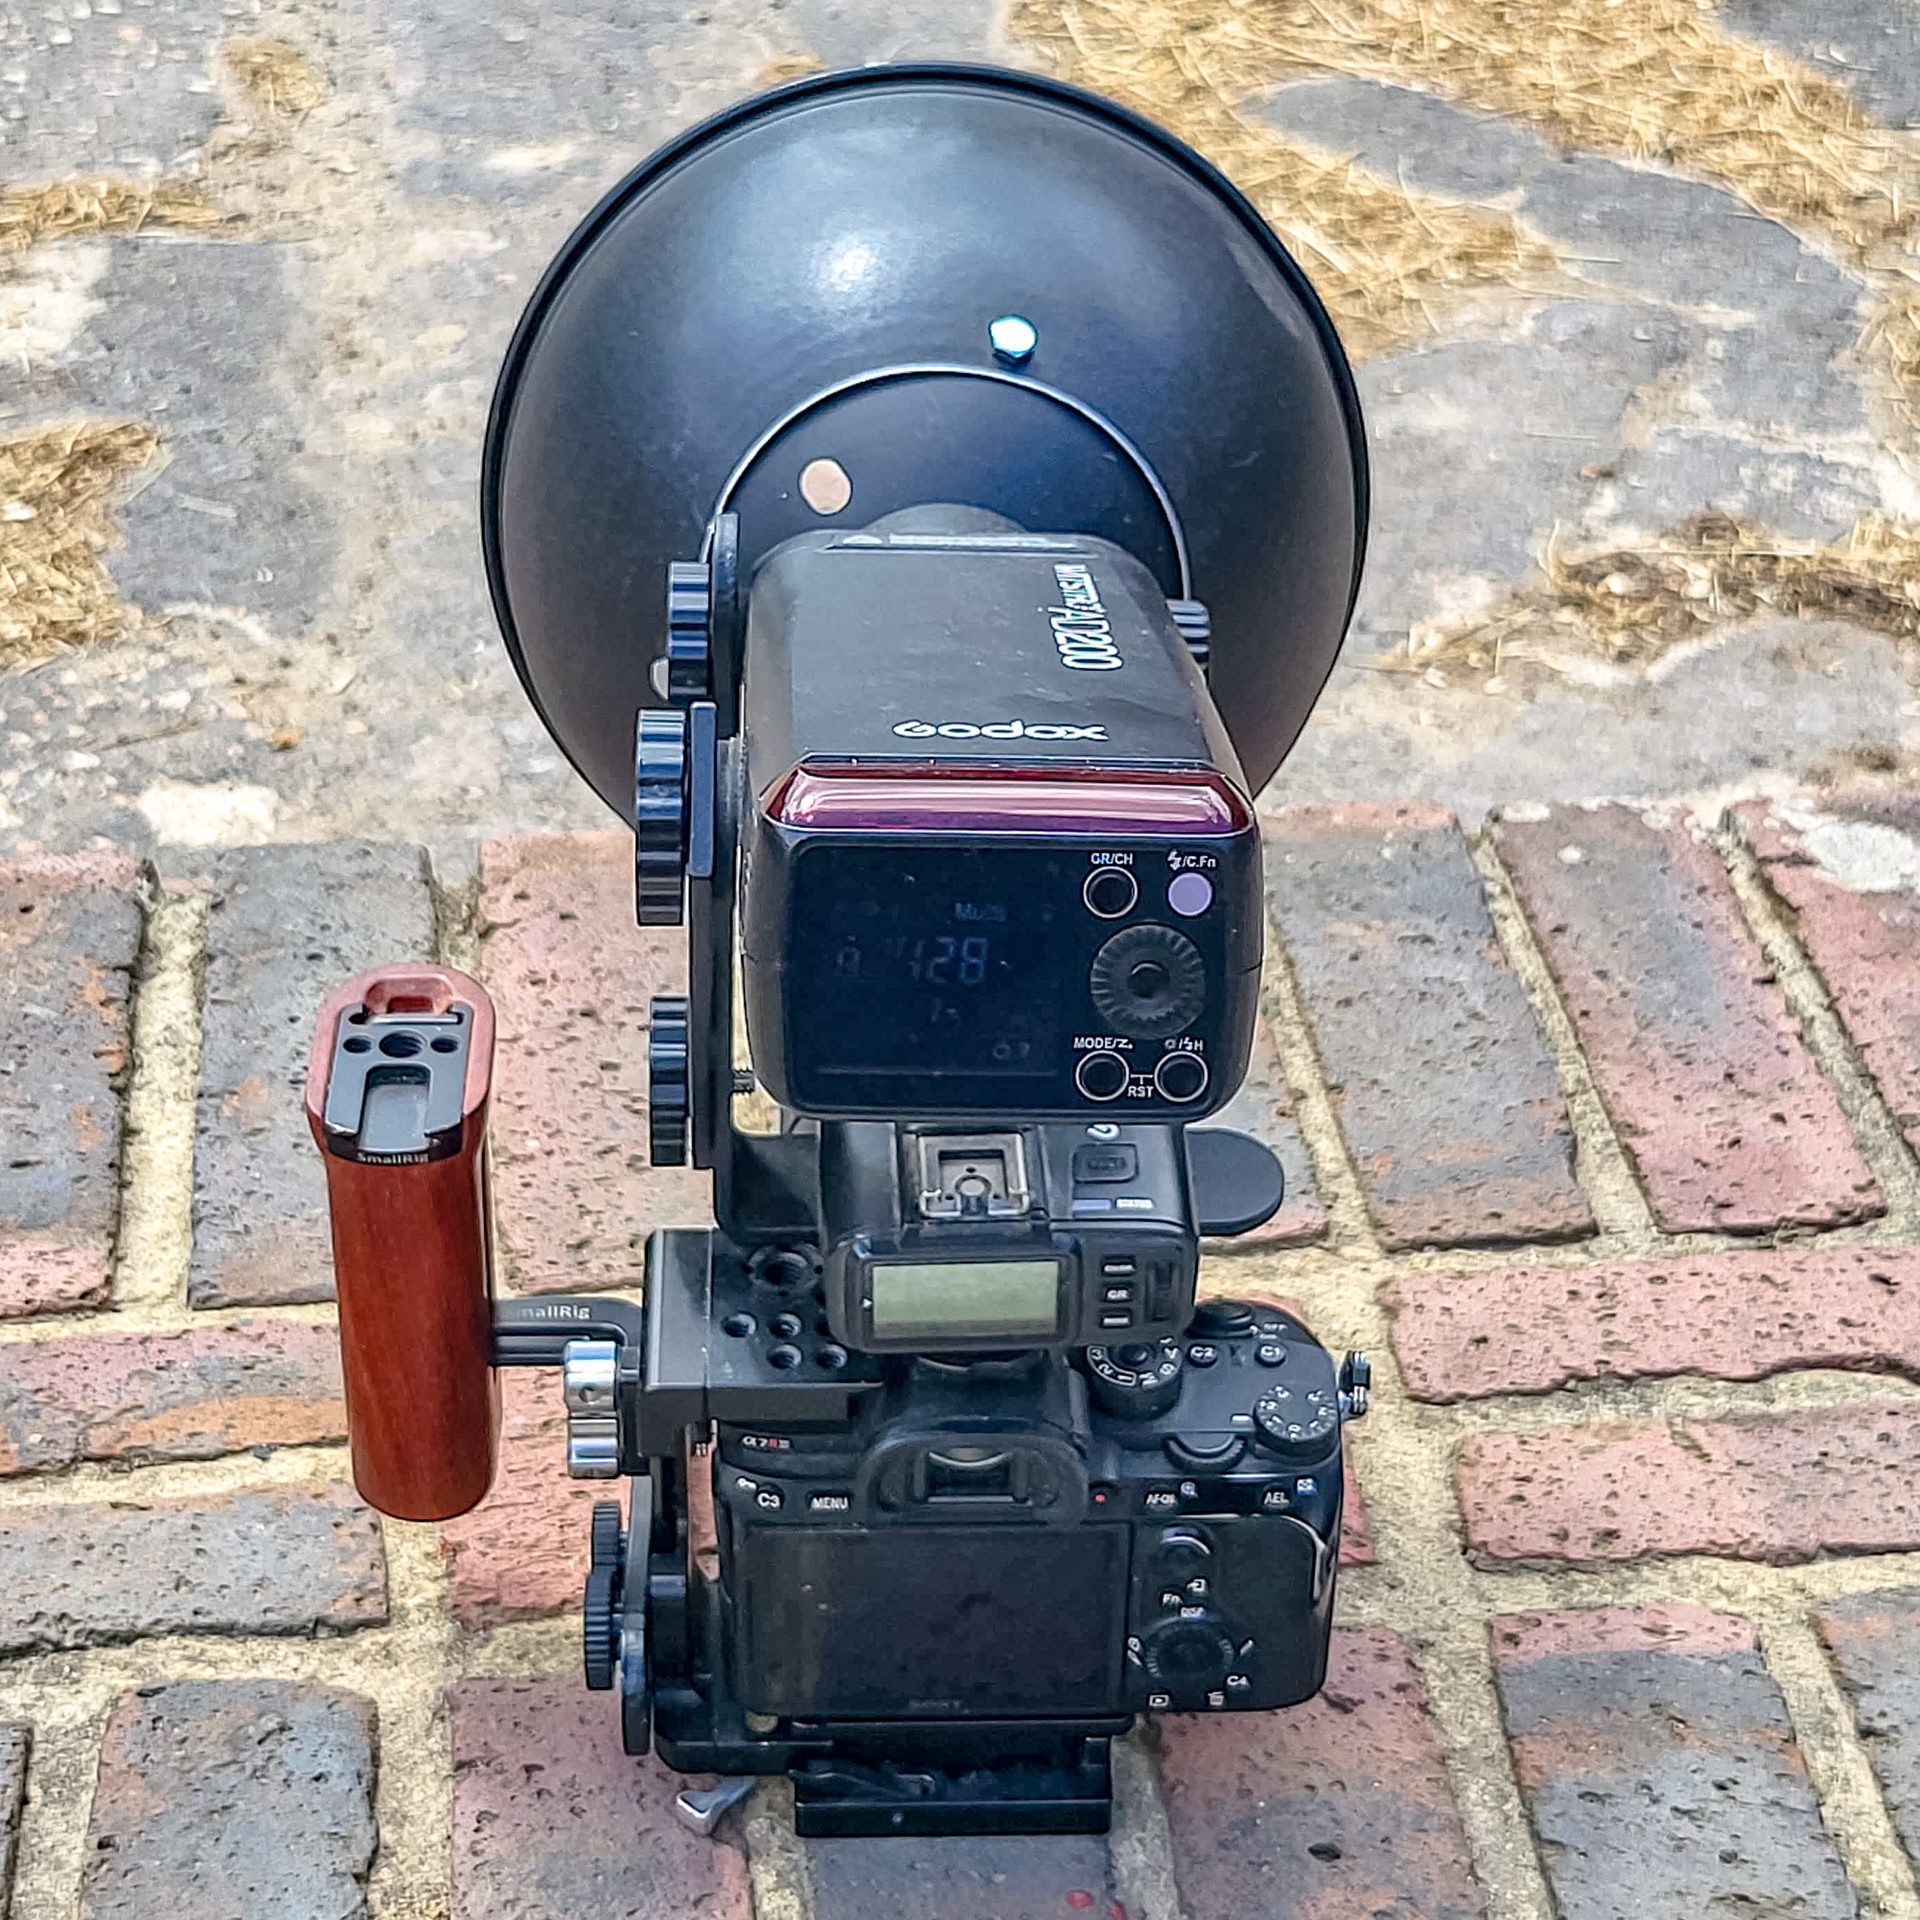
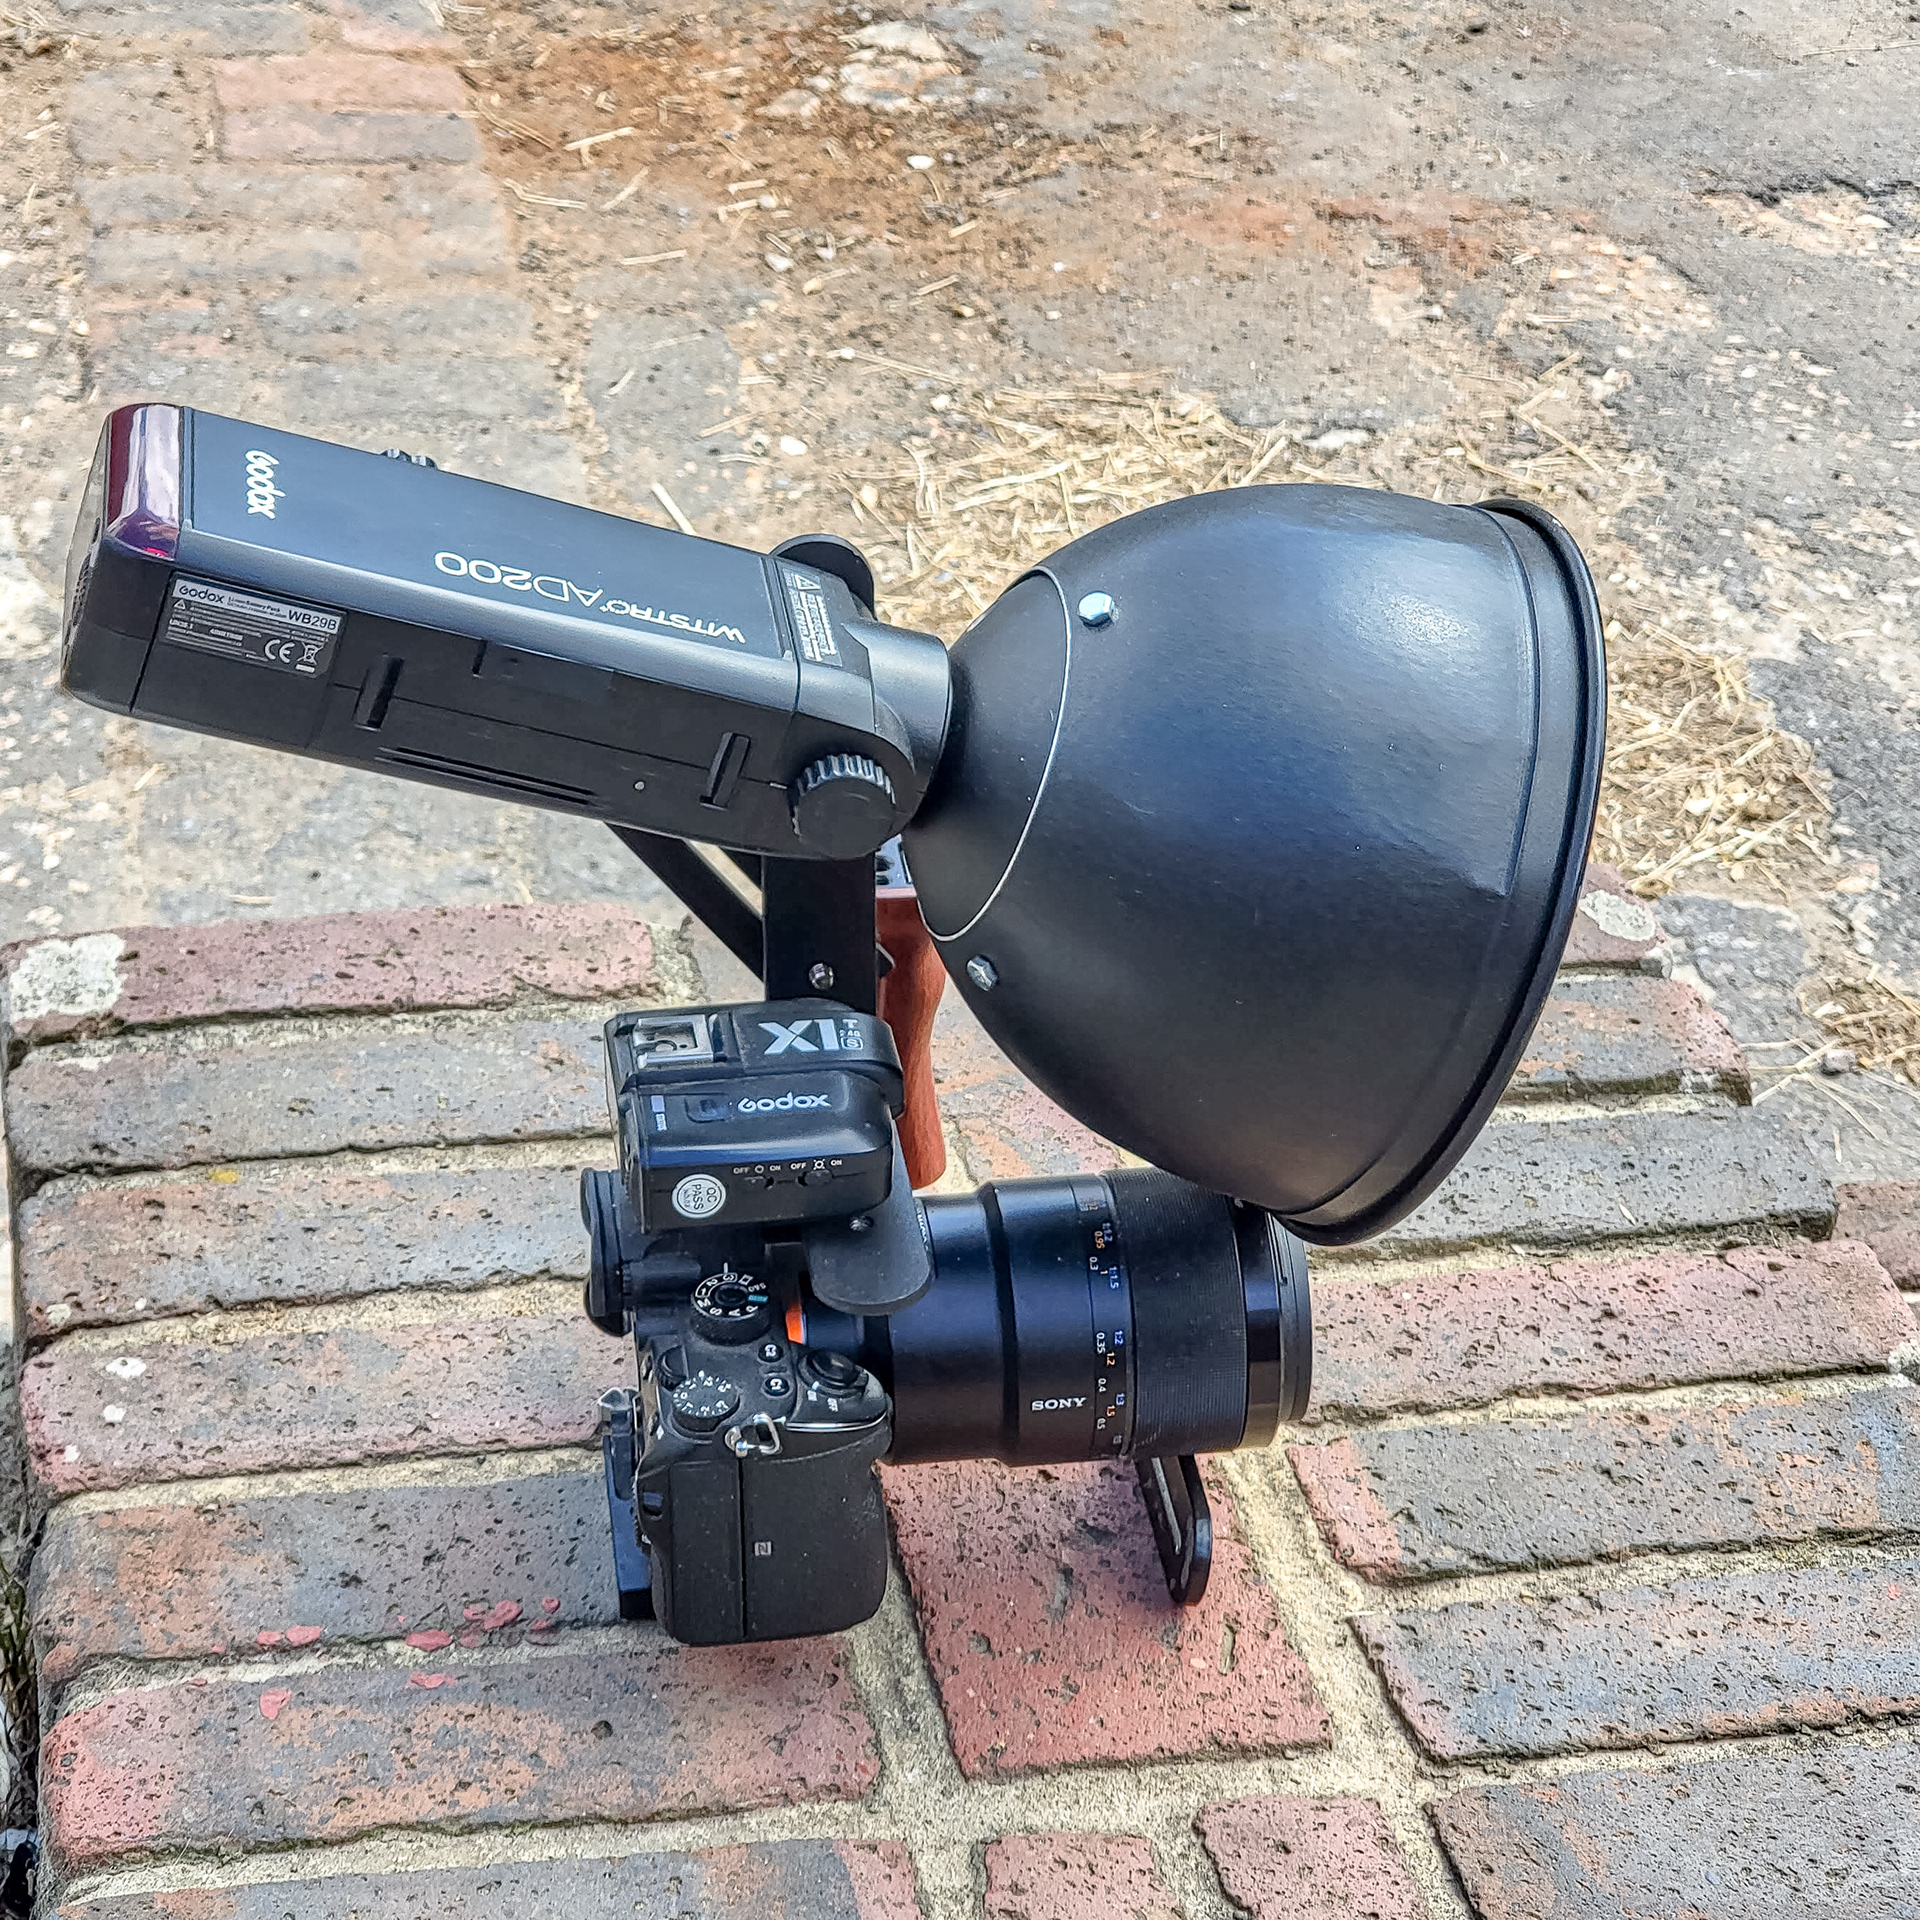
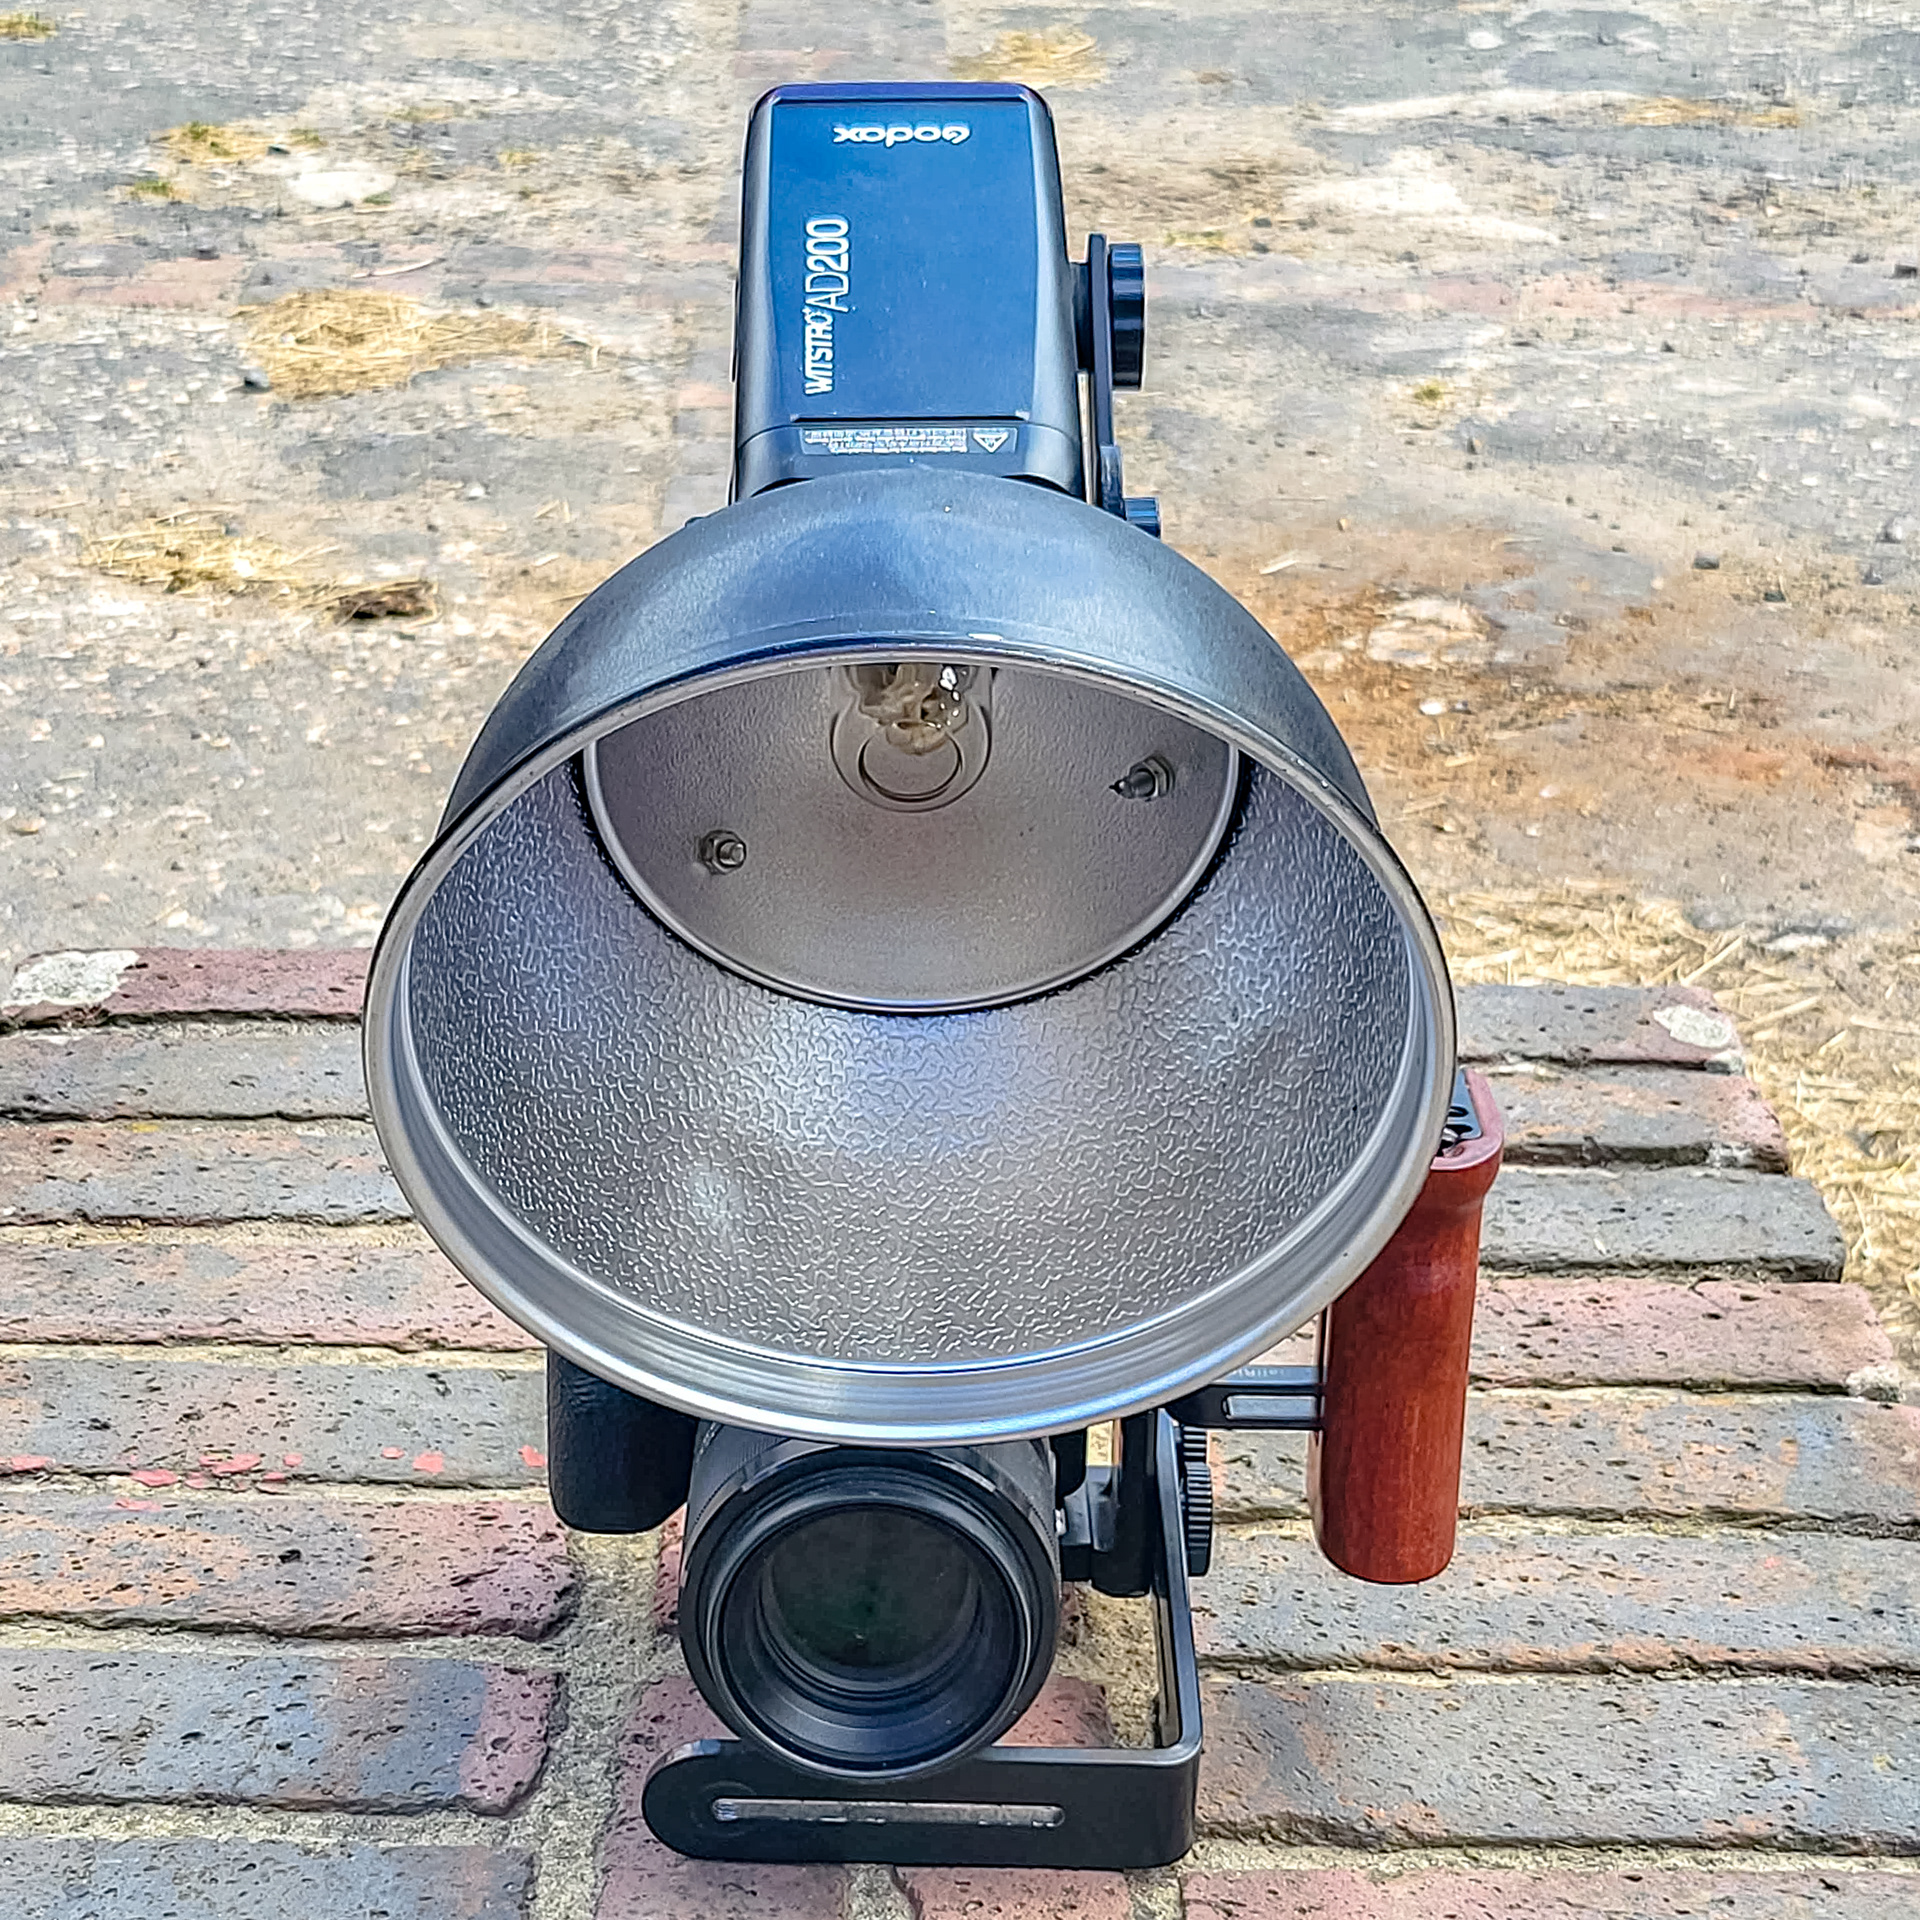
20cm Bowens reflector bolted to Godox AD-S2
Putting it all together
So we have F11, 1/250 sec, ISO 100 and a flash and diffuser (or reflector). We know we want to expose the image with mostly light from the flash and to cut down on the amount of ambient light hitting the sensor. One way to test your settings is to take an image with the flash turned off. What is desired is an under exposed image maybe a stop, maybe two stops or more. The more the image is under exposed the blacker the the dark parts of the image will appear after adding the flash. I do sometimes look at the exposure meter in the viewfinder before I take the shot, just to check the camera is set to under expose. The meter will read before the flash fires so it will read the ambient light. We can then add light with the flash to correctly expose the subject.
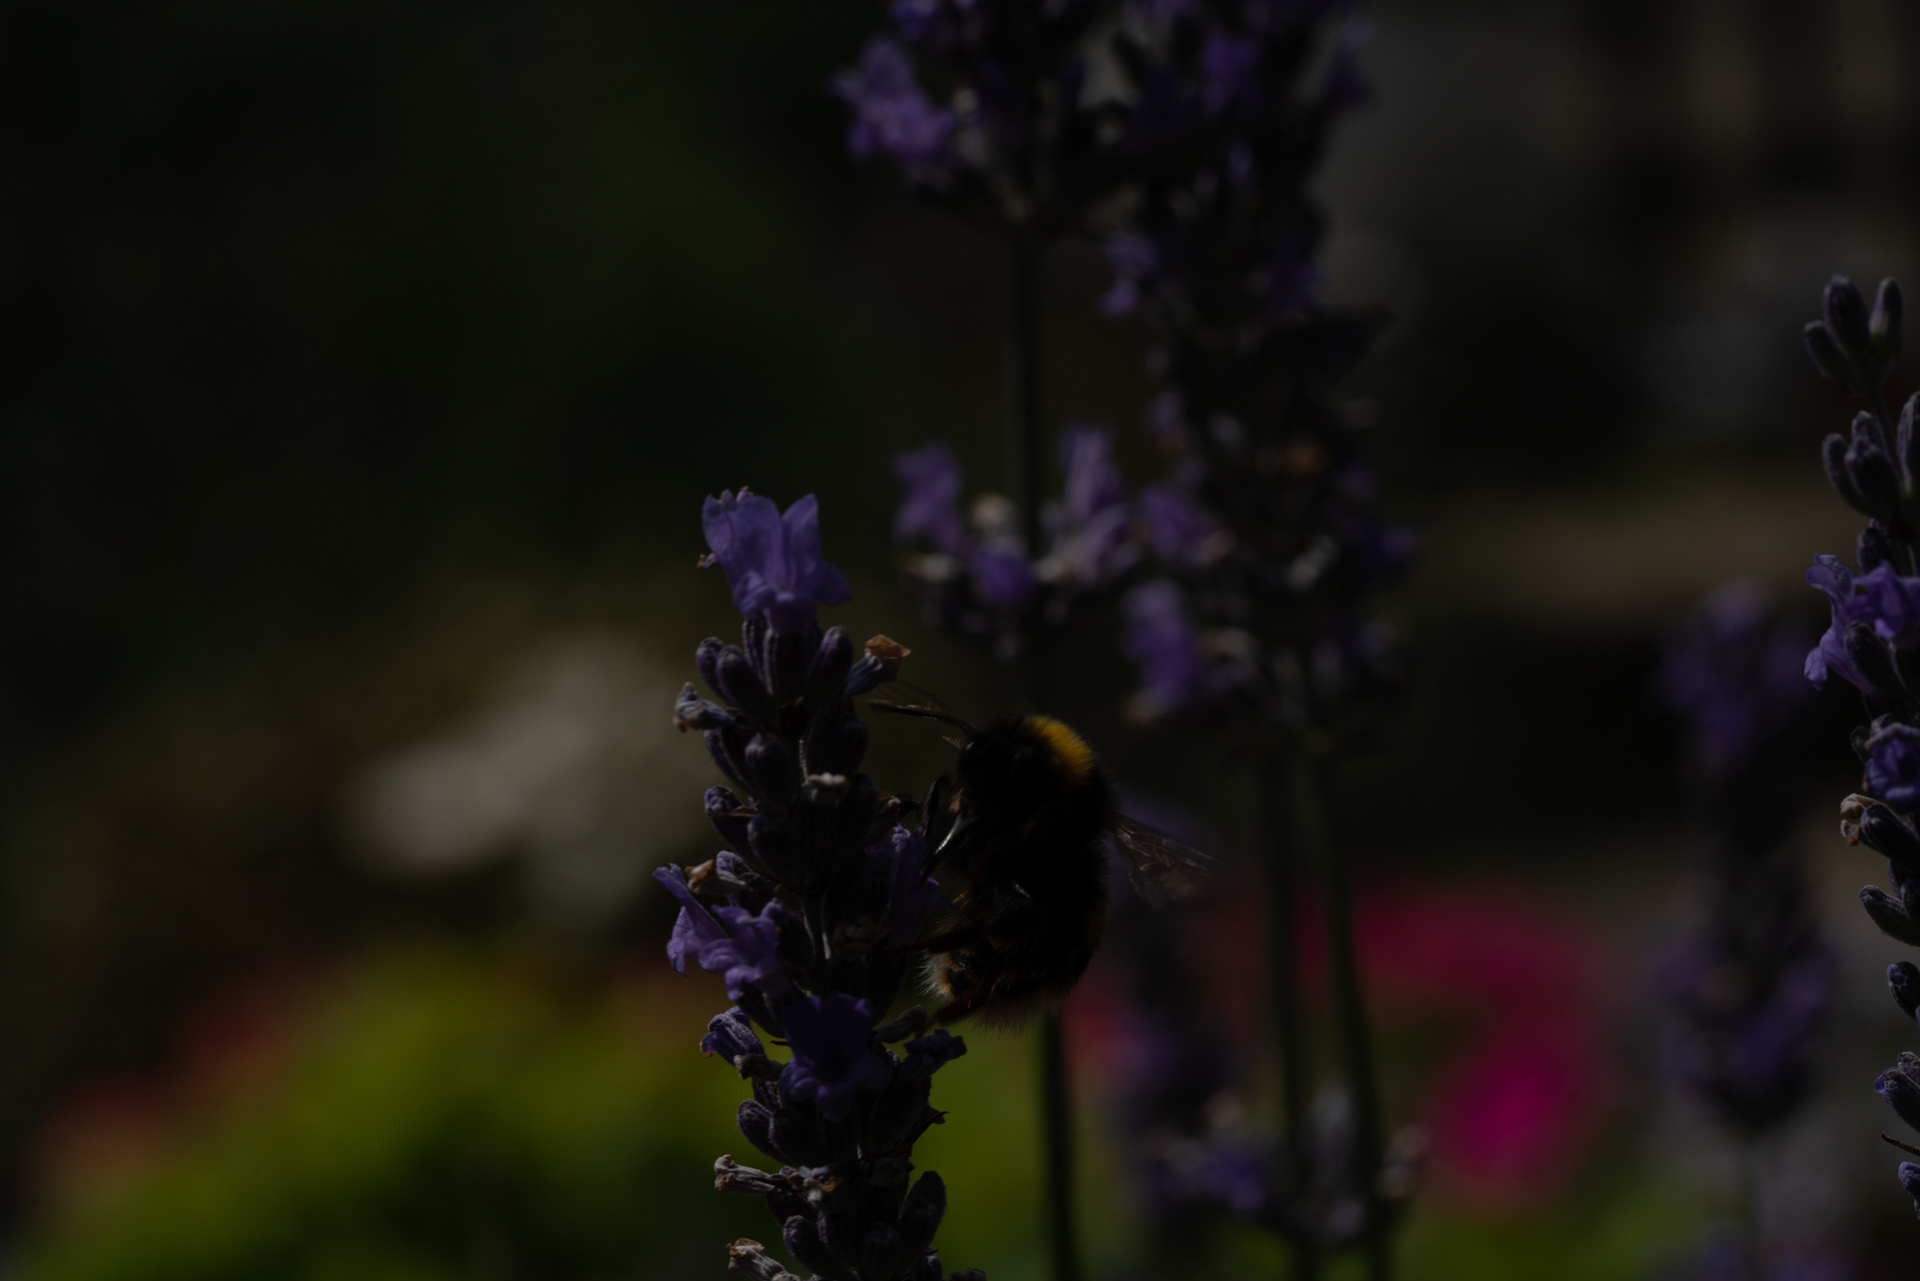
Below are a couple of examples of the type of image we desire with the flash turned off. They can be darker but letting in some ambient light can give a more pleasing background. These type of shots are just to show how under exposed the image is before we add flash and not something that needs to be done on a regular basis.
On my mirrorless camera I choose the setting that ensures the viewfinder displays a bright image no matter how the aperture, shutter and ISO are set. This enables me to see the subject clearly. Quite how a camera will display the image in the viewfinder will depend on the camera and in some cases the lens. In my case the camera is set to under expose but I get bright image in the viewfinder and my exposure meter in the viewfinder tells me the image is under exposed.
So now we shoot with the flash turned on
We have F11, ISO 100, 1/250 sec, and I would suggest starting with a flash power of 1/8 for a single "normal" flash/speedlight and 1/32 for the AD200. The AD200 with reflector has more power and good control of the direction of light enabling a lower power setting and therefore a shorter flash duration which is why I use such a large flash.
Subject under exposed - turn up the flash but we don't want to really go above 1/4 power or the flash duration becomes long enough for motion blur to creep in. The higher the flash power the longer the flash will take to recharge if you wish to fire short bursts.
Subject over exposed - turn down the flash.
You can use TTL flash which will alter the flash setting automatically but I find it slows down my camera and I would rather have a fast, short burst of shots.
It can be tricky with for instance, a white flower and a dark bumble bee to get a good exposure.
On a really sunny day you may find the image is not underexposed at all with the flash turned off in which case you have a few options. 1/Up the shutter speed if you can but do not go over max sync speed. 2/ Use a smaller aperture but that may loose image quality due to diffraction. 3/Cast a shadow on the subject. 4/Try on a duller day. 5/Use a n/d or polarising filter and up the flash power but we do not want the flash power too high. So overcast days may be better or when the sun is lower and less bright. This all sounds complicated but once you are setup it is quite straight forward and rarely needs adjustments.
Post processing
I use Lightroom but most applications will do the job. This subject is too complicated to go into here but here are before and after shots to show what HUGE difference it can make. I crop heavily. This enables me shoot from a little further away which increases depth of field and improves auto focus. For webpage viewing the cropped images are still plenty detailed enough. If an image was desired for a large print I would maybe ease up on the cropping and shoot from closer to the subject. I print my images up to A3+ (19"x13" or 330mm x 485mm) and most look fine. I find a high megapixel camera will help here as you can crop in and still maintain detail. I always shoot RAW to give me more control in post processing.
Below are two before and after processing/cropping images. You can crop harder than this for web pages and they will look ok. I do have a 42mp camera which helps maintain detail after cropping. Sometimes the image will be under exposed but I find I can raise the exposure a stop or two quite easily in post processing. I also use DXO PureRaw to reduce noise. I find PureRaw will improve most of my images and I use it together with Lightroom for my editing.
Focus
When all of the above has been set up, we will get a sharp image of where the lens is focused regardless of subject or hand movement. The tricky bit is focusing on the main subject and not getting sharp image of something in front or behind the subject. I said at the start, this is how I shoot and I realise other people shoot in other ways. The whole point of this page is to have somewhere I can point people who ask questions about how I shoot. The camera and lens combination you own will decide whether you can shoot using continuous autofocus in the way I do, or not. In general the older and less advanced your gear, the worse will be the autofocus. A good quality modern camera and lens will auto focus fine as in the examples above. The best thing to is try it and see if it works for you. You can use manual focus if you wish and everything else on this page will still be relevant. I use autofocus a lot. I also use back button focus so my focusing is decoupled from the shutter button.
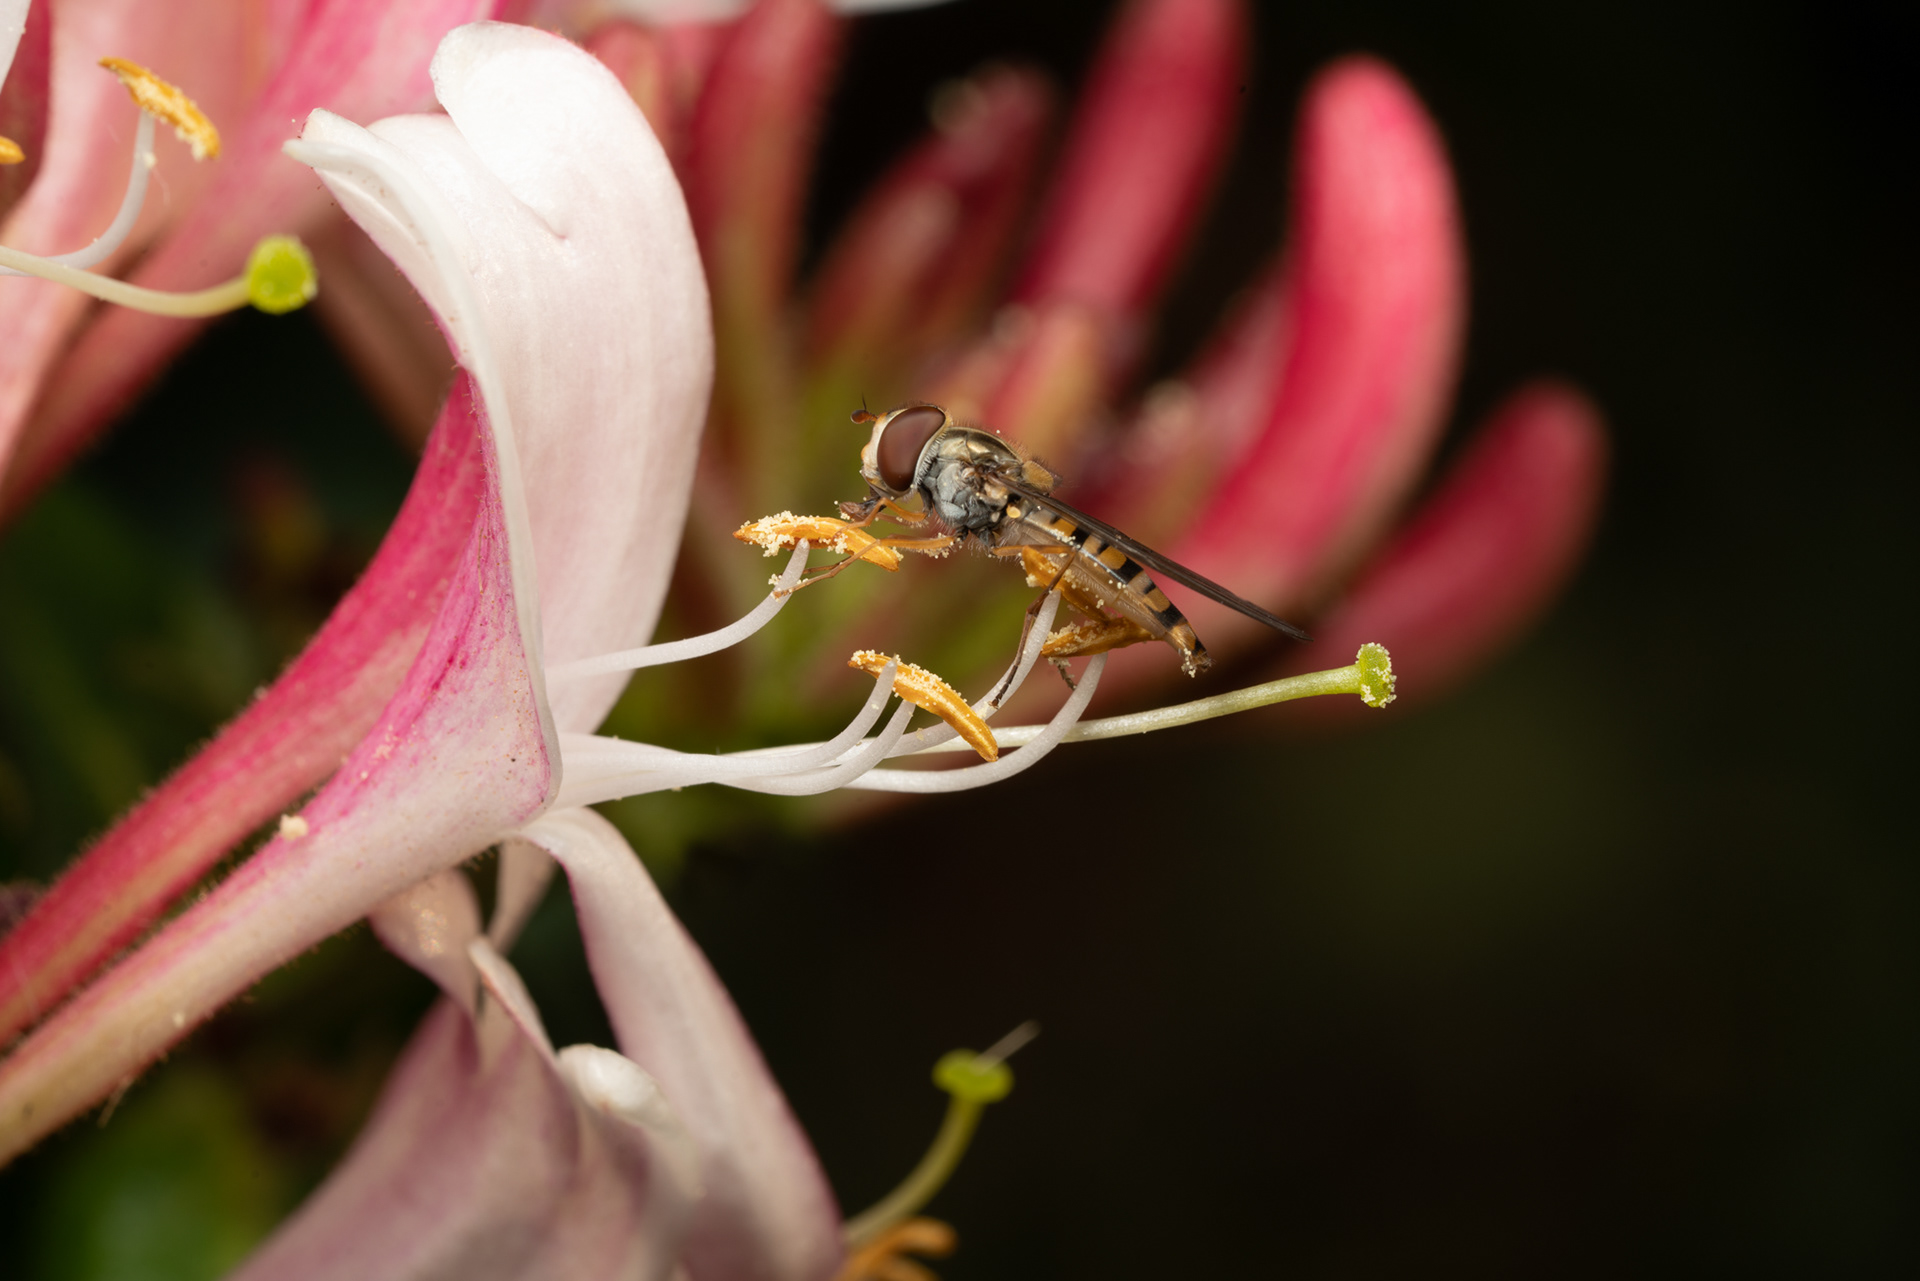
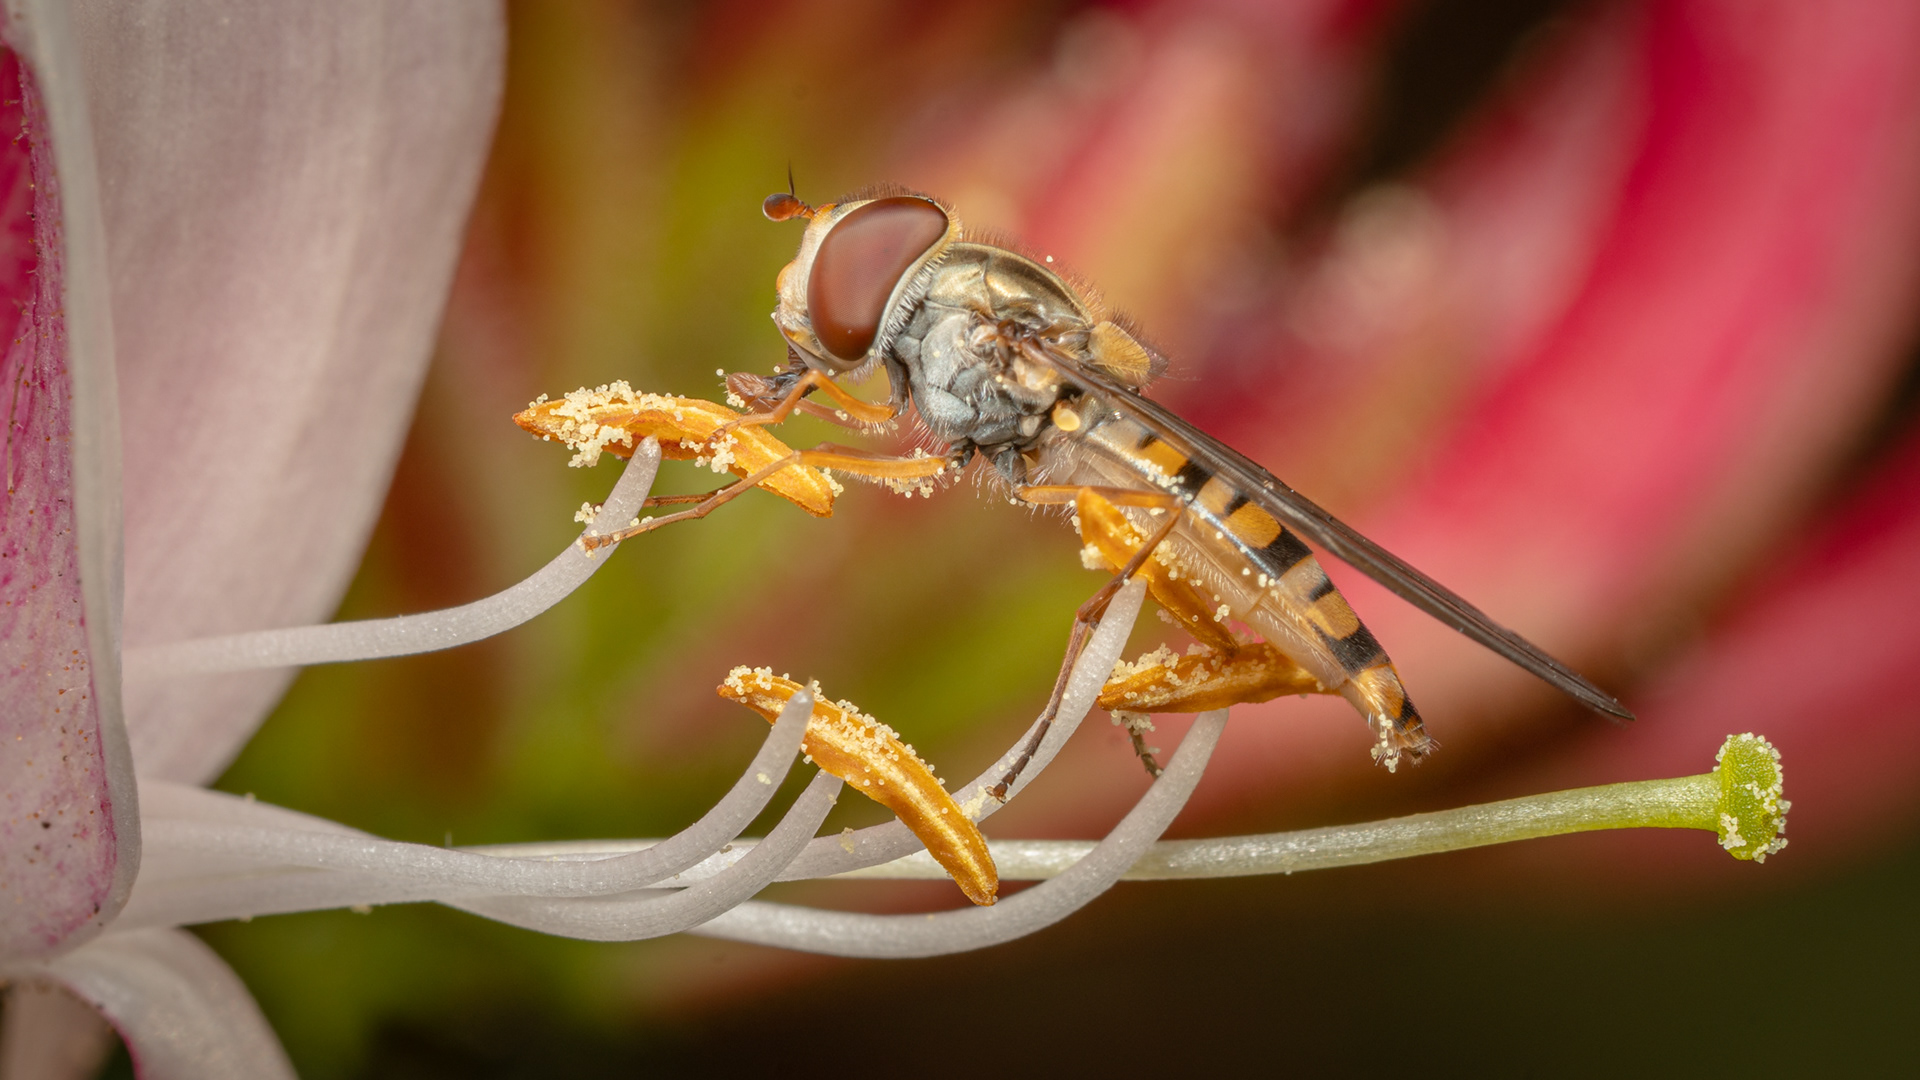
For insects on flowers, or indeed just flowers, I use continuous autofocus with a small spot. Using this method you can usually focus on the subjects head or maybe eye depending on the size of the insect. Using continuous autofocus will take care of any slight movement (backwards and forwards) of the subject or the camera.
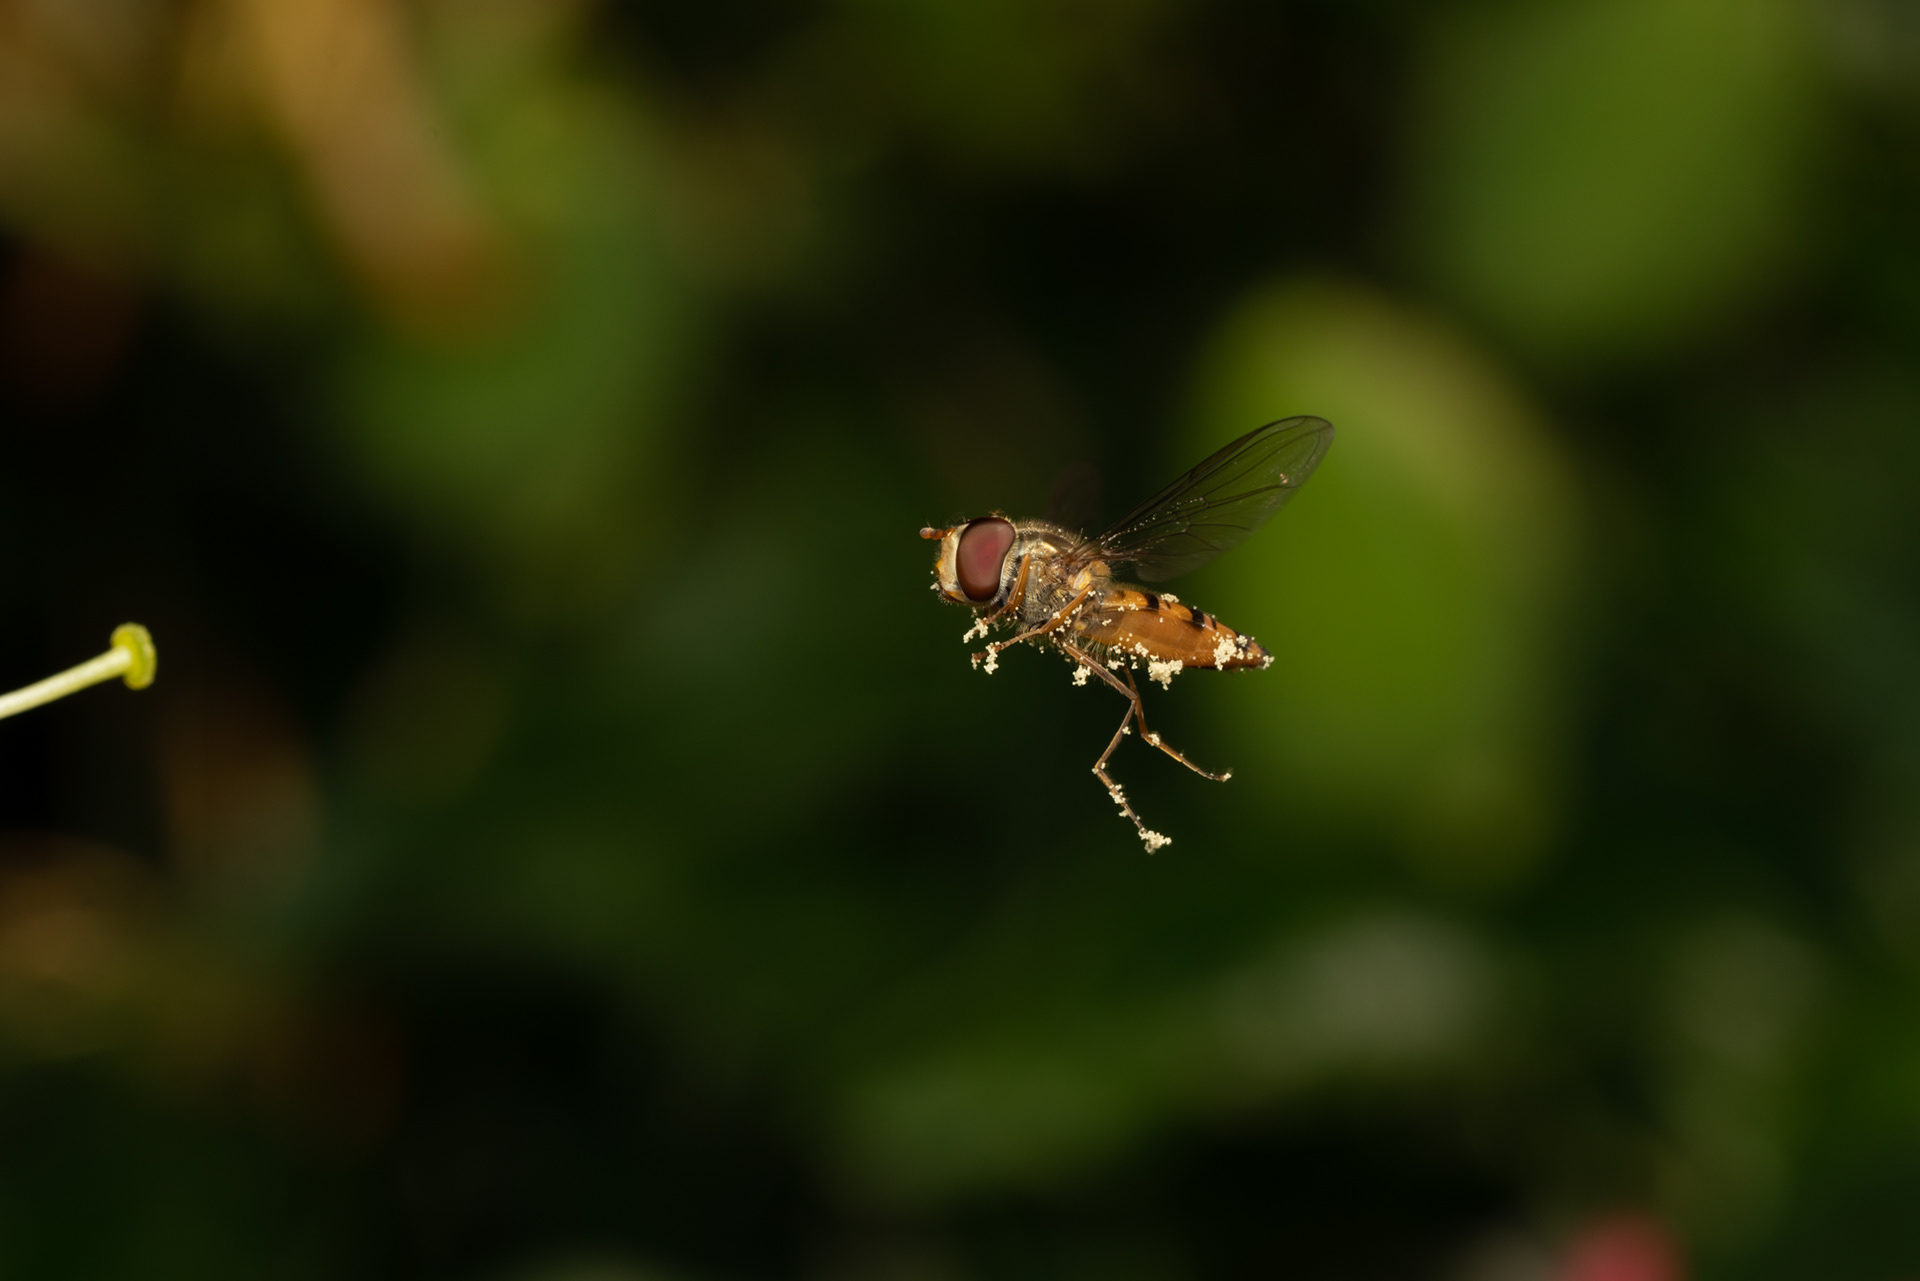
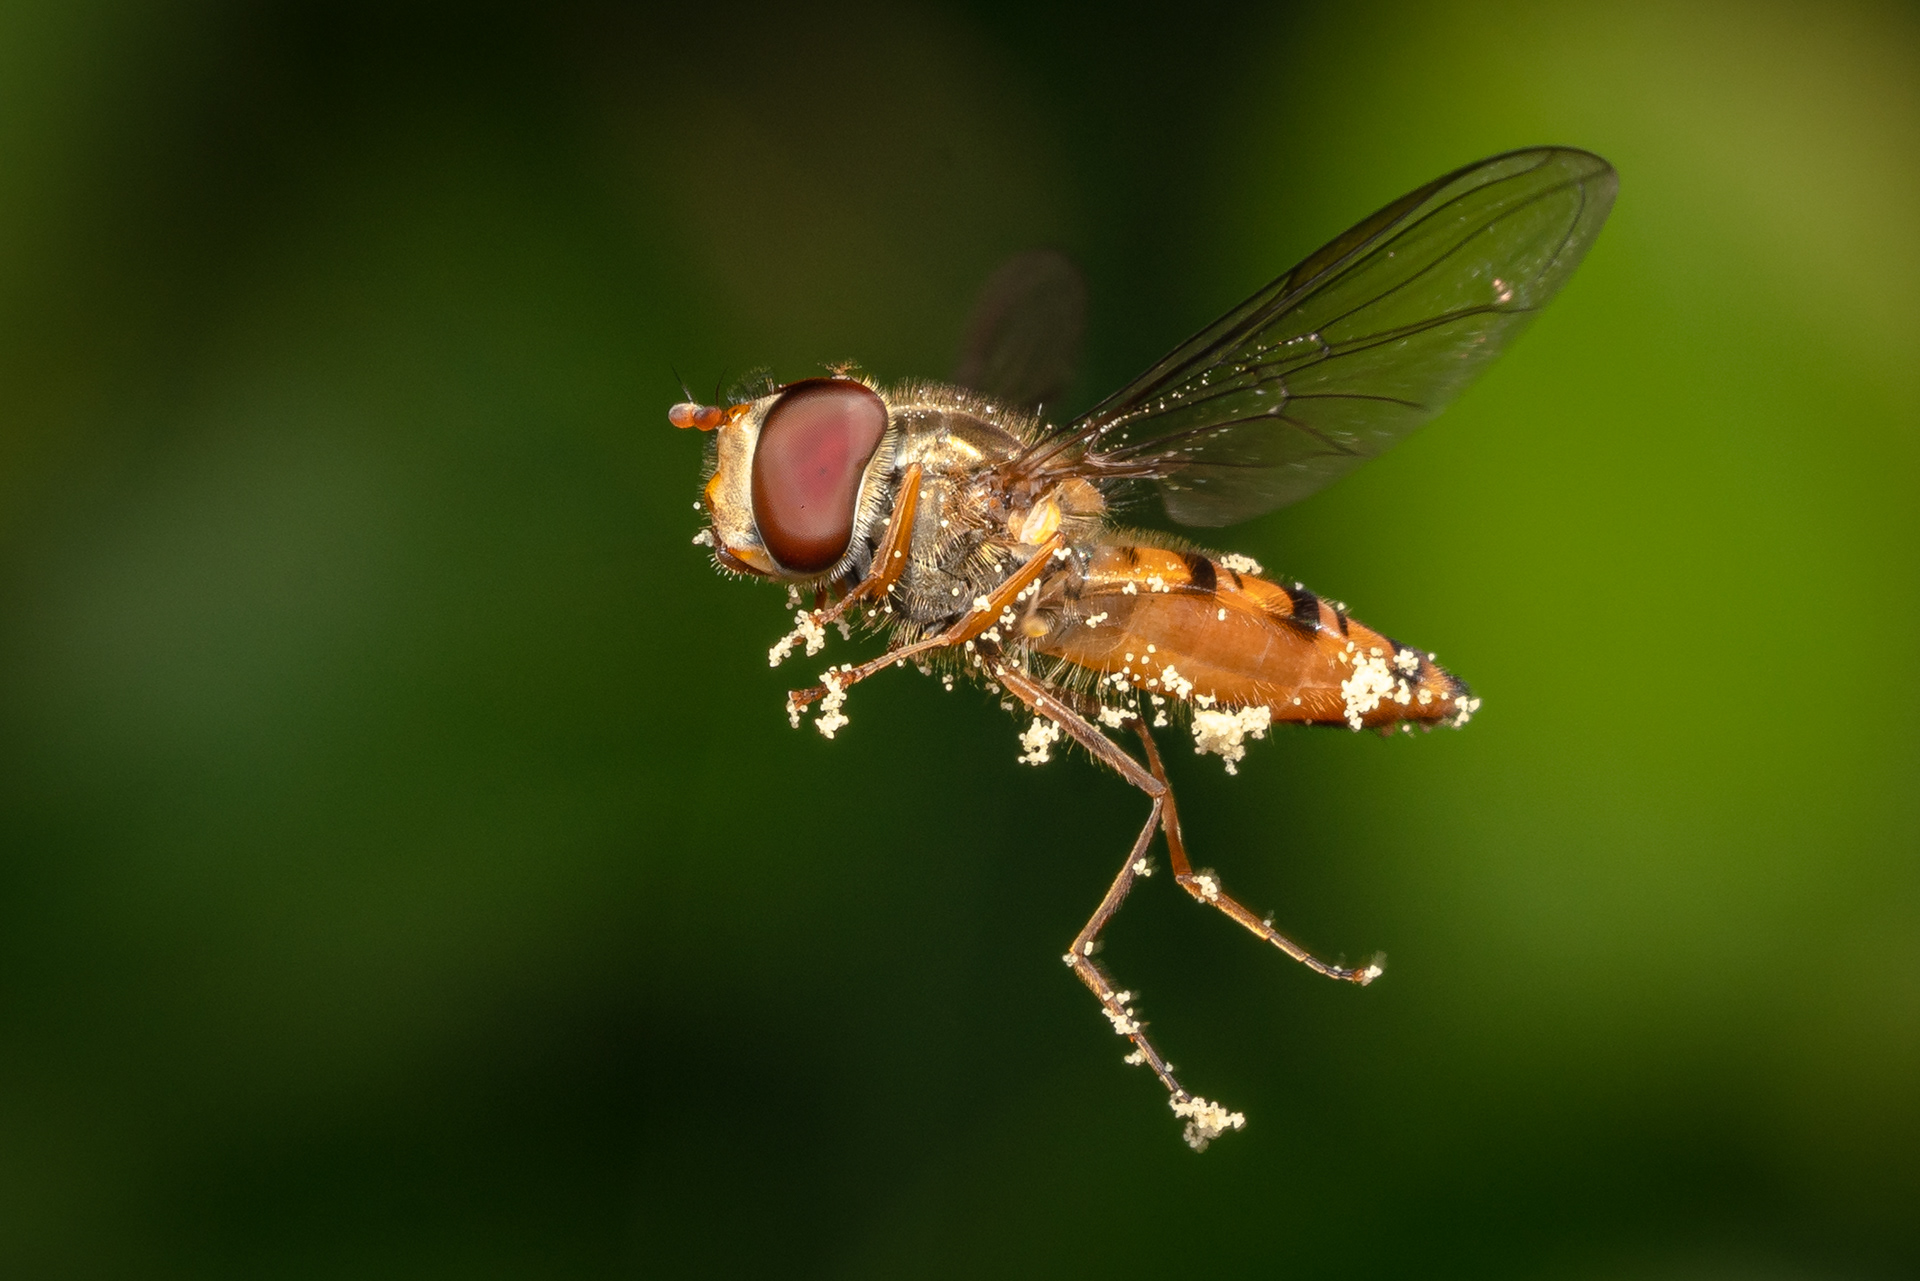
Flying insects are of course much trickier. For bees I usually focus on the bee while it is on the flower. Then as it lifts off I fire a short burst (maybe 3 shots) while NOT pressing the focus button. I have found no way to make my camera's autofocus track a flying bee with any regularity. Maybe the really expensive modern, latest release, cameras can do this but alas I do not have one. For something like a hoverfly in flight, i.e. an insect that is mostly hovering, I either use the small spot continuous auto focus or I have another button set to wide continuous autofocus. Wide autofocus will only work if the insect is well away from other items like the flower or the background. The hoverfly above covered with pollen and flying would have been possible with wide. If it is possible to lock on with wide it will track the subject to some extent. If autofocus is not working in a certain situation, you can always stop pressing the focus button and move the camera in and out instead, this is an advantage of back button autofocus.